
DIY Bicycle Generator Mounting Plans: A Step-By-Step Guide
Here is everything you’ll need to know about mounting a B300 Bicycle Generator to your own bike. If you’d like to purchase one already assembled, you can find that here.
This blog post will show you how to hook up a pulley drive bicycle generator (B300) that can do up to 300 watts of power, that’s 12-40 volts output. You can connect to a power station to charge it, use a charge controller and a fuse to charge batteries, power lights, 12 volt blenders, there are so many things you can do. Kids especially love doing something with this for science fairs, and many times they win 1st place!
This is a universal approach, using a wooden platform, where it doesn’t matter the size of the bike or bike stand.
Here is the video of the whole process, or scroll down for a step-by-step guide.
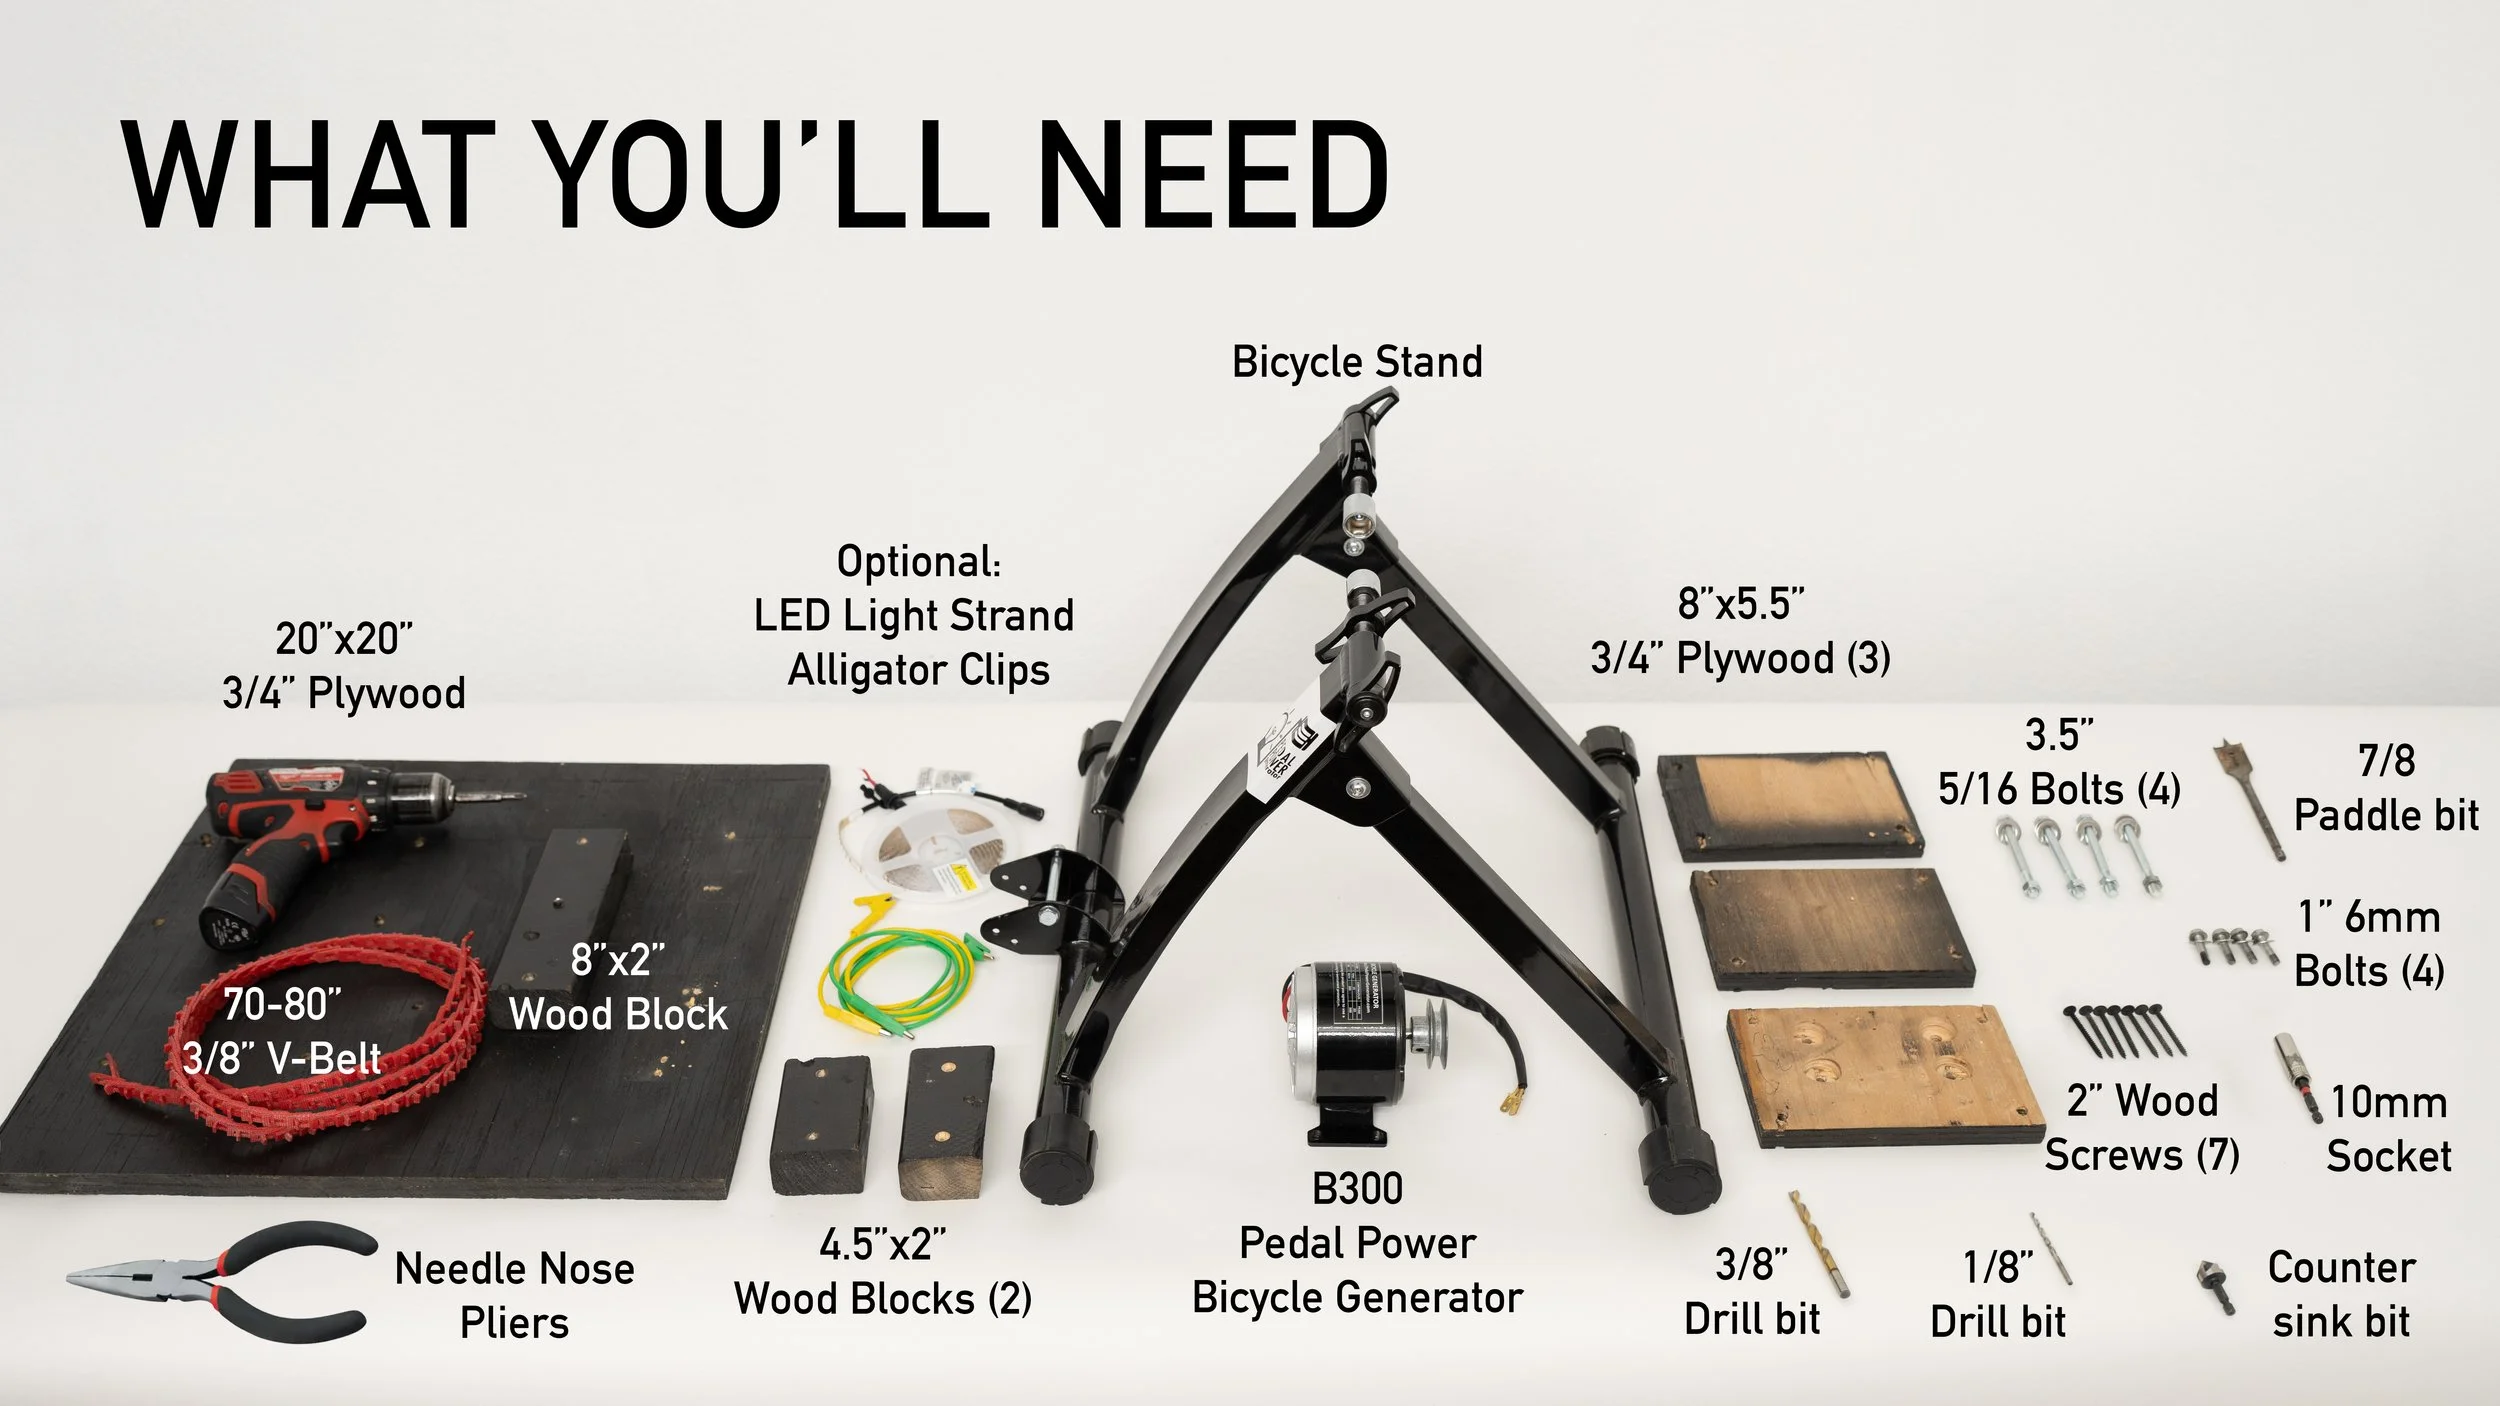
What you’ll need
B300 Belt Drive Bicycle Generator - https://amzn.to/48Cm0uI
3/8'“ V-Belt - https://amzn.to/3WcgE1S
Bicycle Stand - https://amzn.to/4pHF6Wm
3/4” Plywood - cut 1 - 20”x20”, cut 3 - 8”x5.5”
17-20” 1x2’s (or similar) - cut 2 - 4.5”, cut 1 - 8”
Drill/Screwdriver - https://amzn.to/4nt9ylI
Needle Nose Pliers - https://amzn.to/48CmJvW
3/8” Drill bit - https://amzn.to/42e6Vf5
1/8” Drill bit - https://amzn.to/4nmvRt9
Countersink bit - https://amzn.to/4gNTVTm
7/8 Paddle bit - https://amzn.to/4h4klAB
10mm Socket - https://amzn.to/4mzSA3F
2” Wood screws - https://amzn.to/3VGHpvd
1'“ 6mm Bolts - https://amzn.to/4nw5C3M
3.5” 5/16 Bolts
Alligator Clips - https://amzn.to/4nTenof
LED Light Strand - https://amzn.to/4pIXJtb
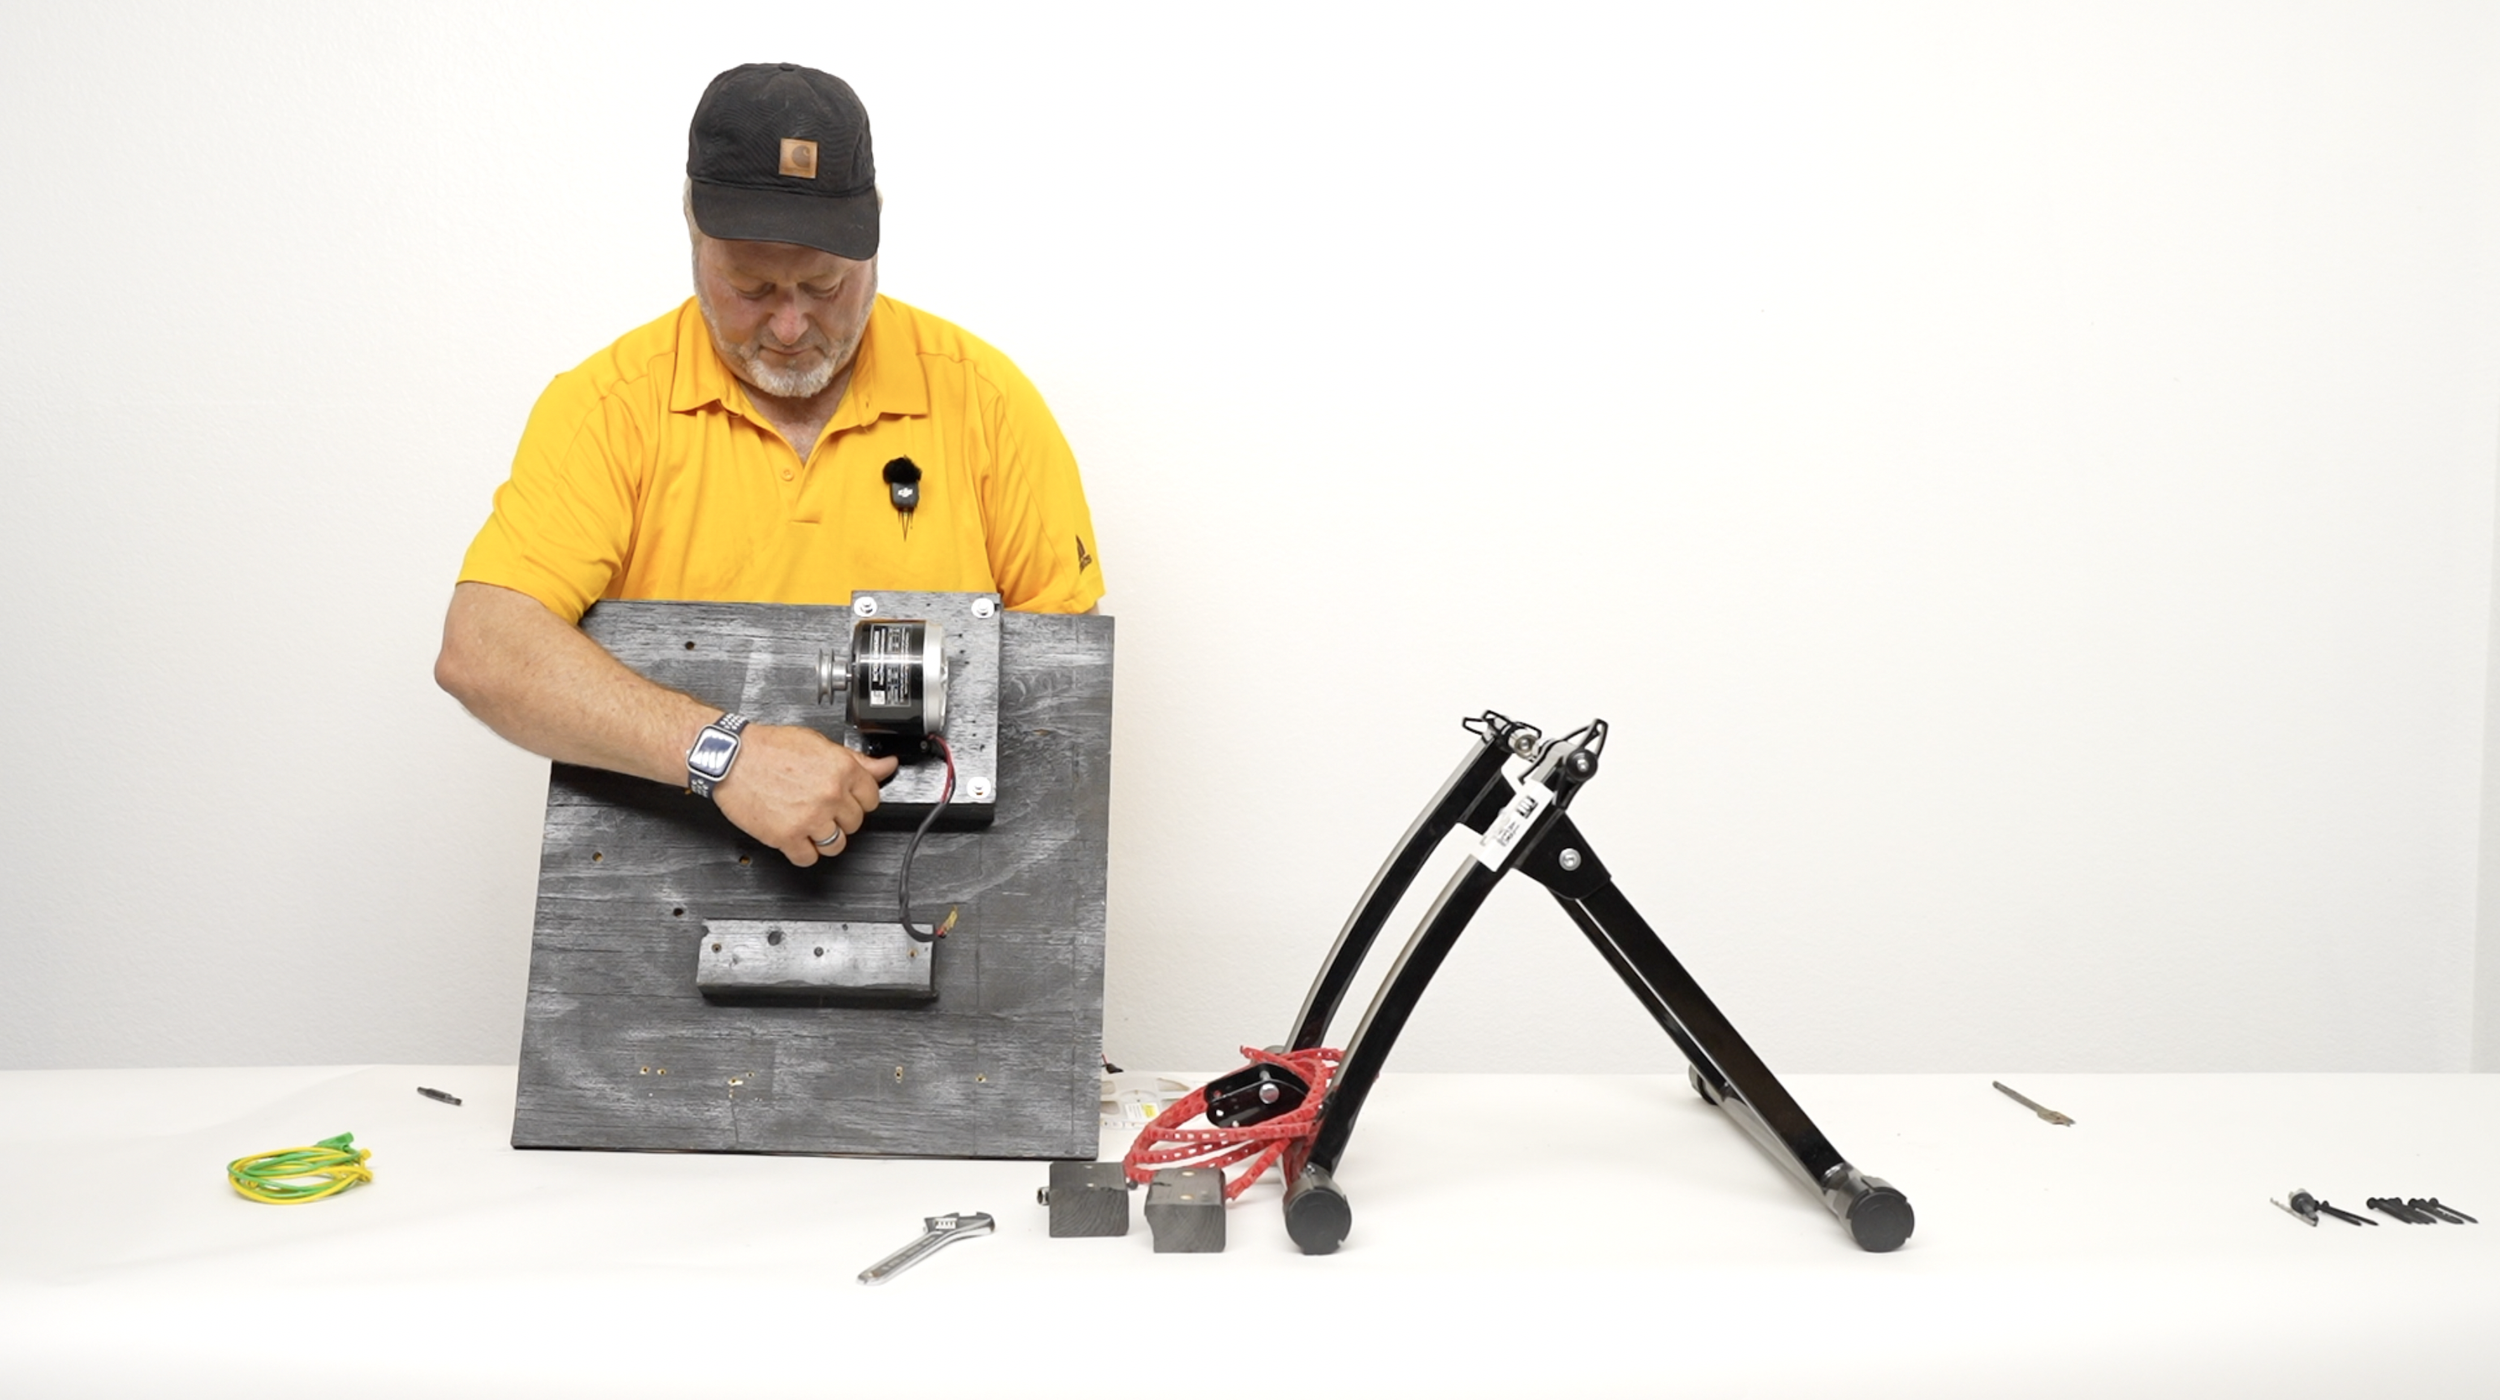
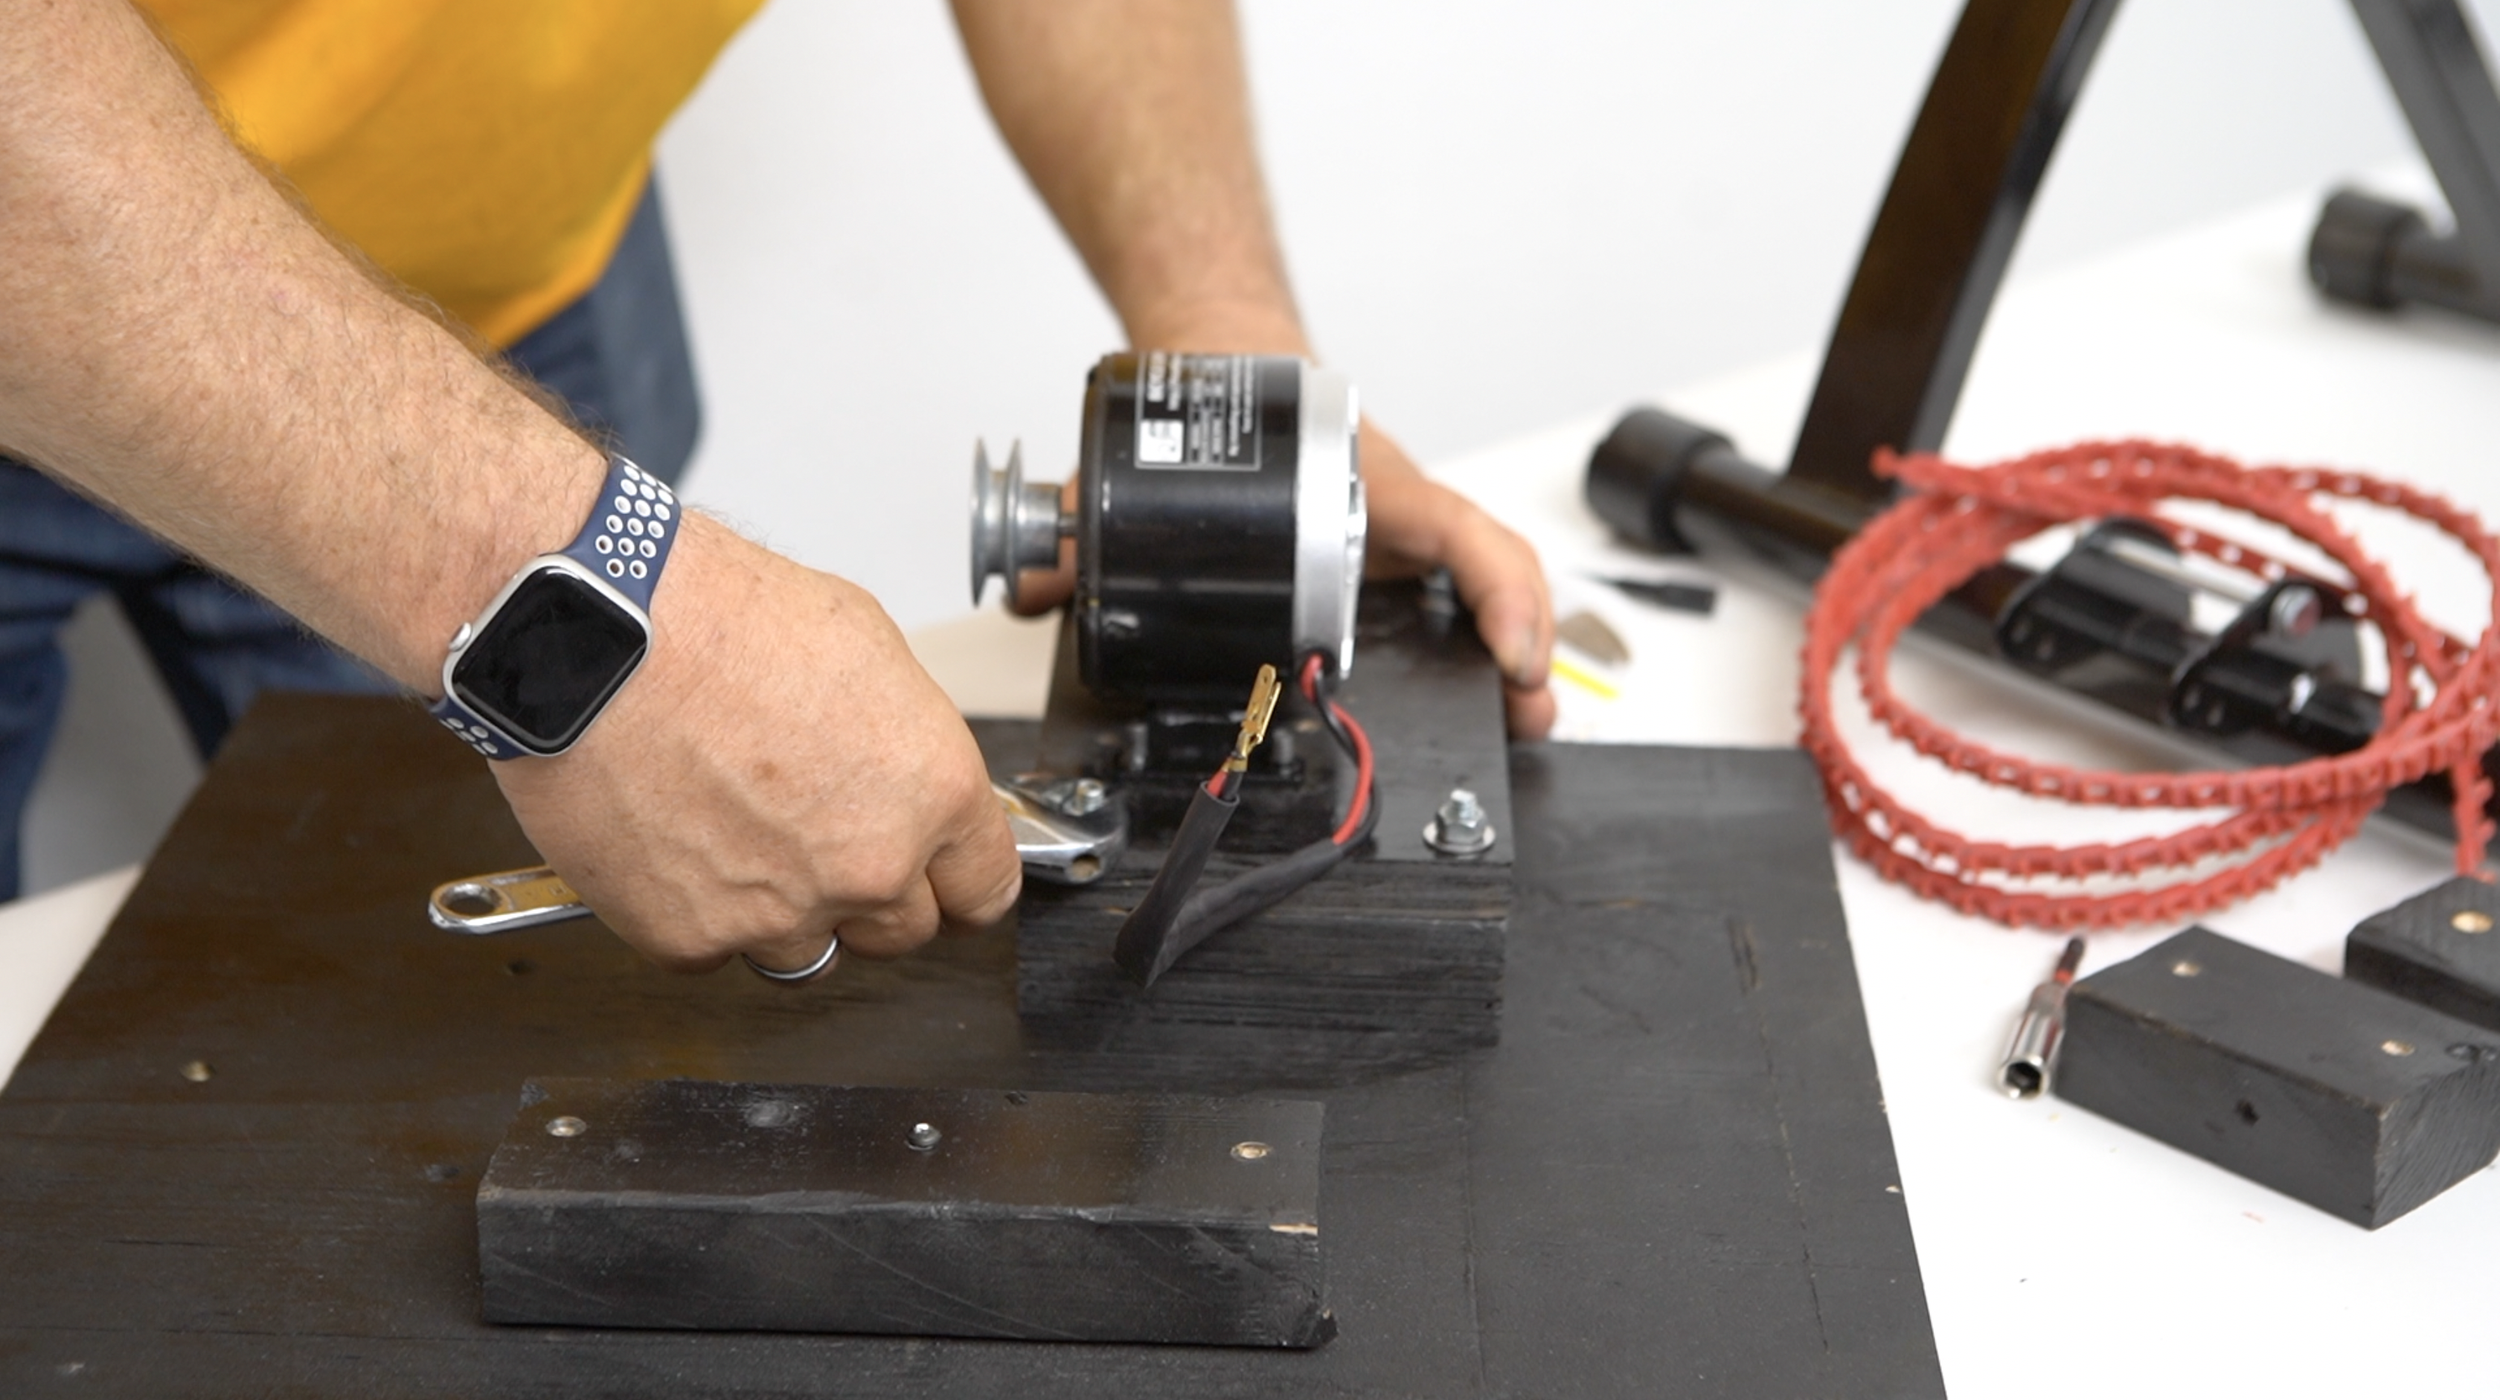
Step 1 - Mount The Generator
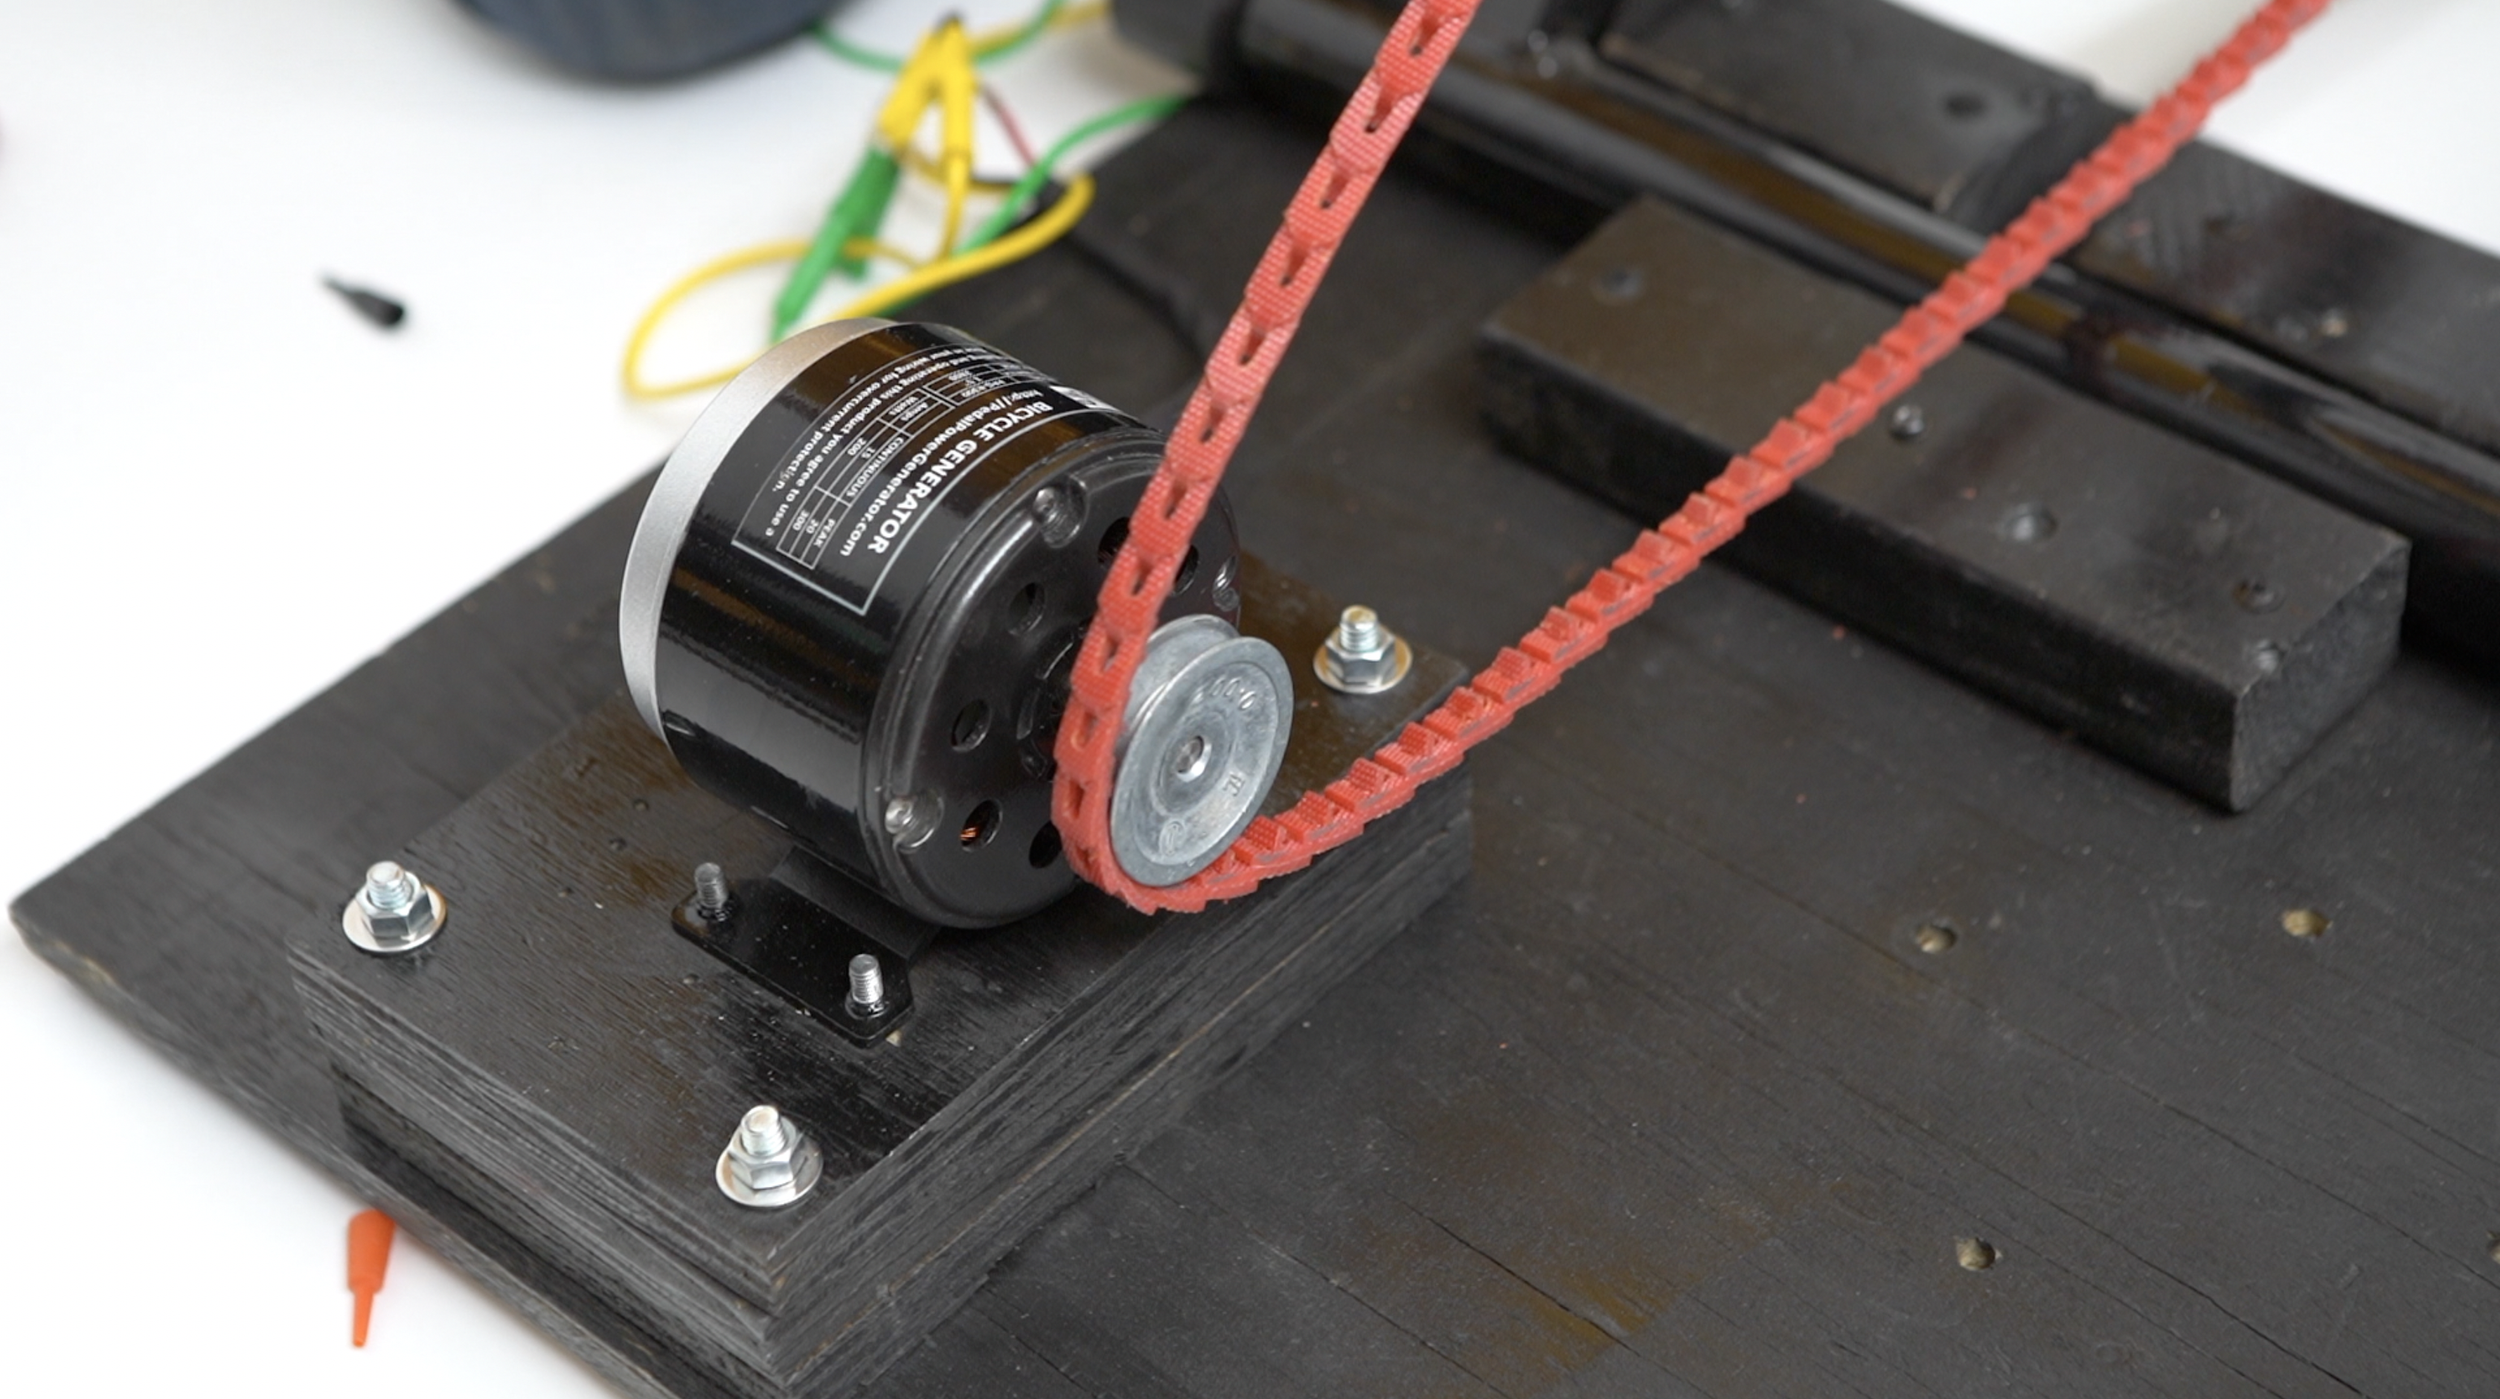
Drill counter sink holes into one of the 8x5.5” plywood risers. I used a 7/8 paddle bit for mine.
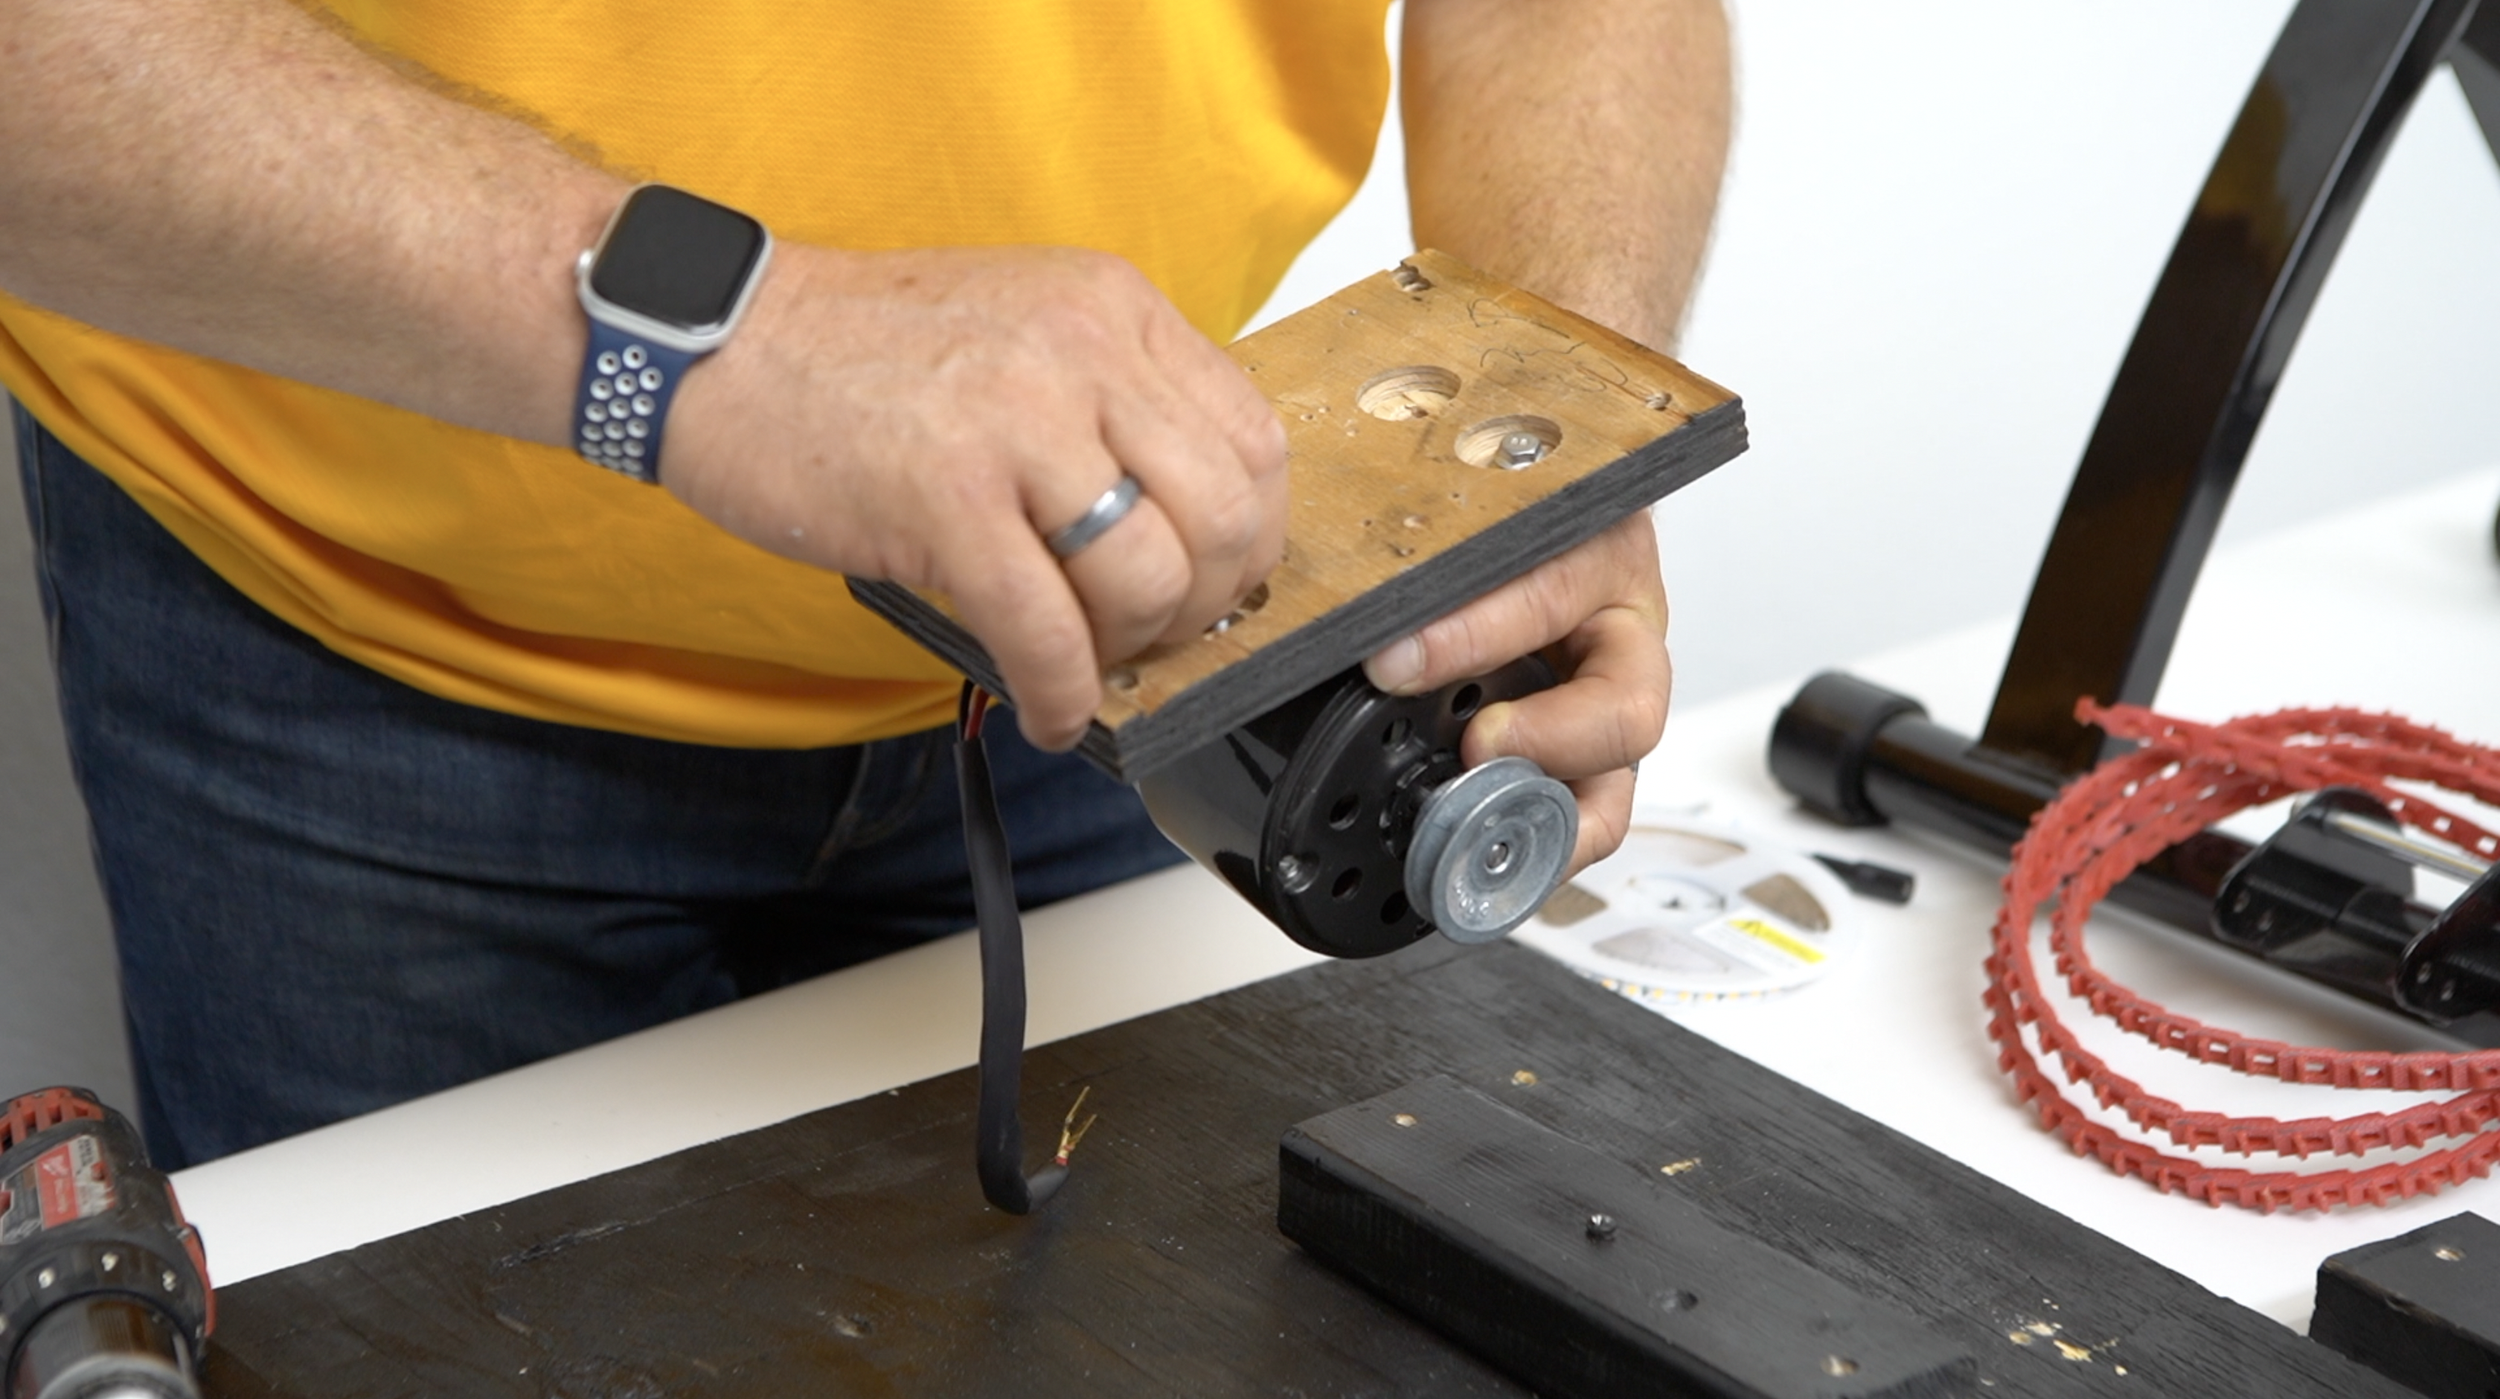
Use the 1” 6mm bolts to attach the generator to the riser plate. Just get them started, until they are all in place. You don’t want to cross thread these because you will ruin the threads. Be really careful, tighten to finger tight. Then use a drill at 25% to tighten fully.
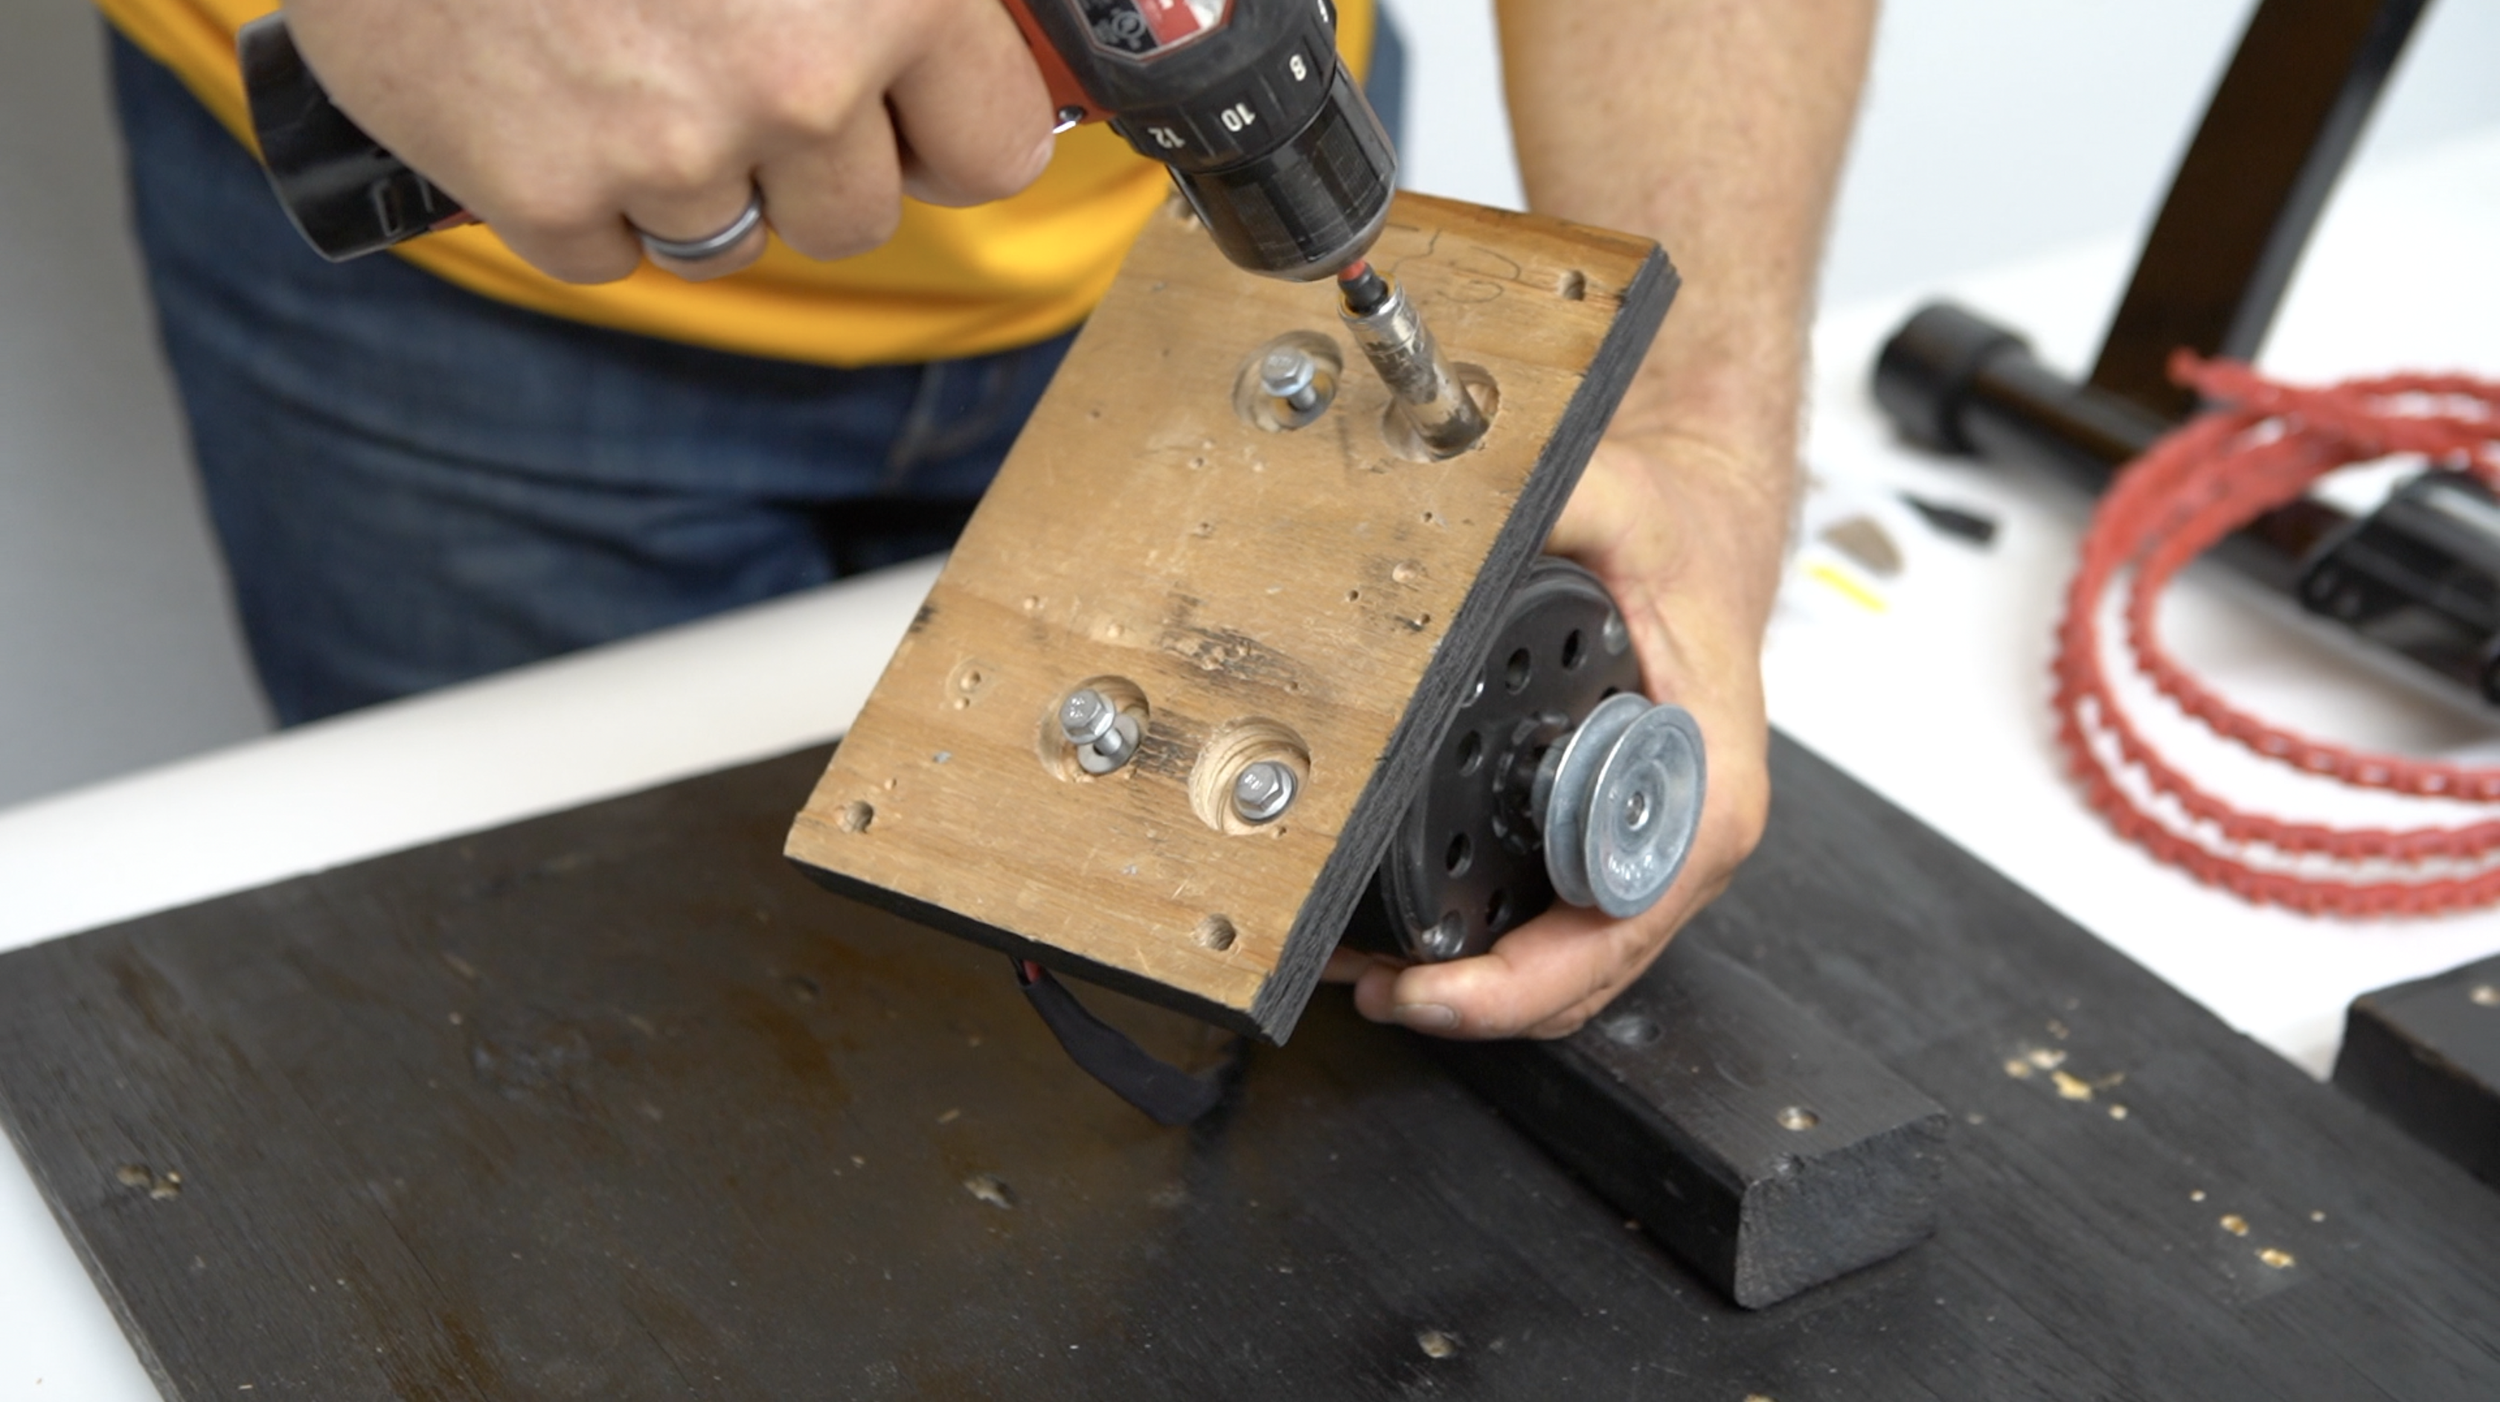
Align all three riser plates and pre drill in each corner so the bolts may be used.
Use the 5/16'‘ bolts and washers to secure all three risers to the base plate. One washer on the top, one on the bottom. Tighten them barely to finger tight at first.

Use a wrench to finish tightening the bolts. You only need about 5 ft lbs on these, you don’t need a lot of force on them.
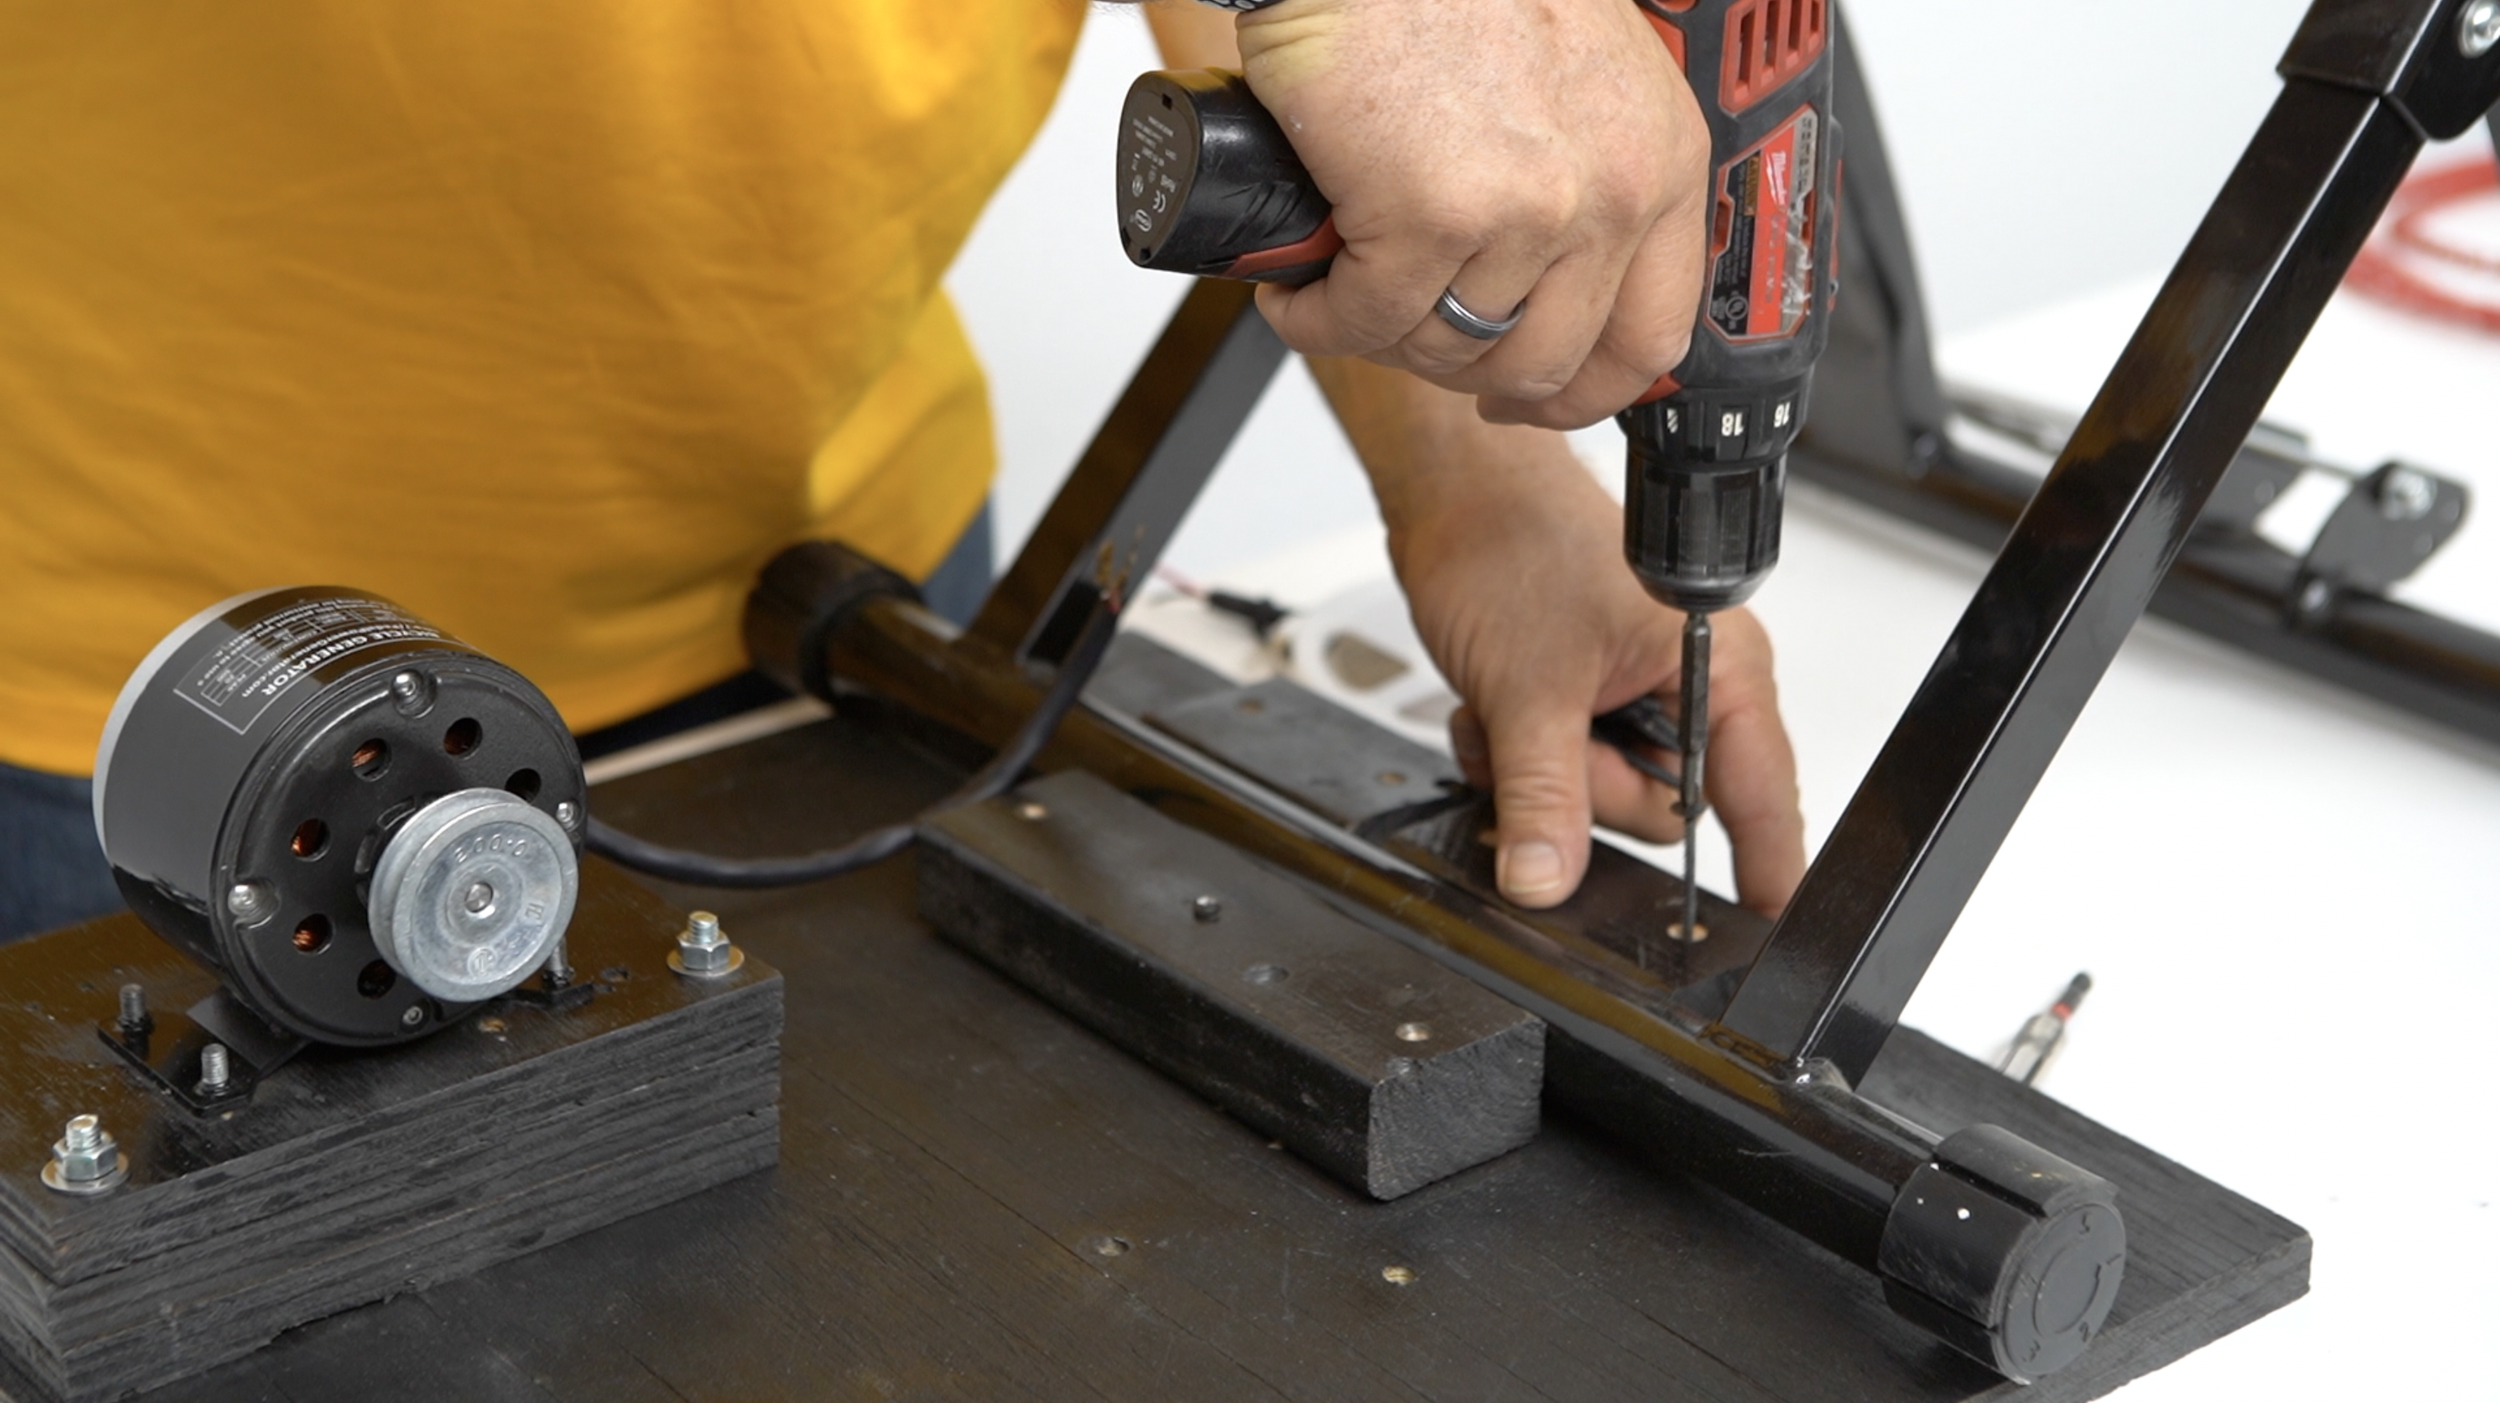
Step 2 - Mount the bike stand blocks
Put the bike stand on the base plate and set the blocks up against the stand. Pre drill quarter inch holes in each block. (2 in each smaller block, and 3 holes in the bigger block). You definitely want the holes bigger than the screws so that way they can tighten down into the base plate.
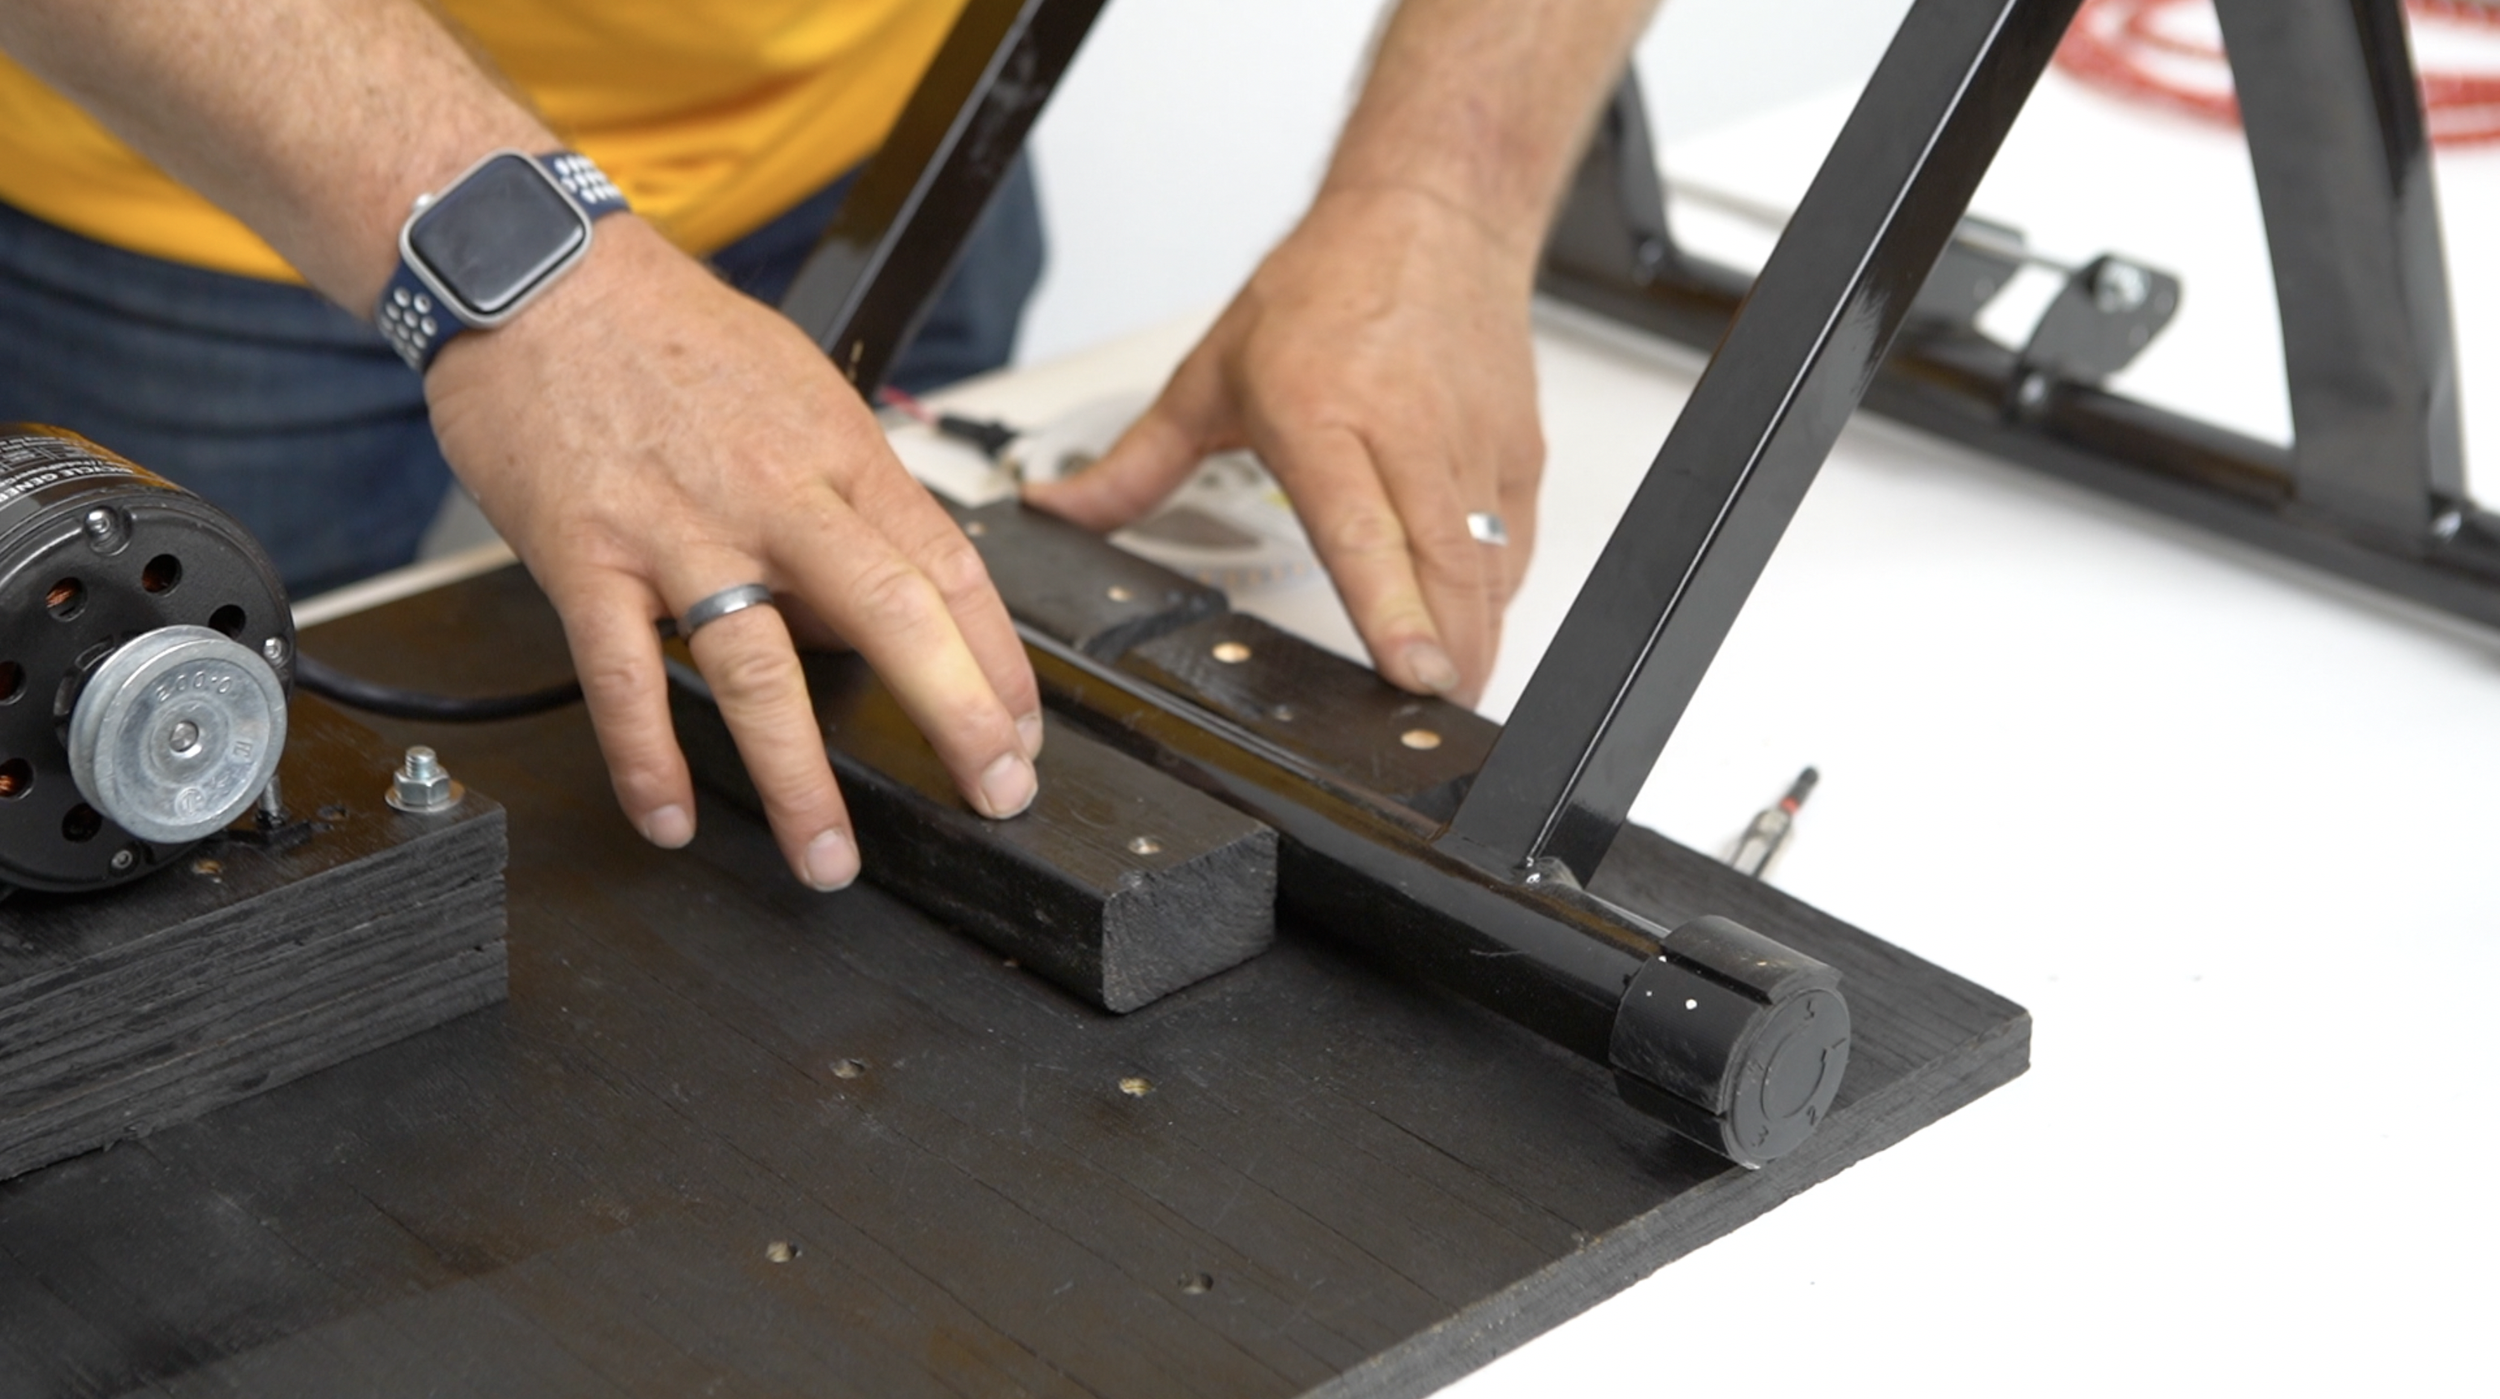
Use the 2” screws to secure all 3 blocks to the base plate. I used about 1/2 tourque and low speed so they don’t strip out.
Step 3 - Remove the back tire
We need to take the back wheel off to remove the tire to install the v-belt.
Loosen the rear break:
Squeeze the break arms together, then lift the cable assembly out of the notch.
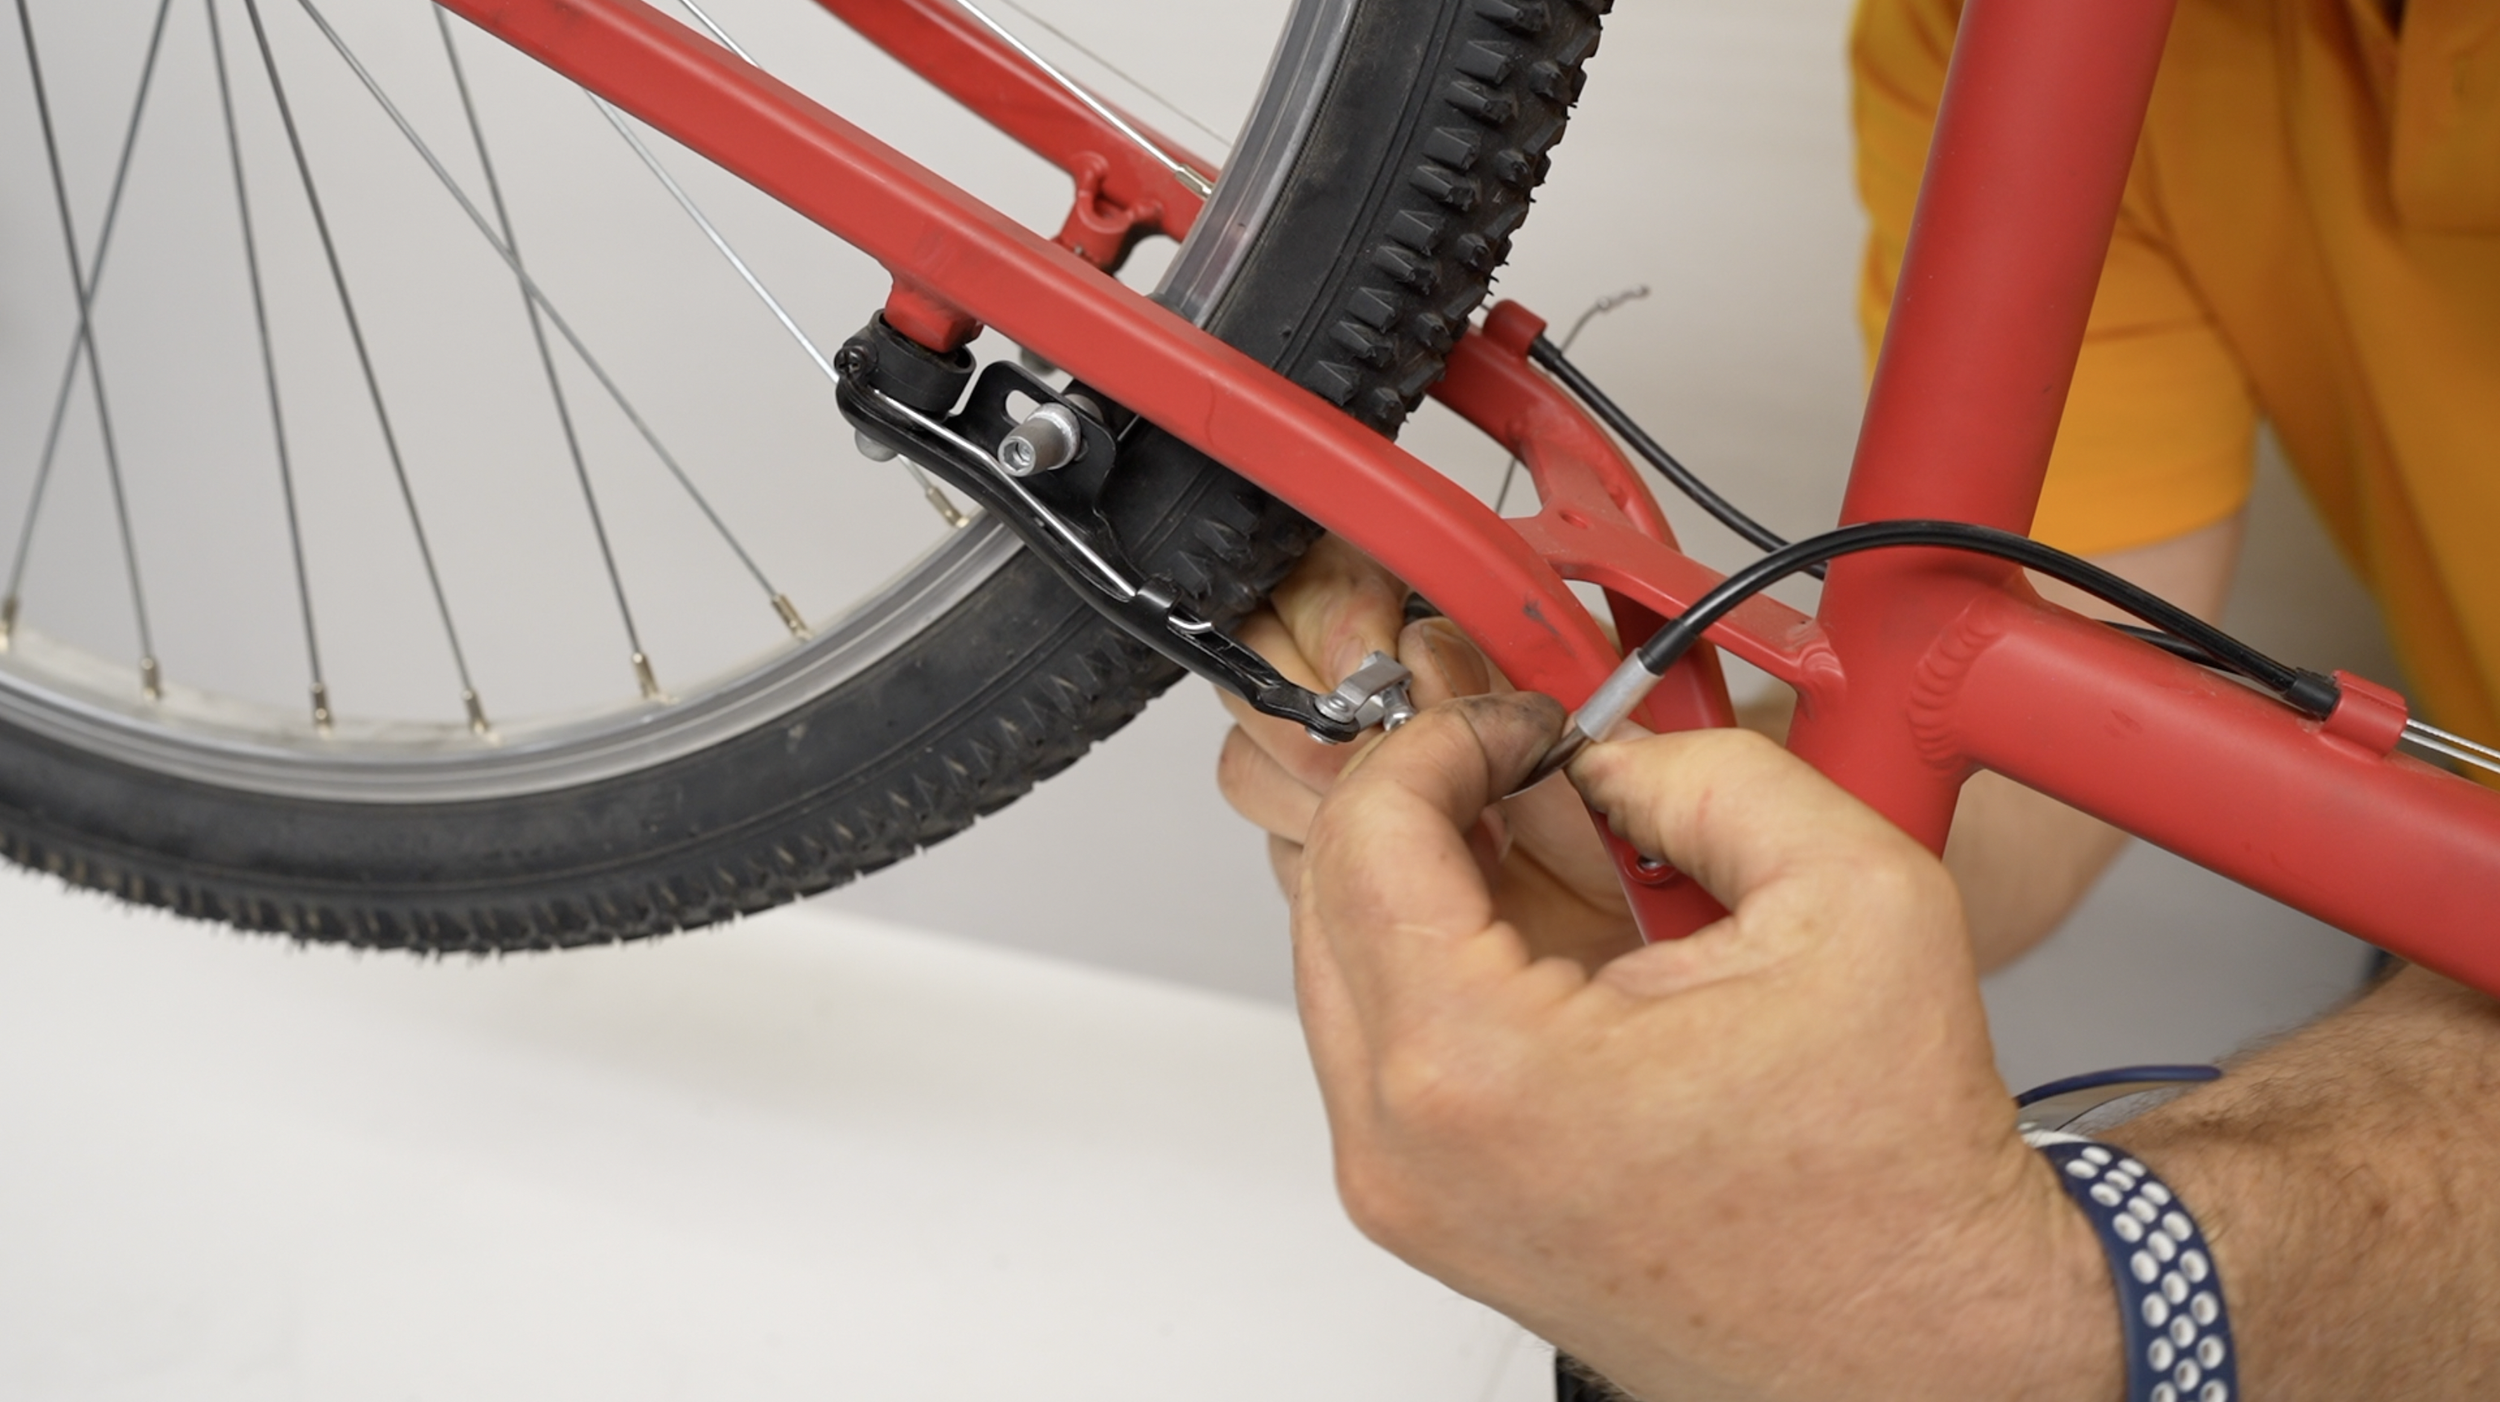
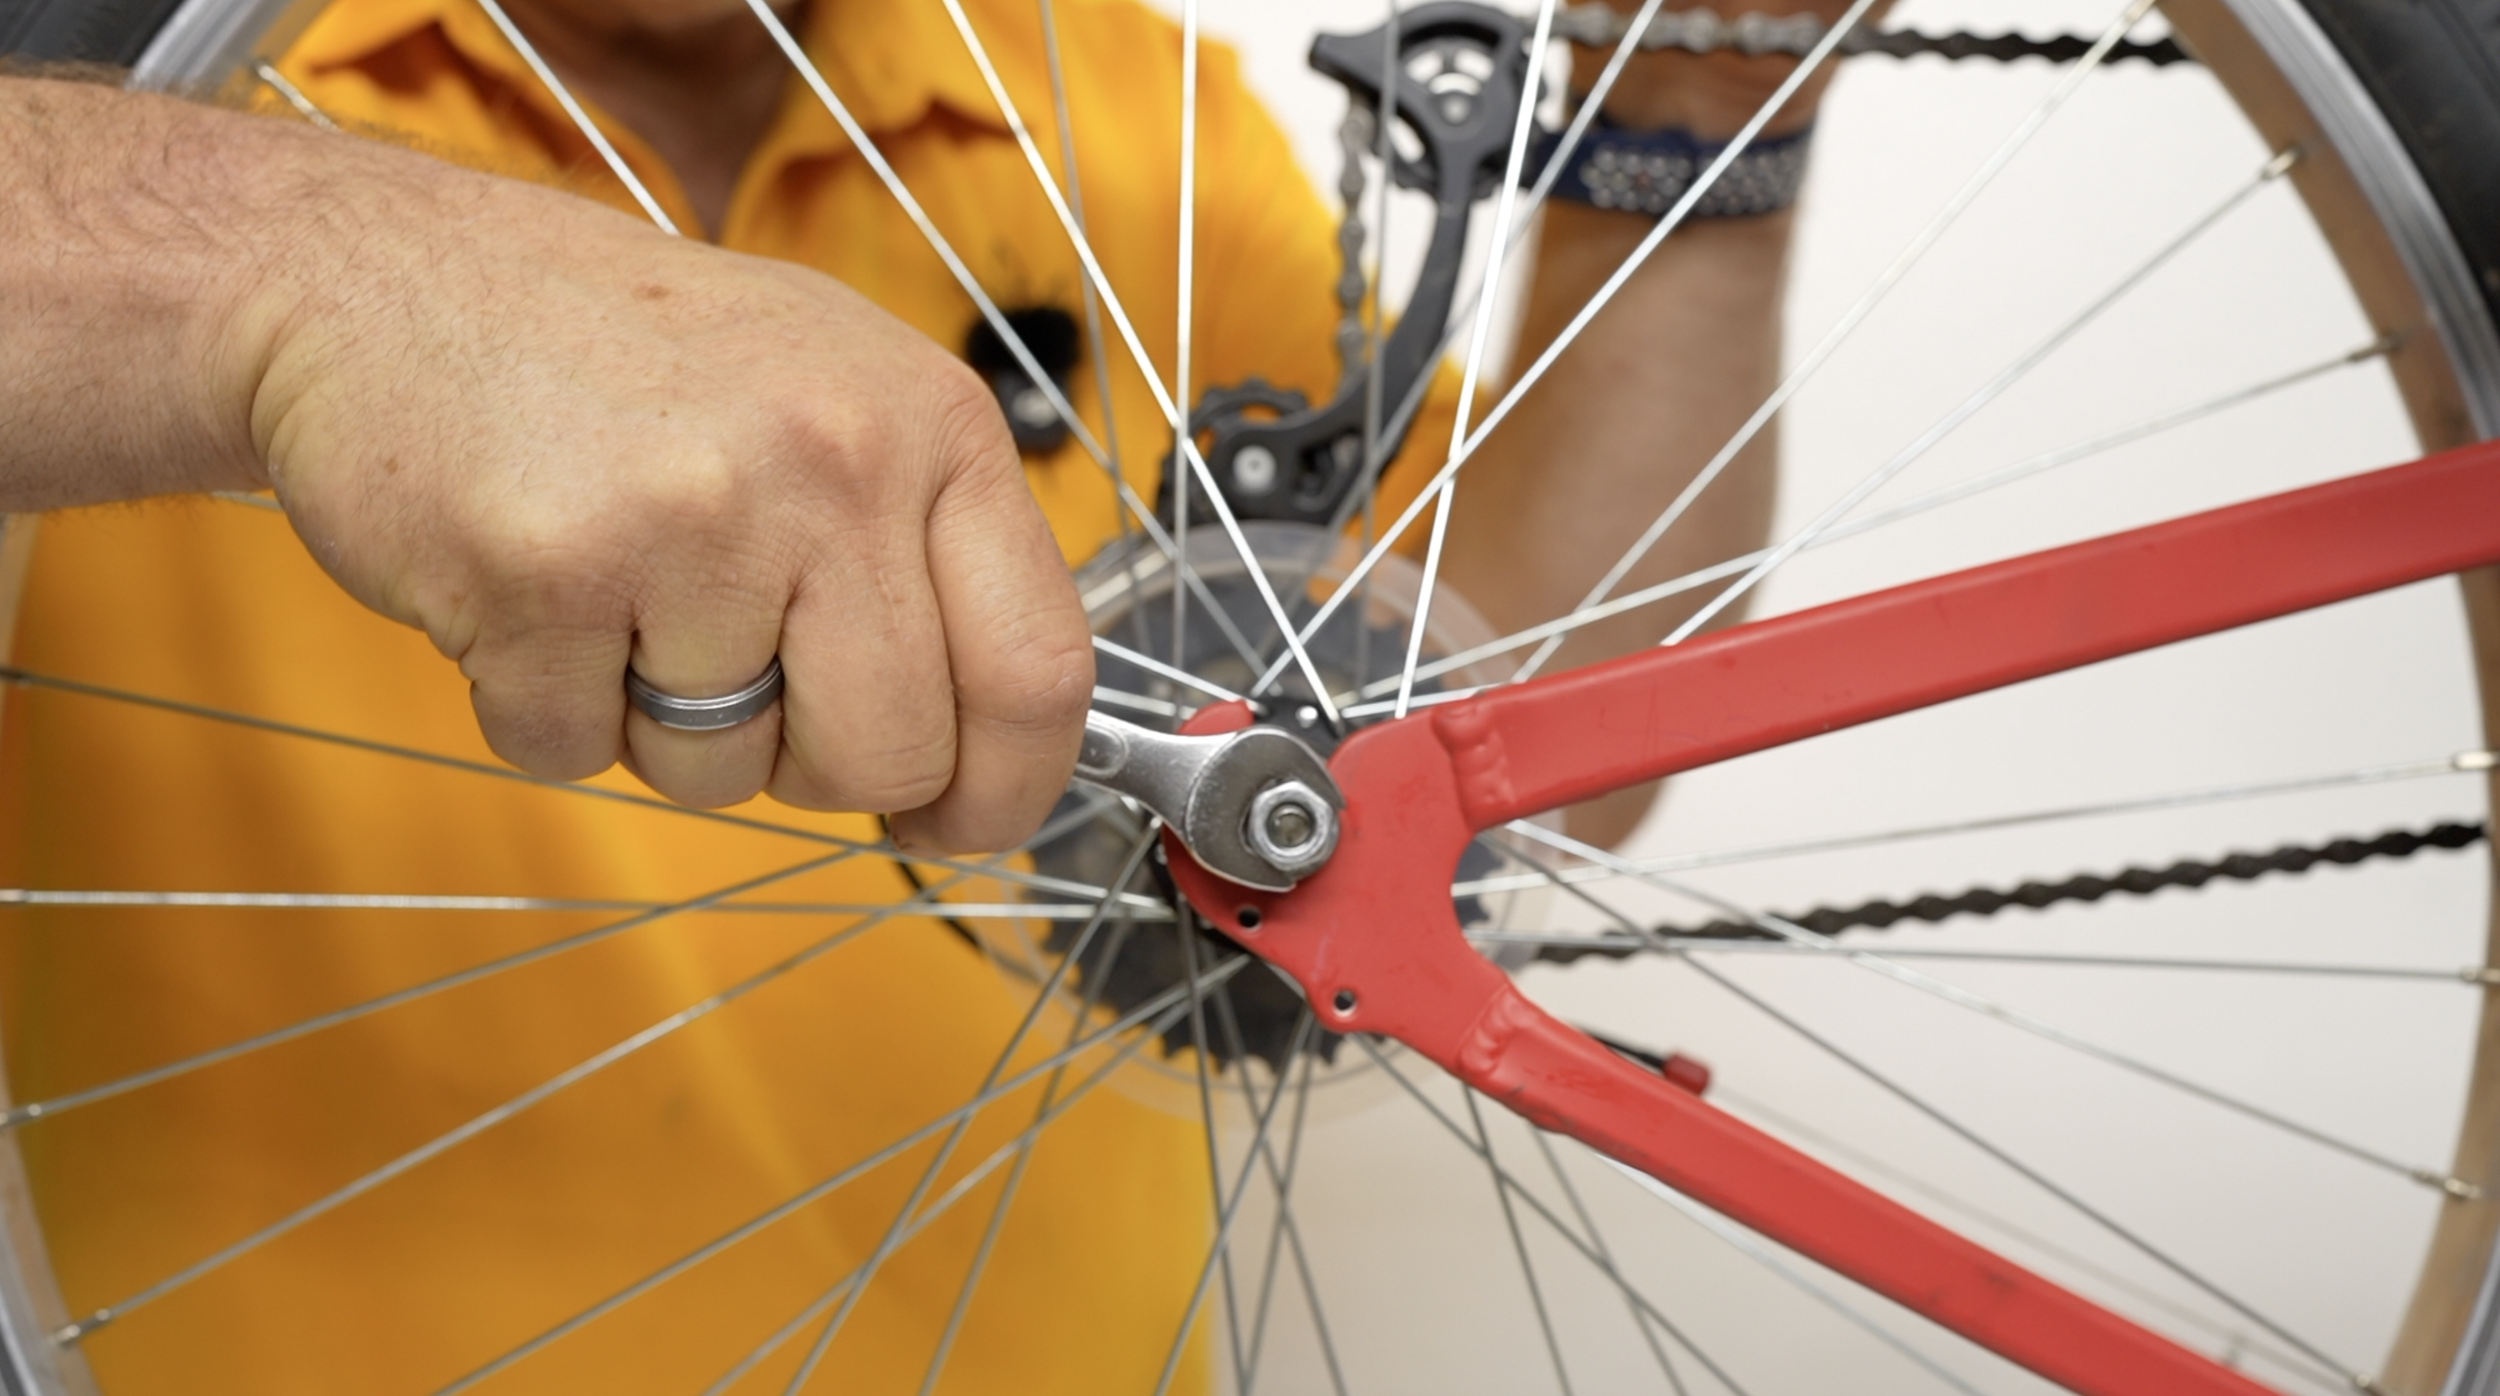
Loosen the axel nuts:
Use a wrench or socket that corresponds to the size of your axel nuts. Give it a couple of turns on each side to loosen.
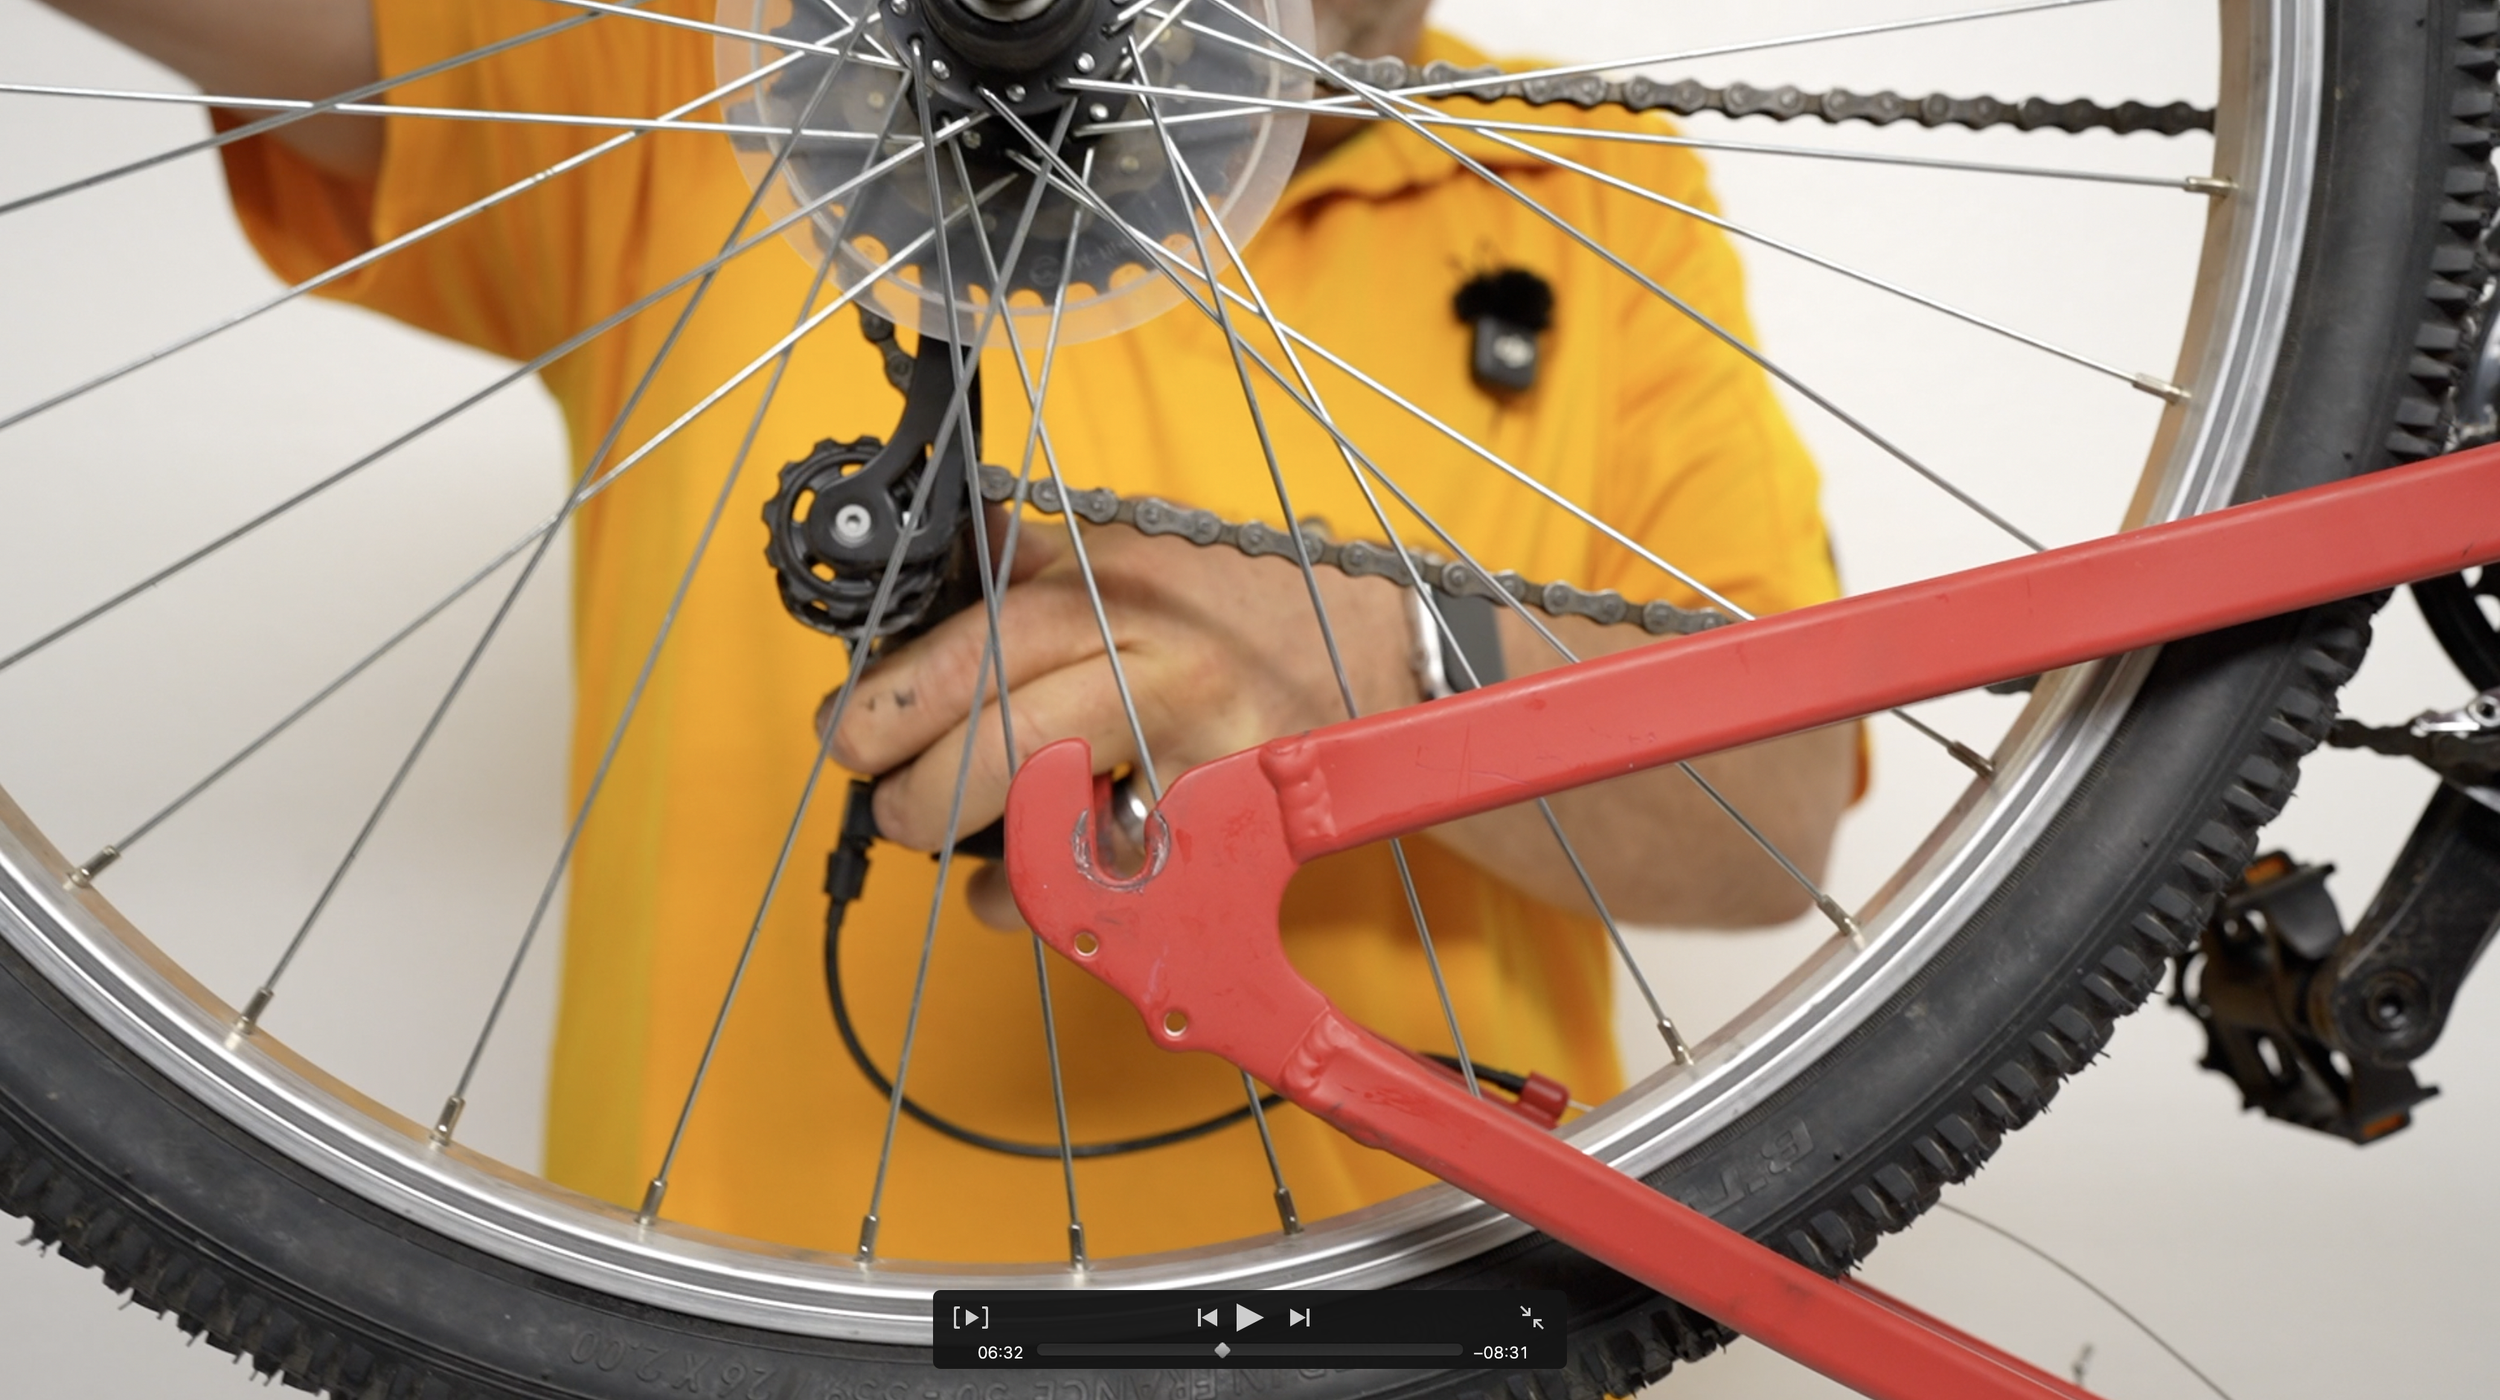
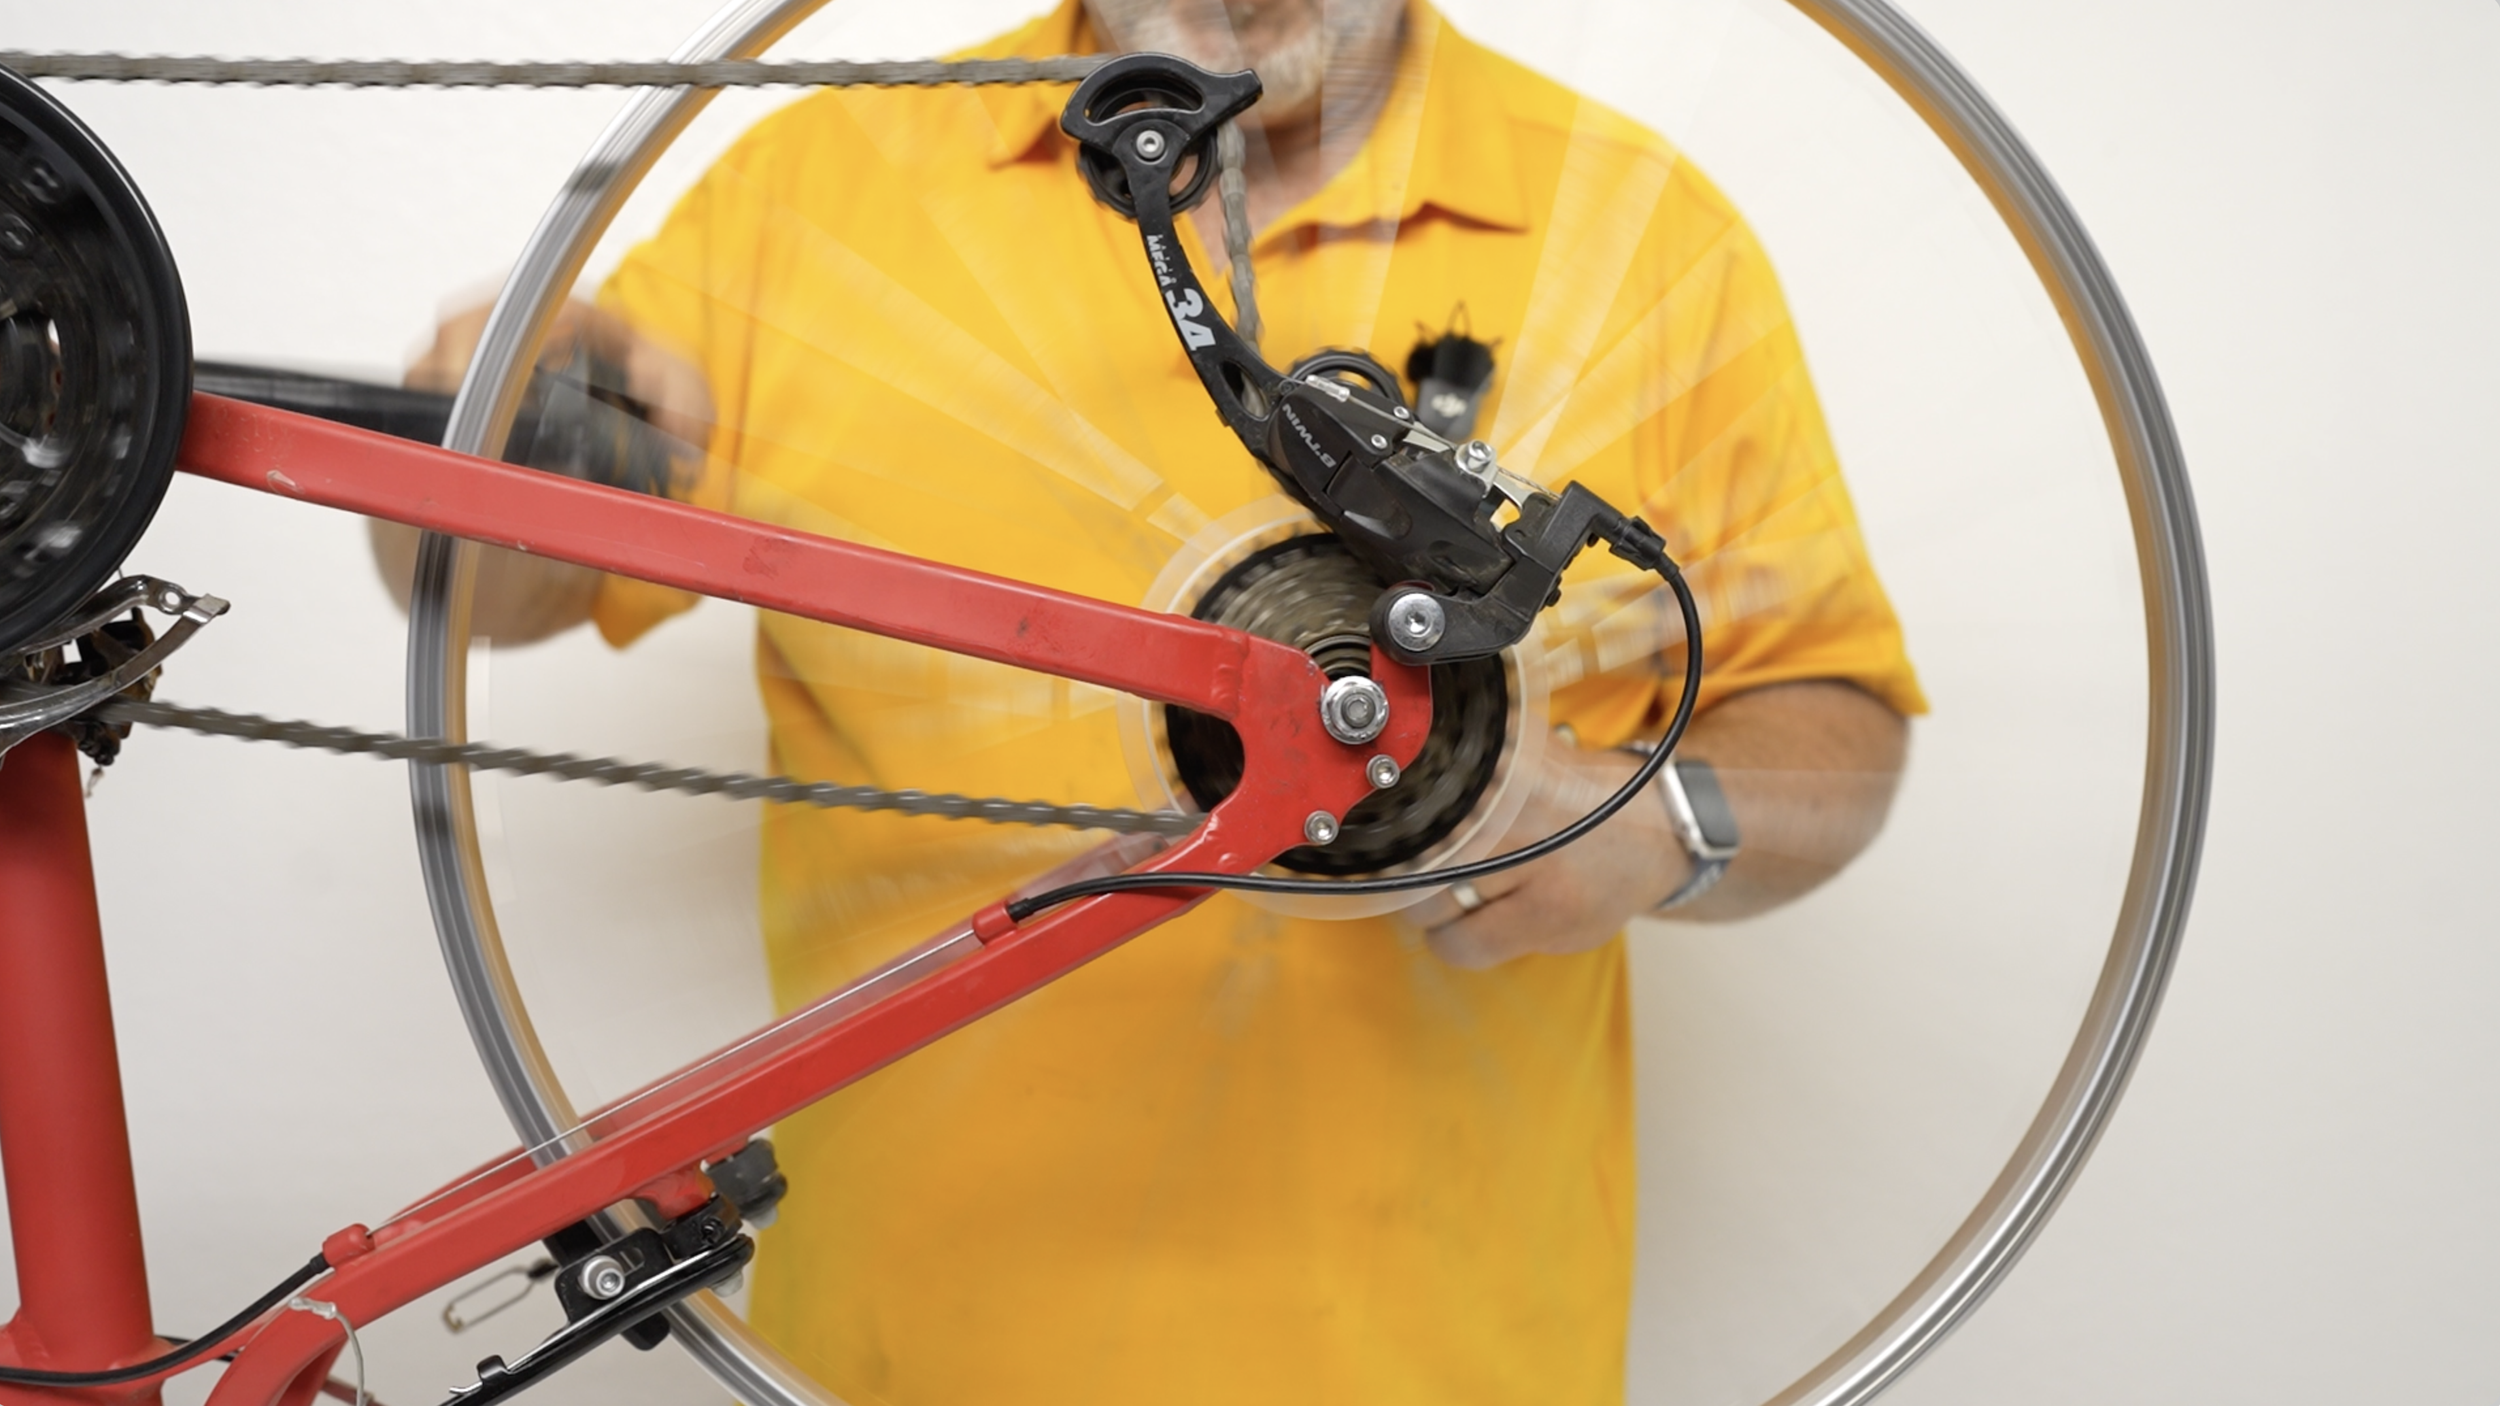
Pull back the derailleur:
Firmly press the derailleur toward the back of the bike while holding onto the wheel with the other hand.


Slide the wheel off the bike:
The wheel should pop right out, and carefully let go of the derailleur.
Let the air out of the tire by depressing the the small metal pin in the center of the tire's valve stem. Keep pressing until the air stops flowing out.
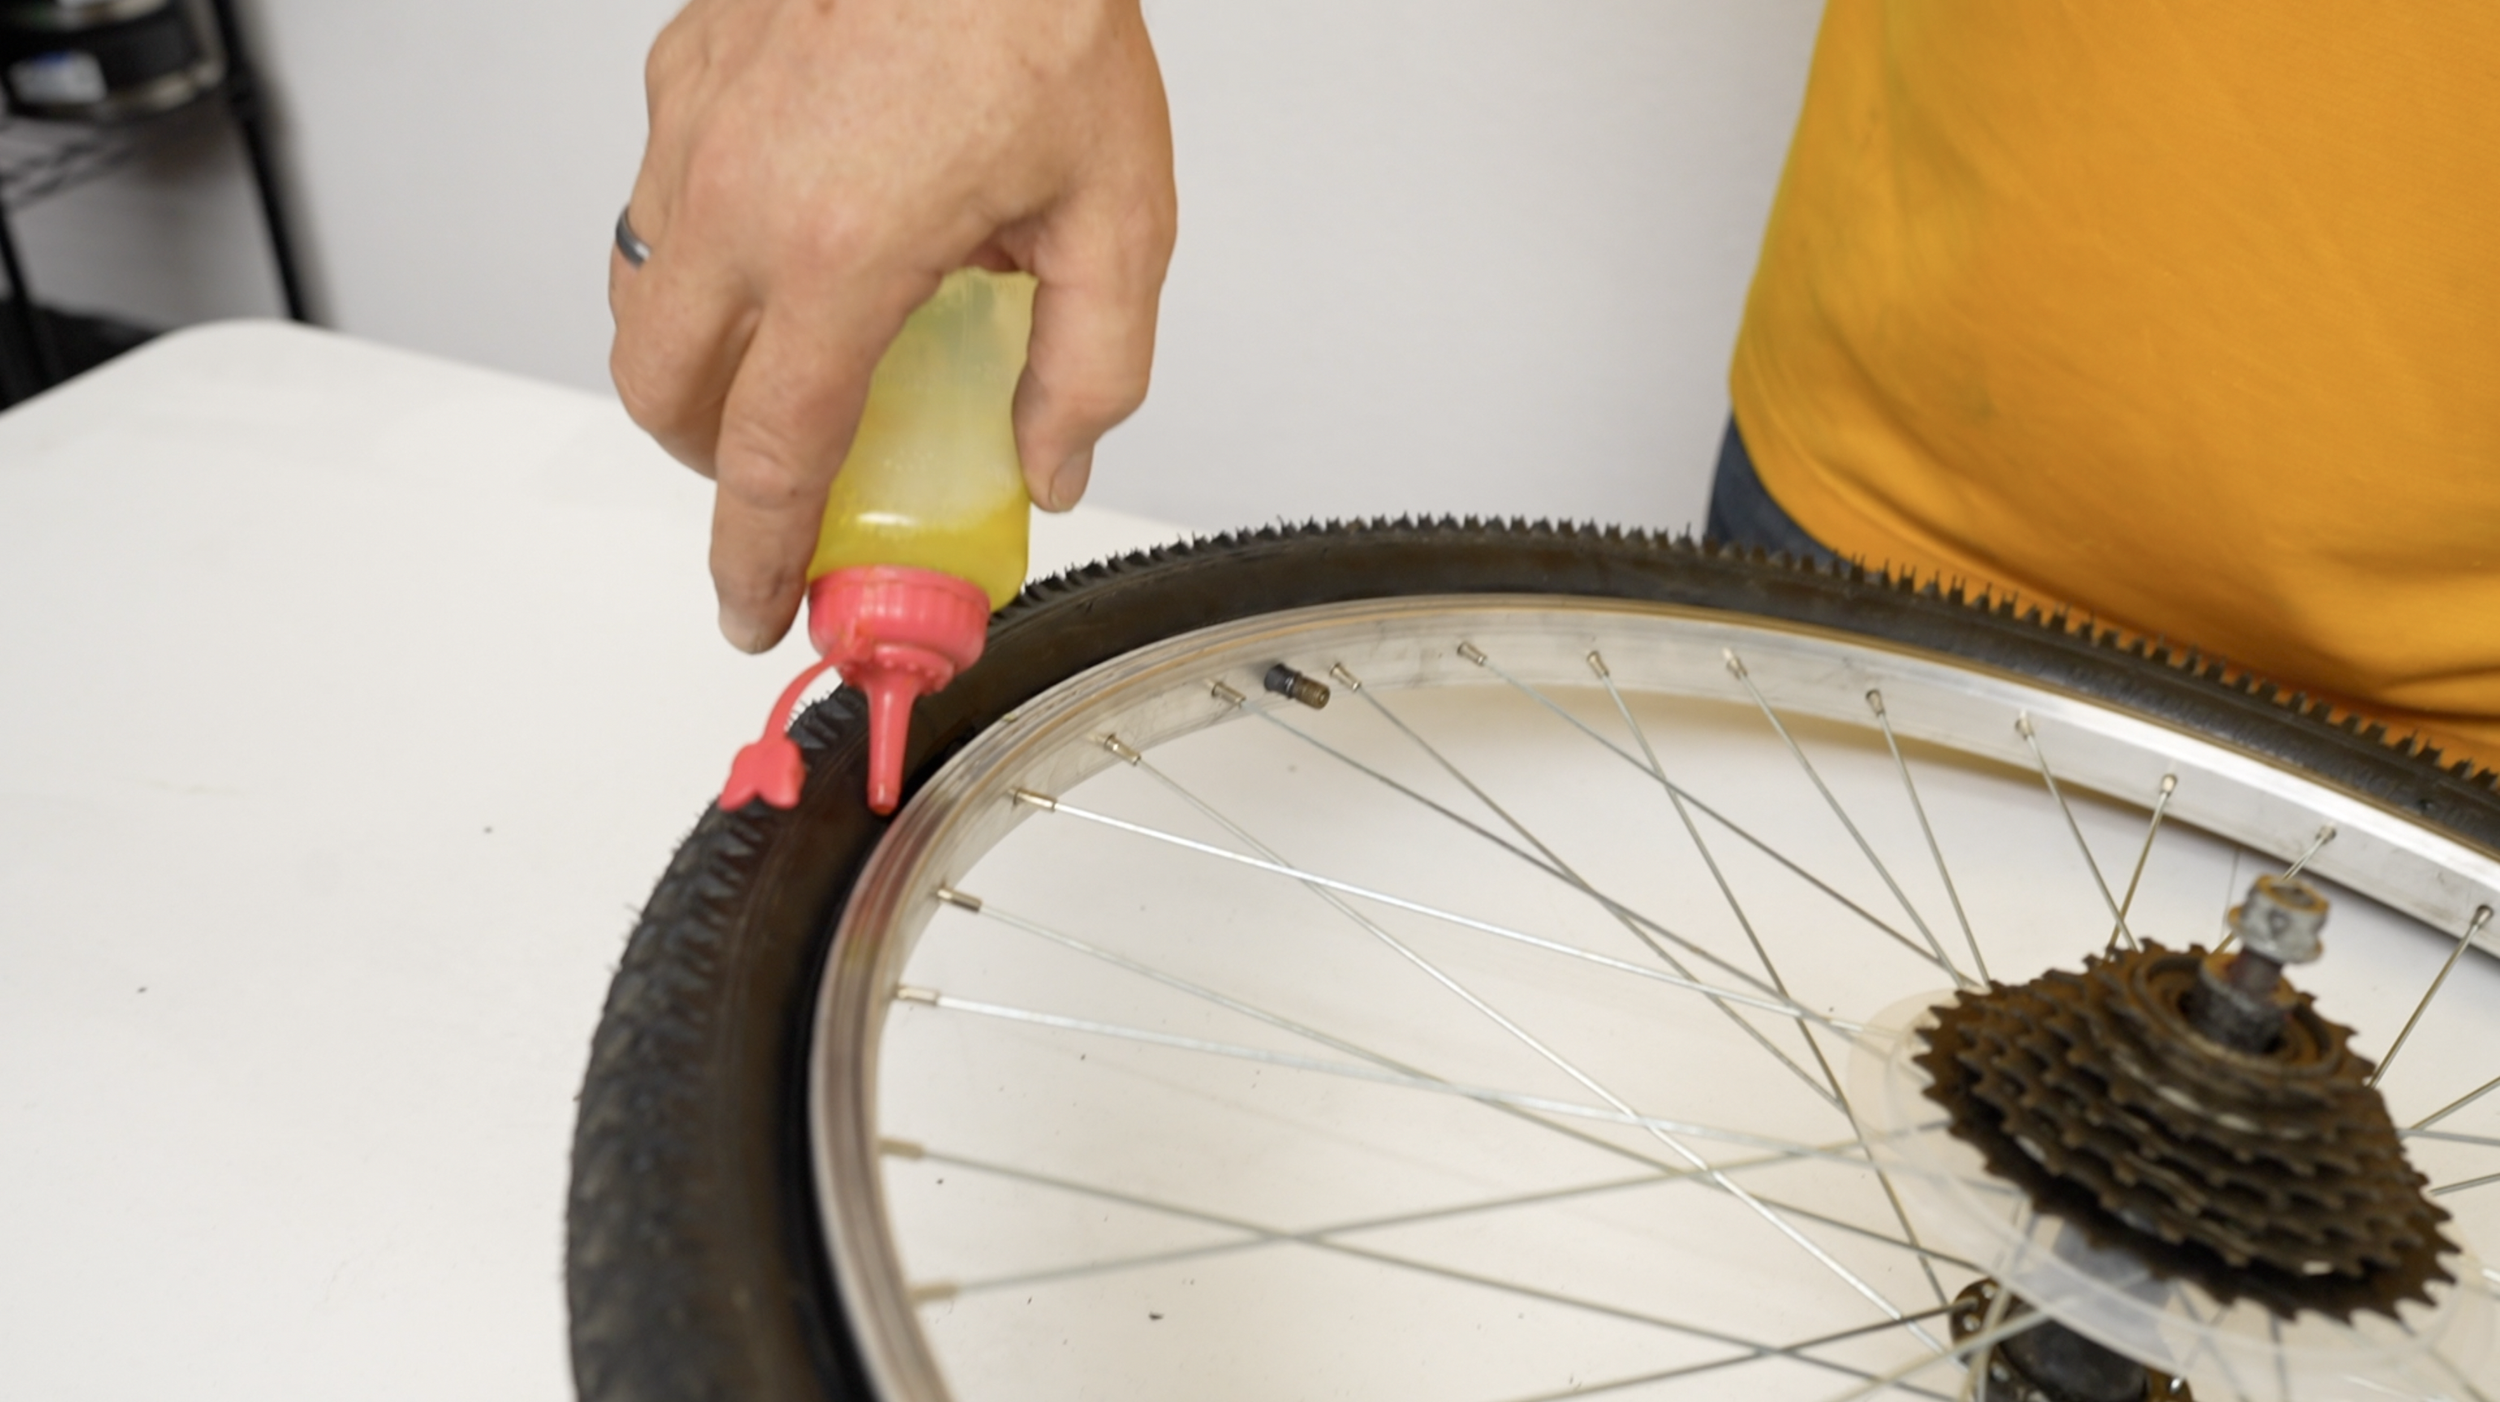
If your tire is difficult to get off the rim, you can get dishwashing liquid and just put a little around the rim. It makes it very slippery and easy to get off.
Start on the opposite side of the valve stem. Lift the tire off the edge of the rim. If this is difficult, you can use a plastic tire lever. If you use a screwdriver, you may puncture the tube, so if you can get a tire lever, that will be your best bet. My tire happens to be really loose, I just used my finger.
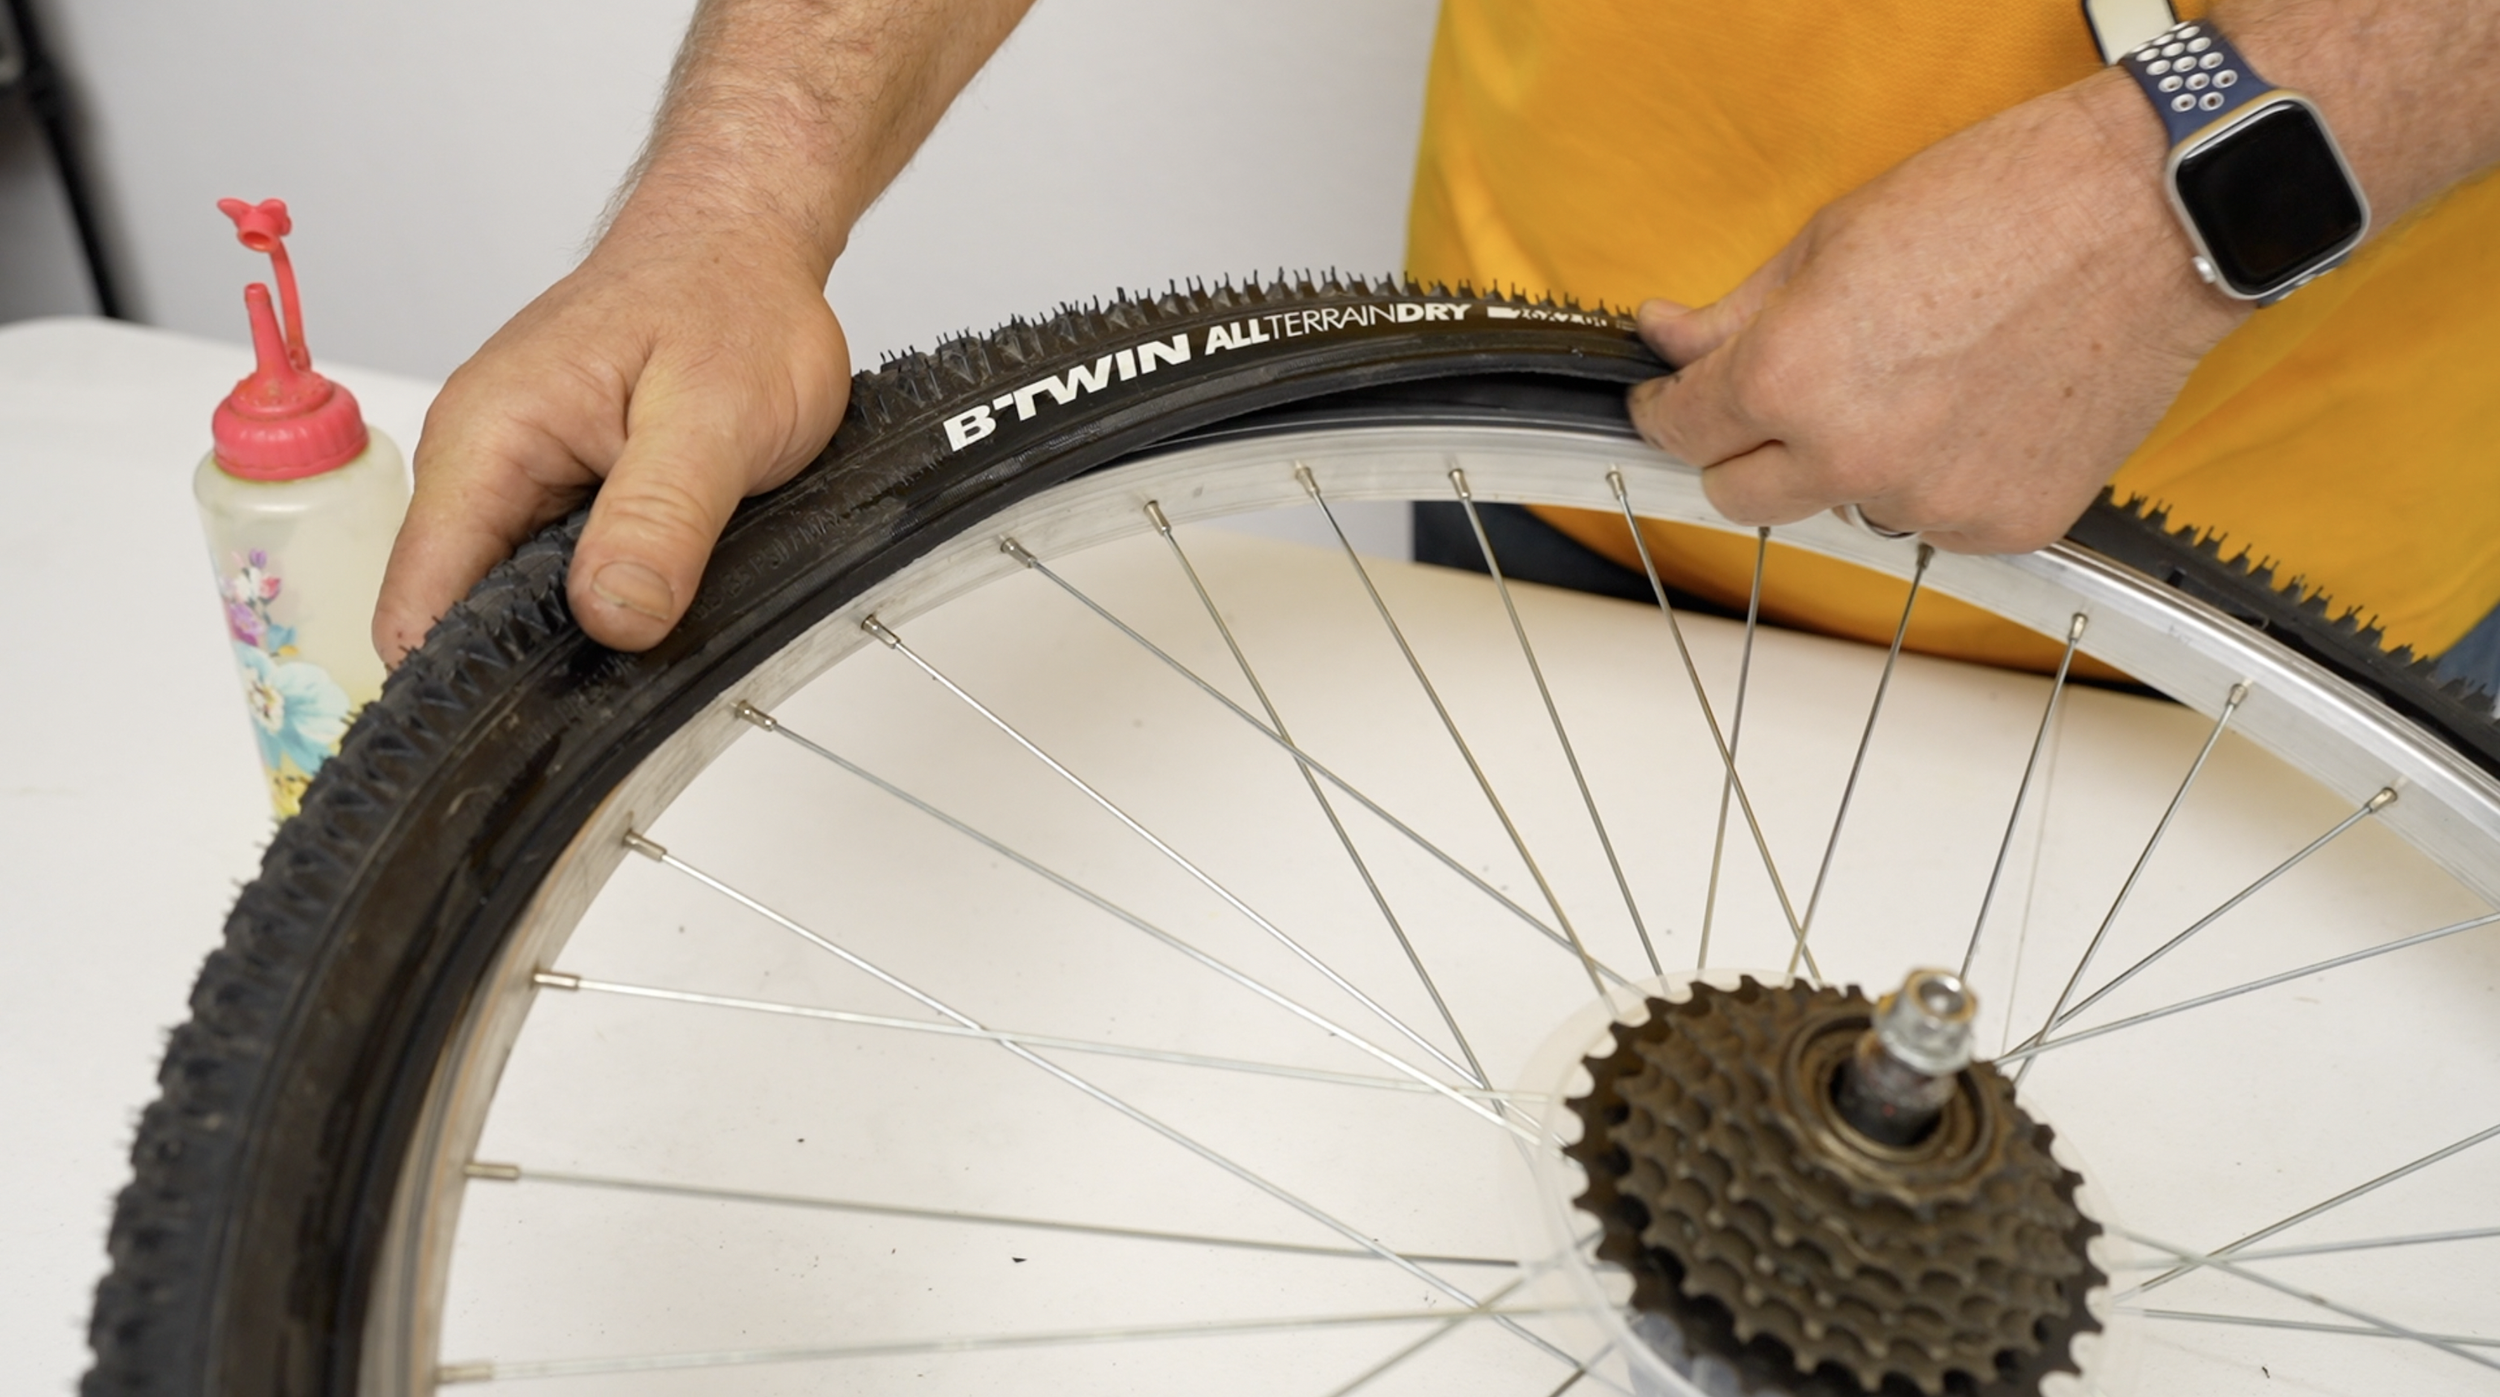
Now grab the other side of the tire and pull. It should slide off.
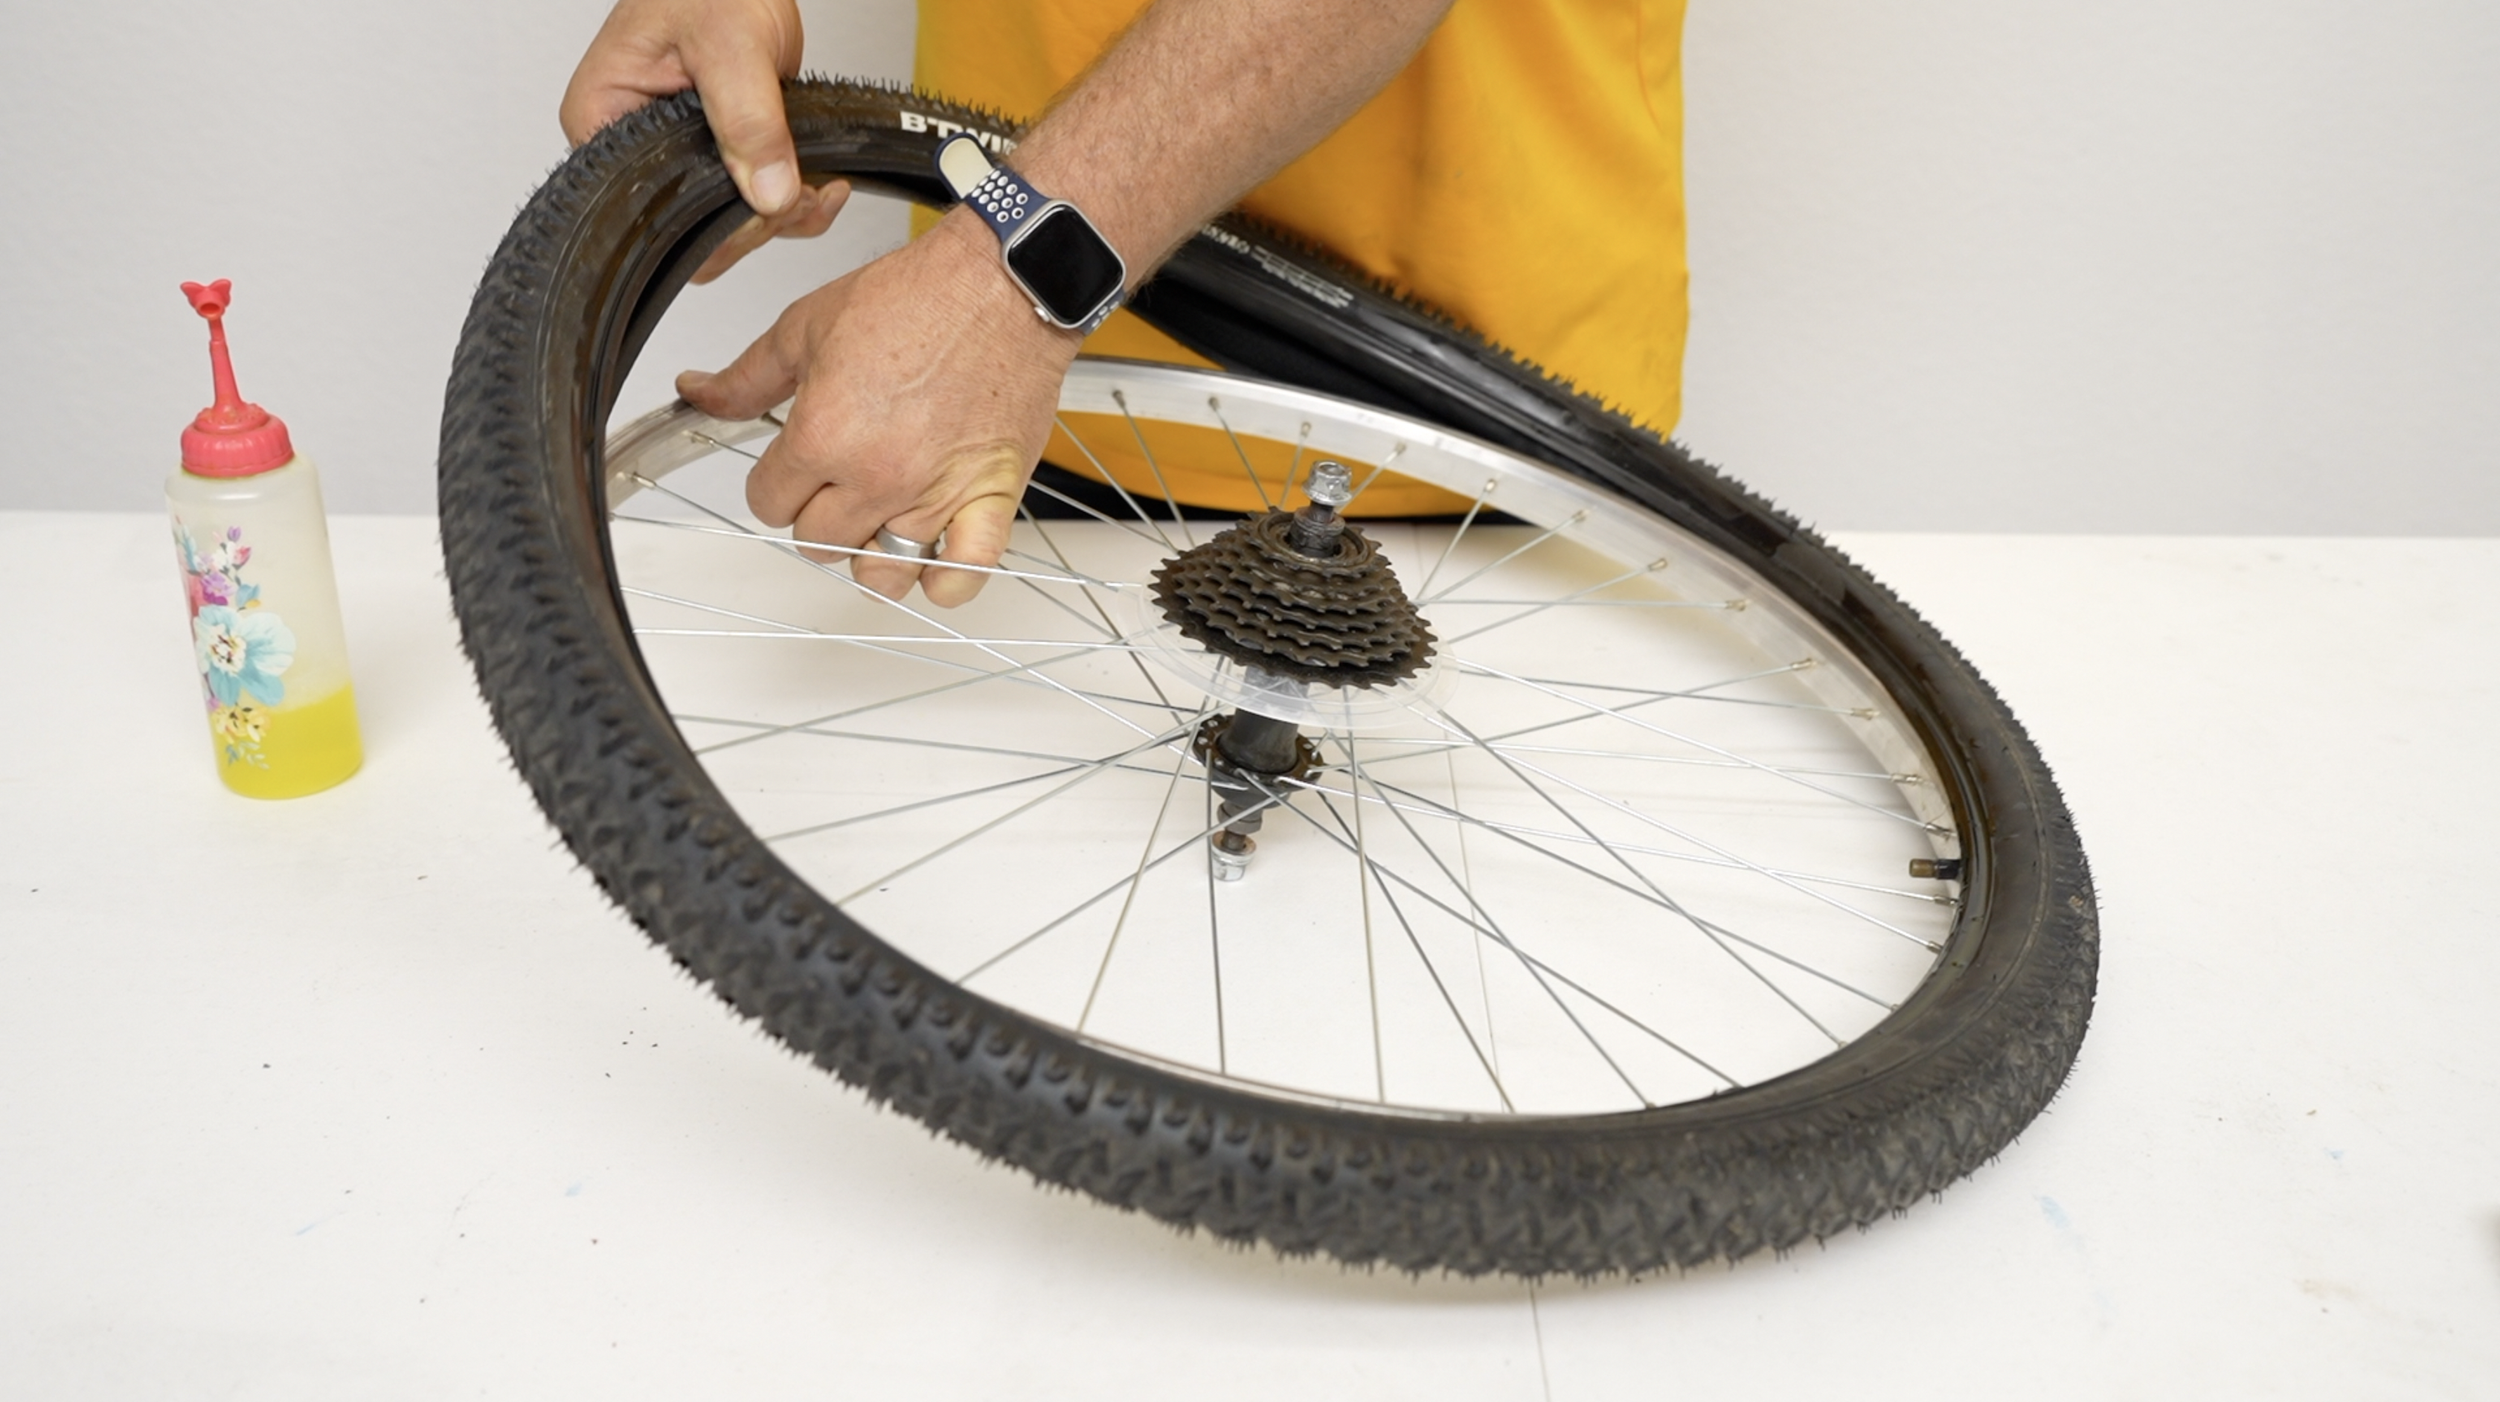
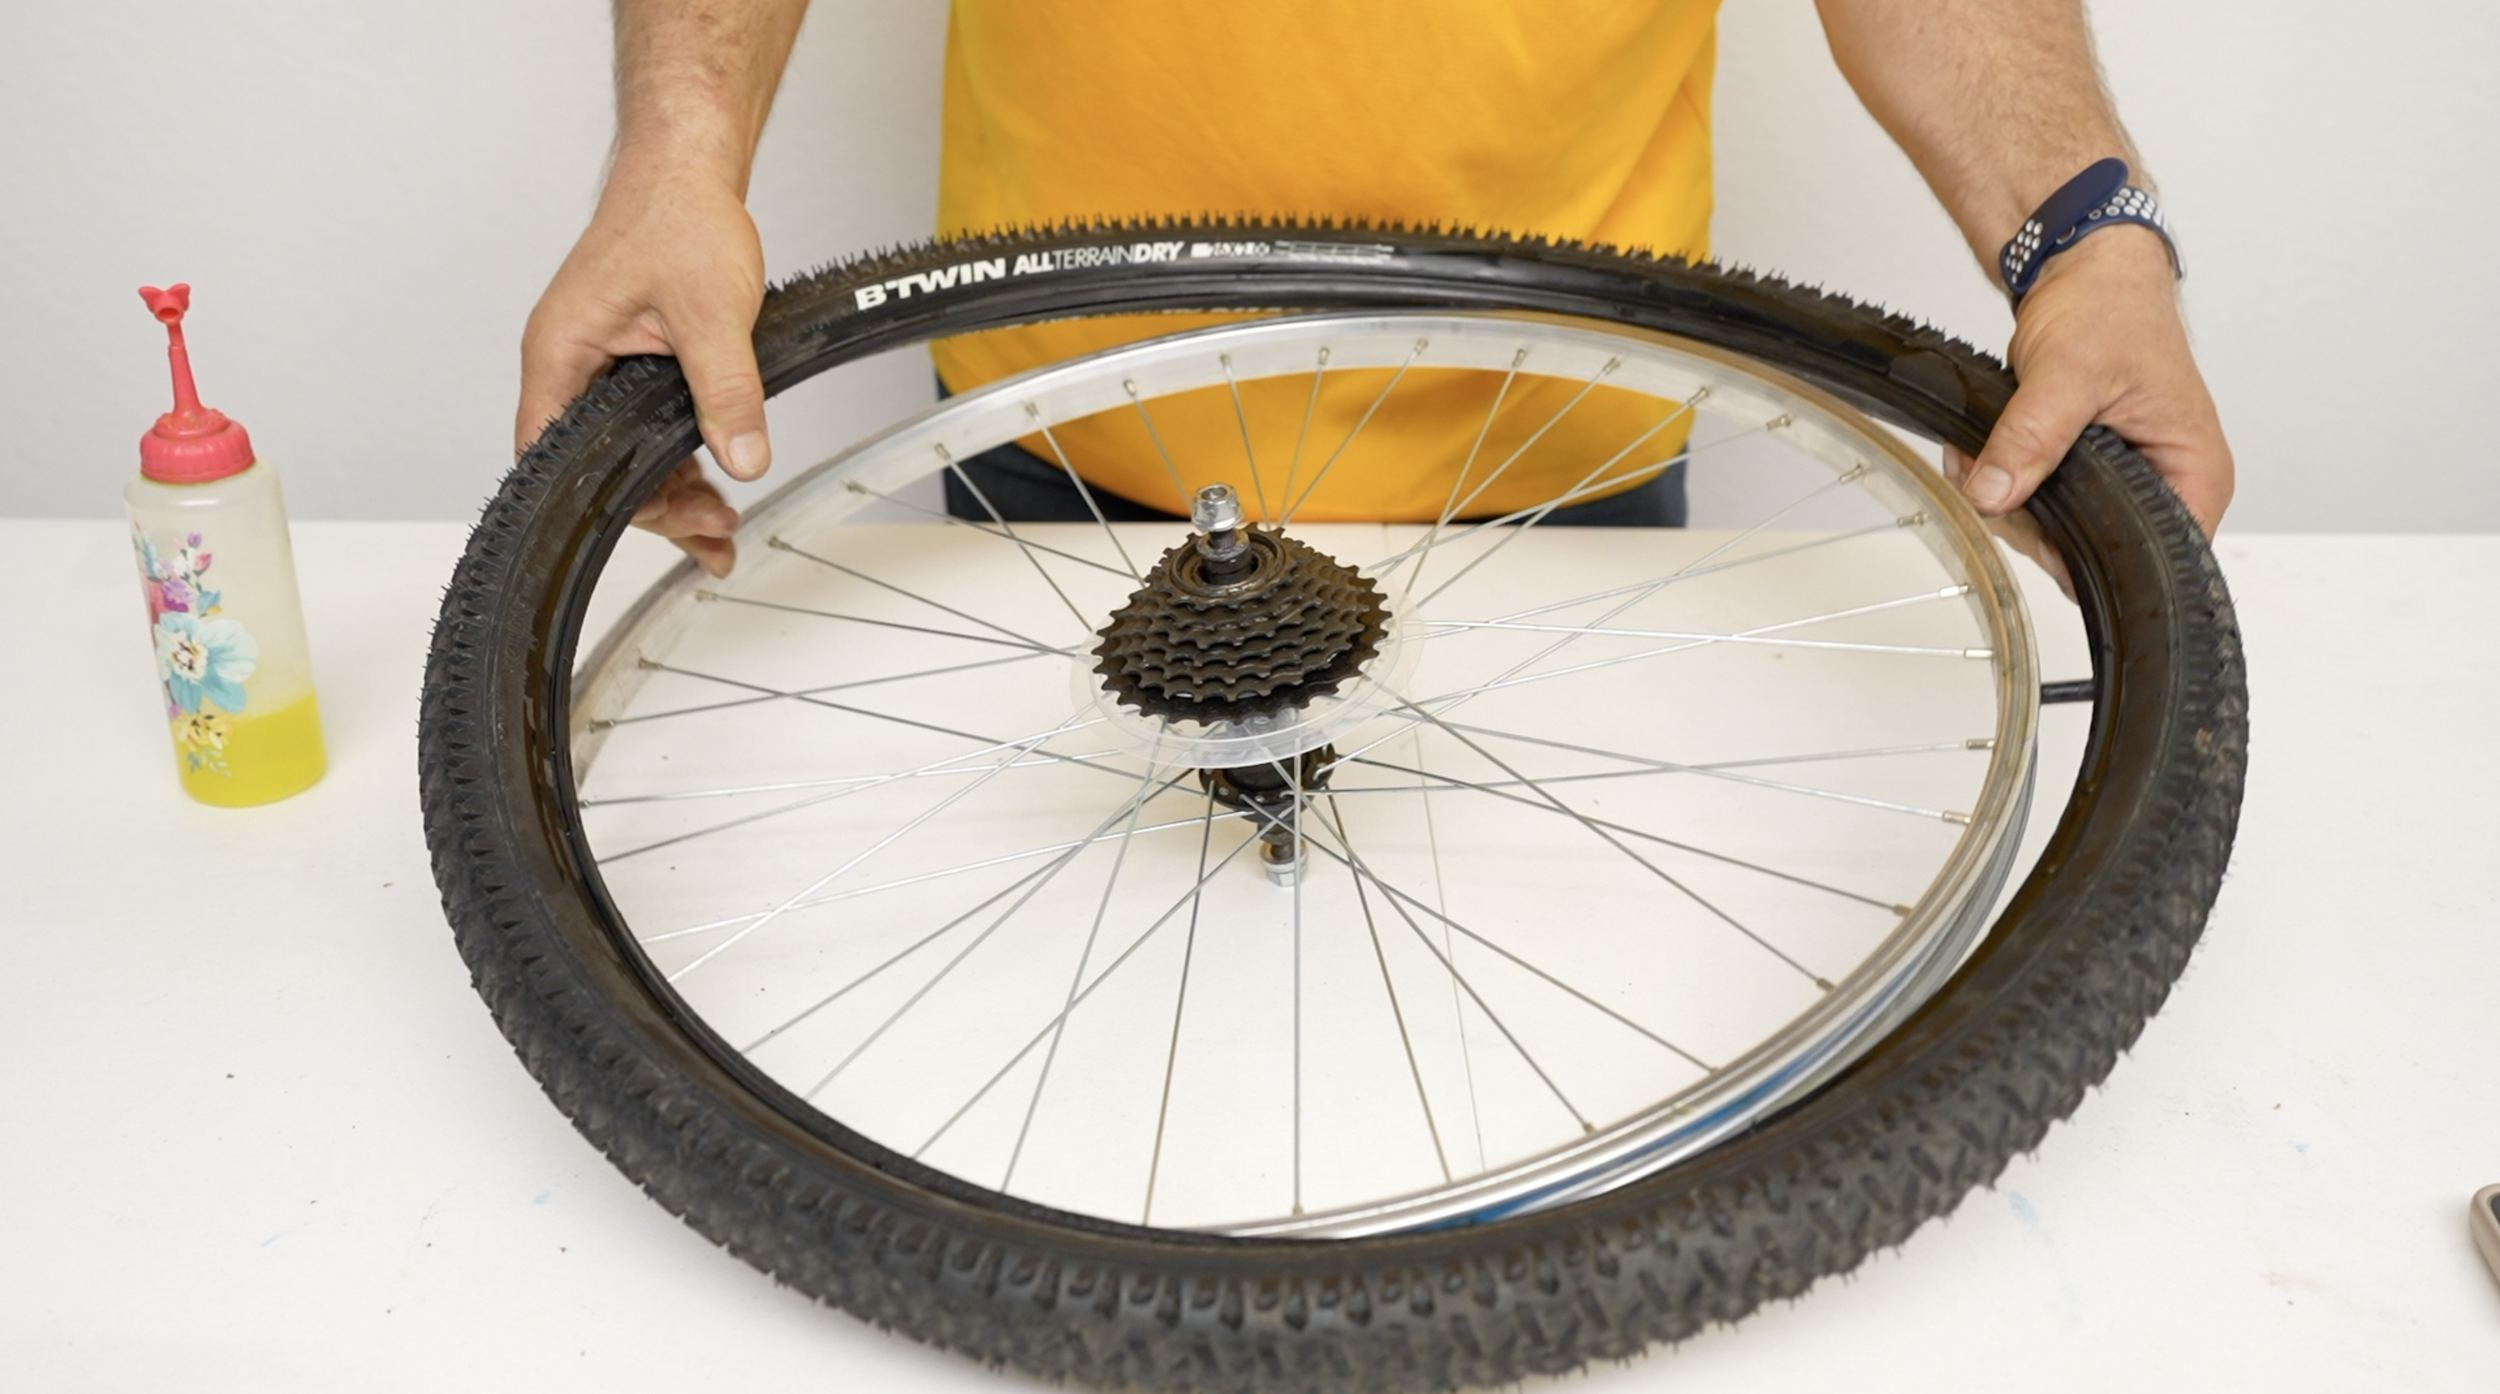
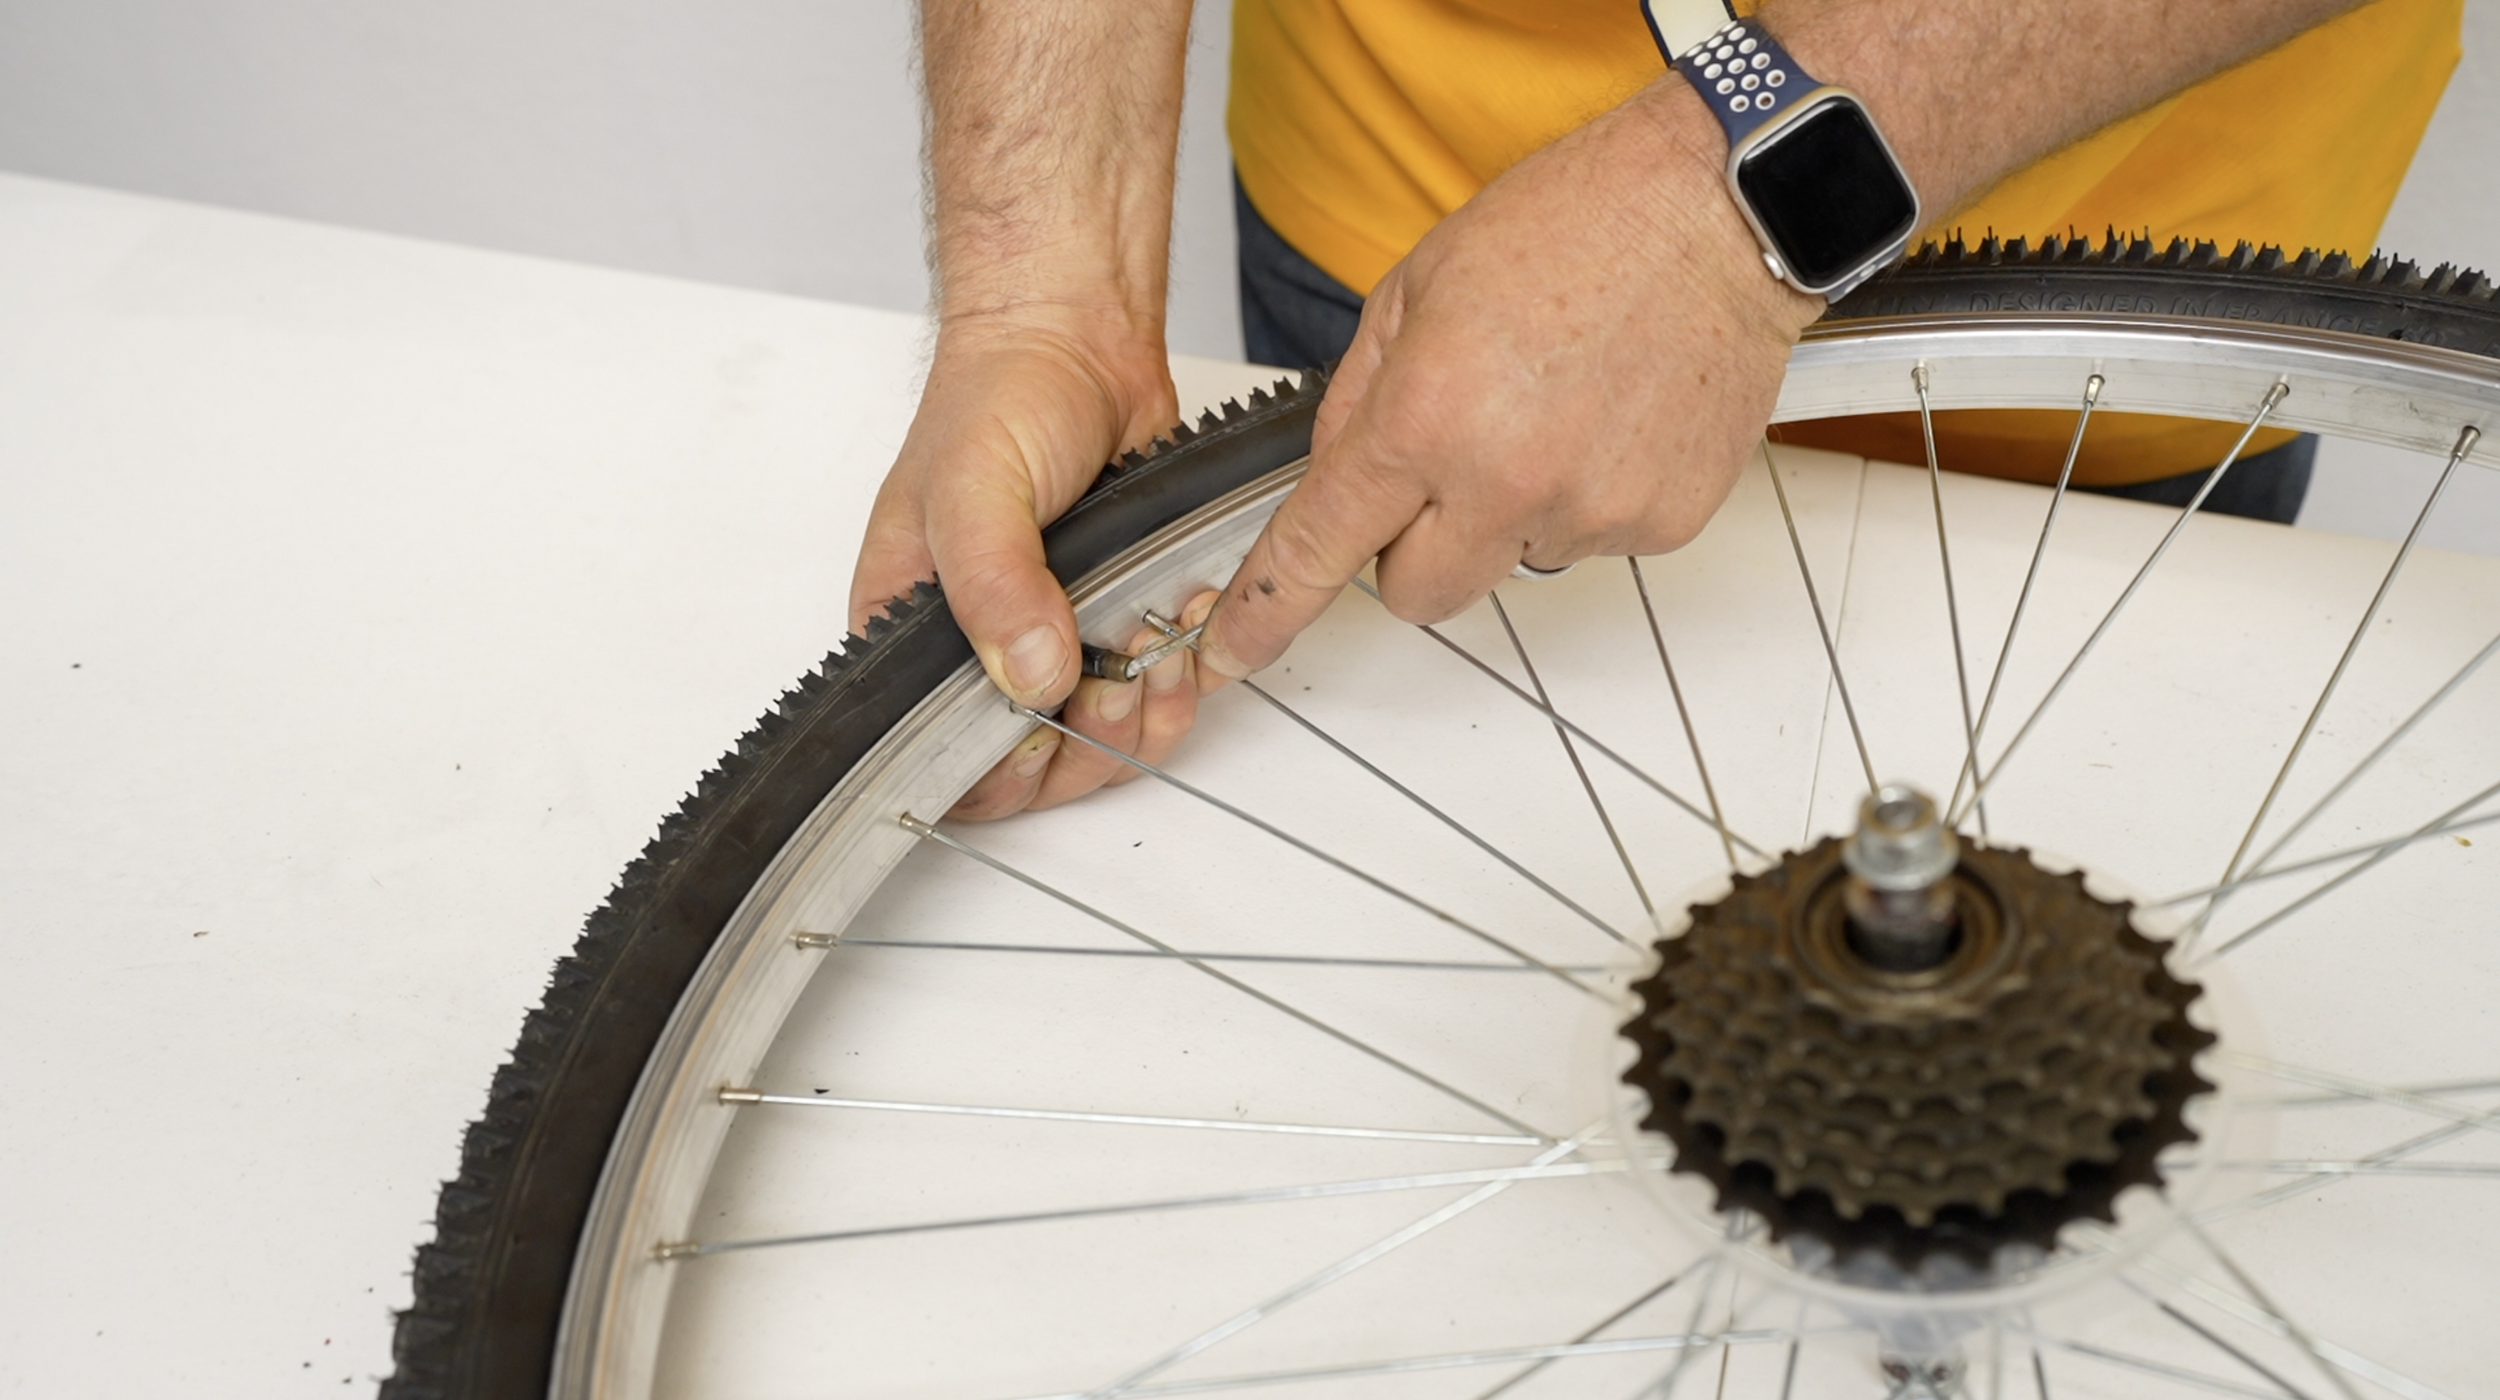
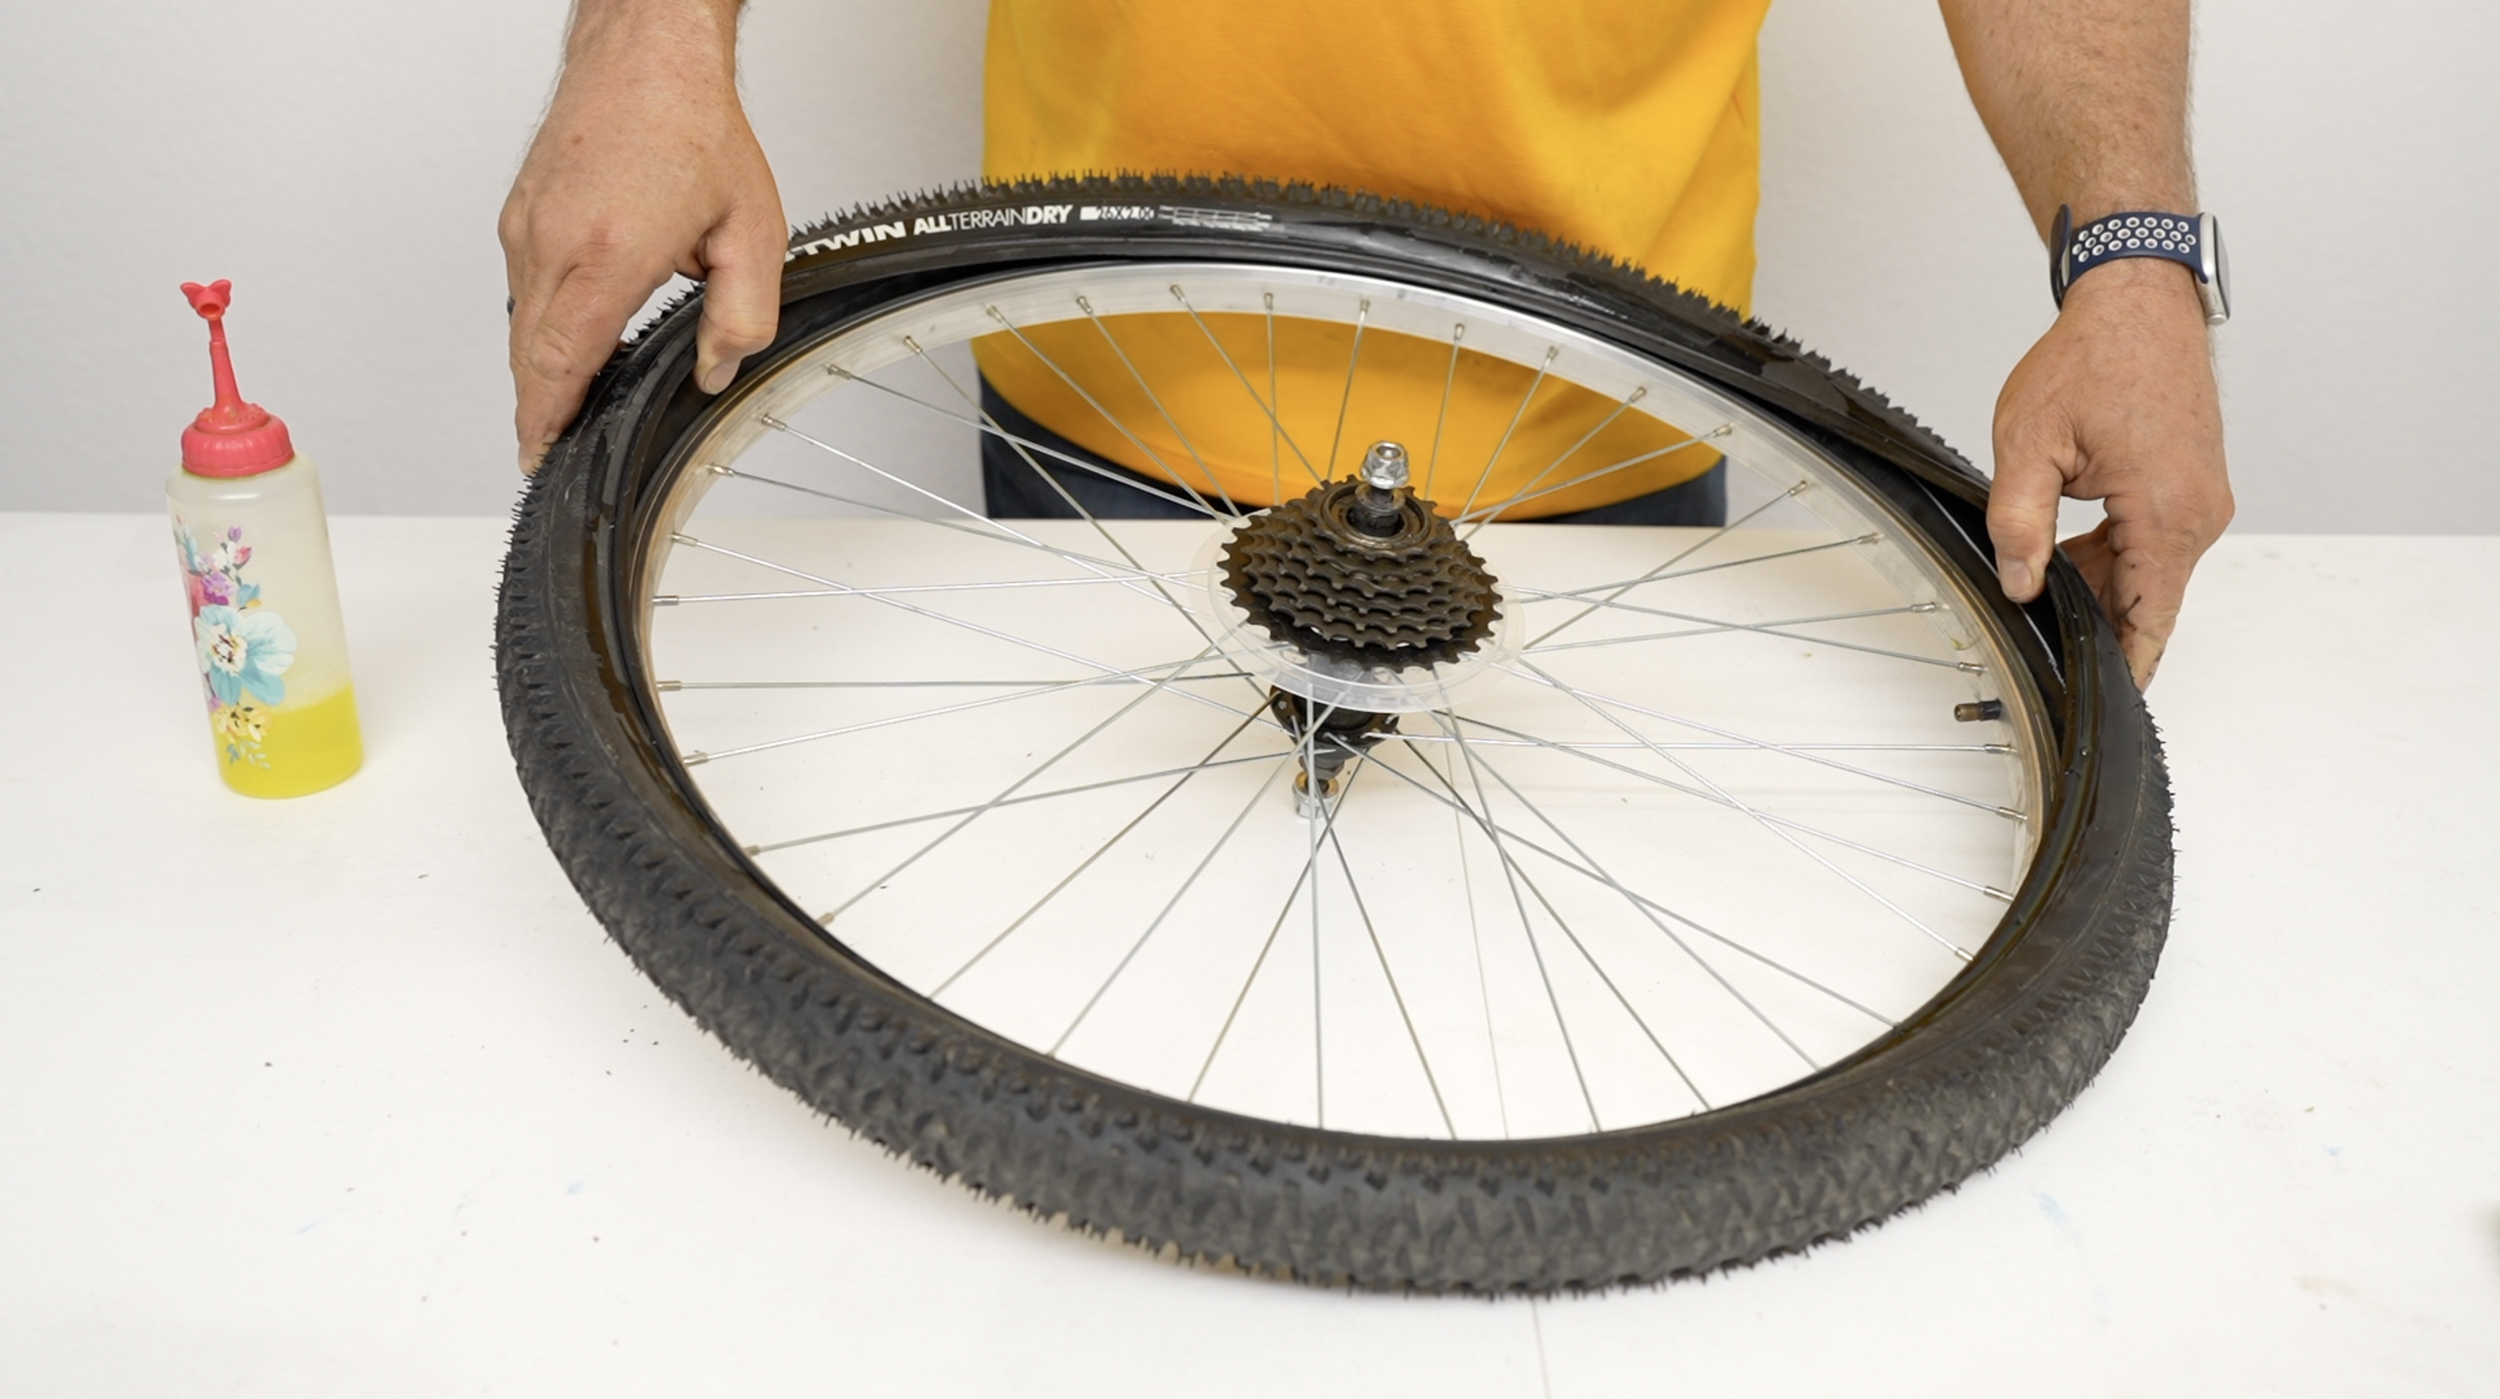
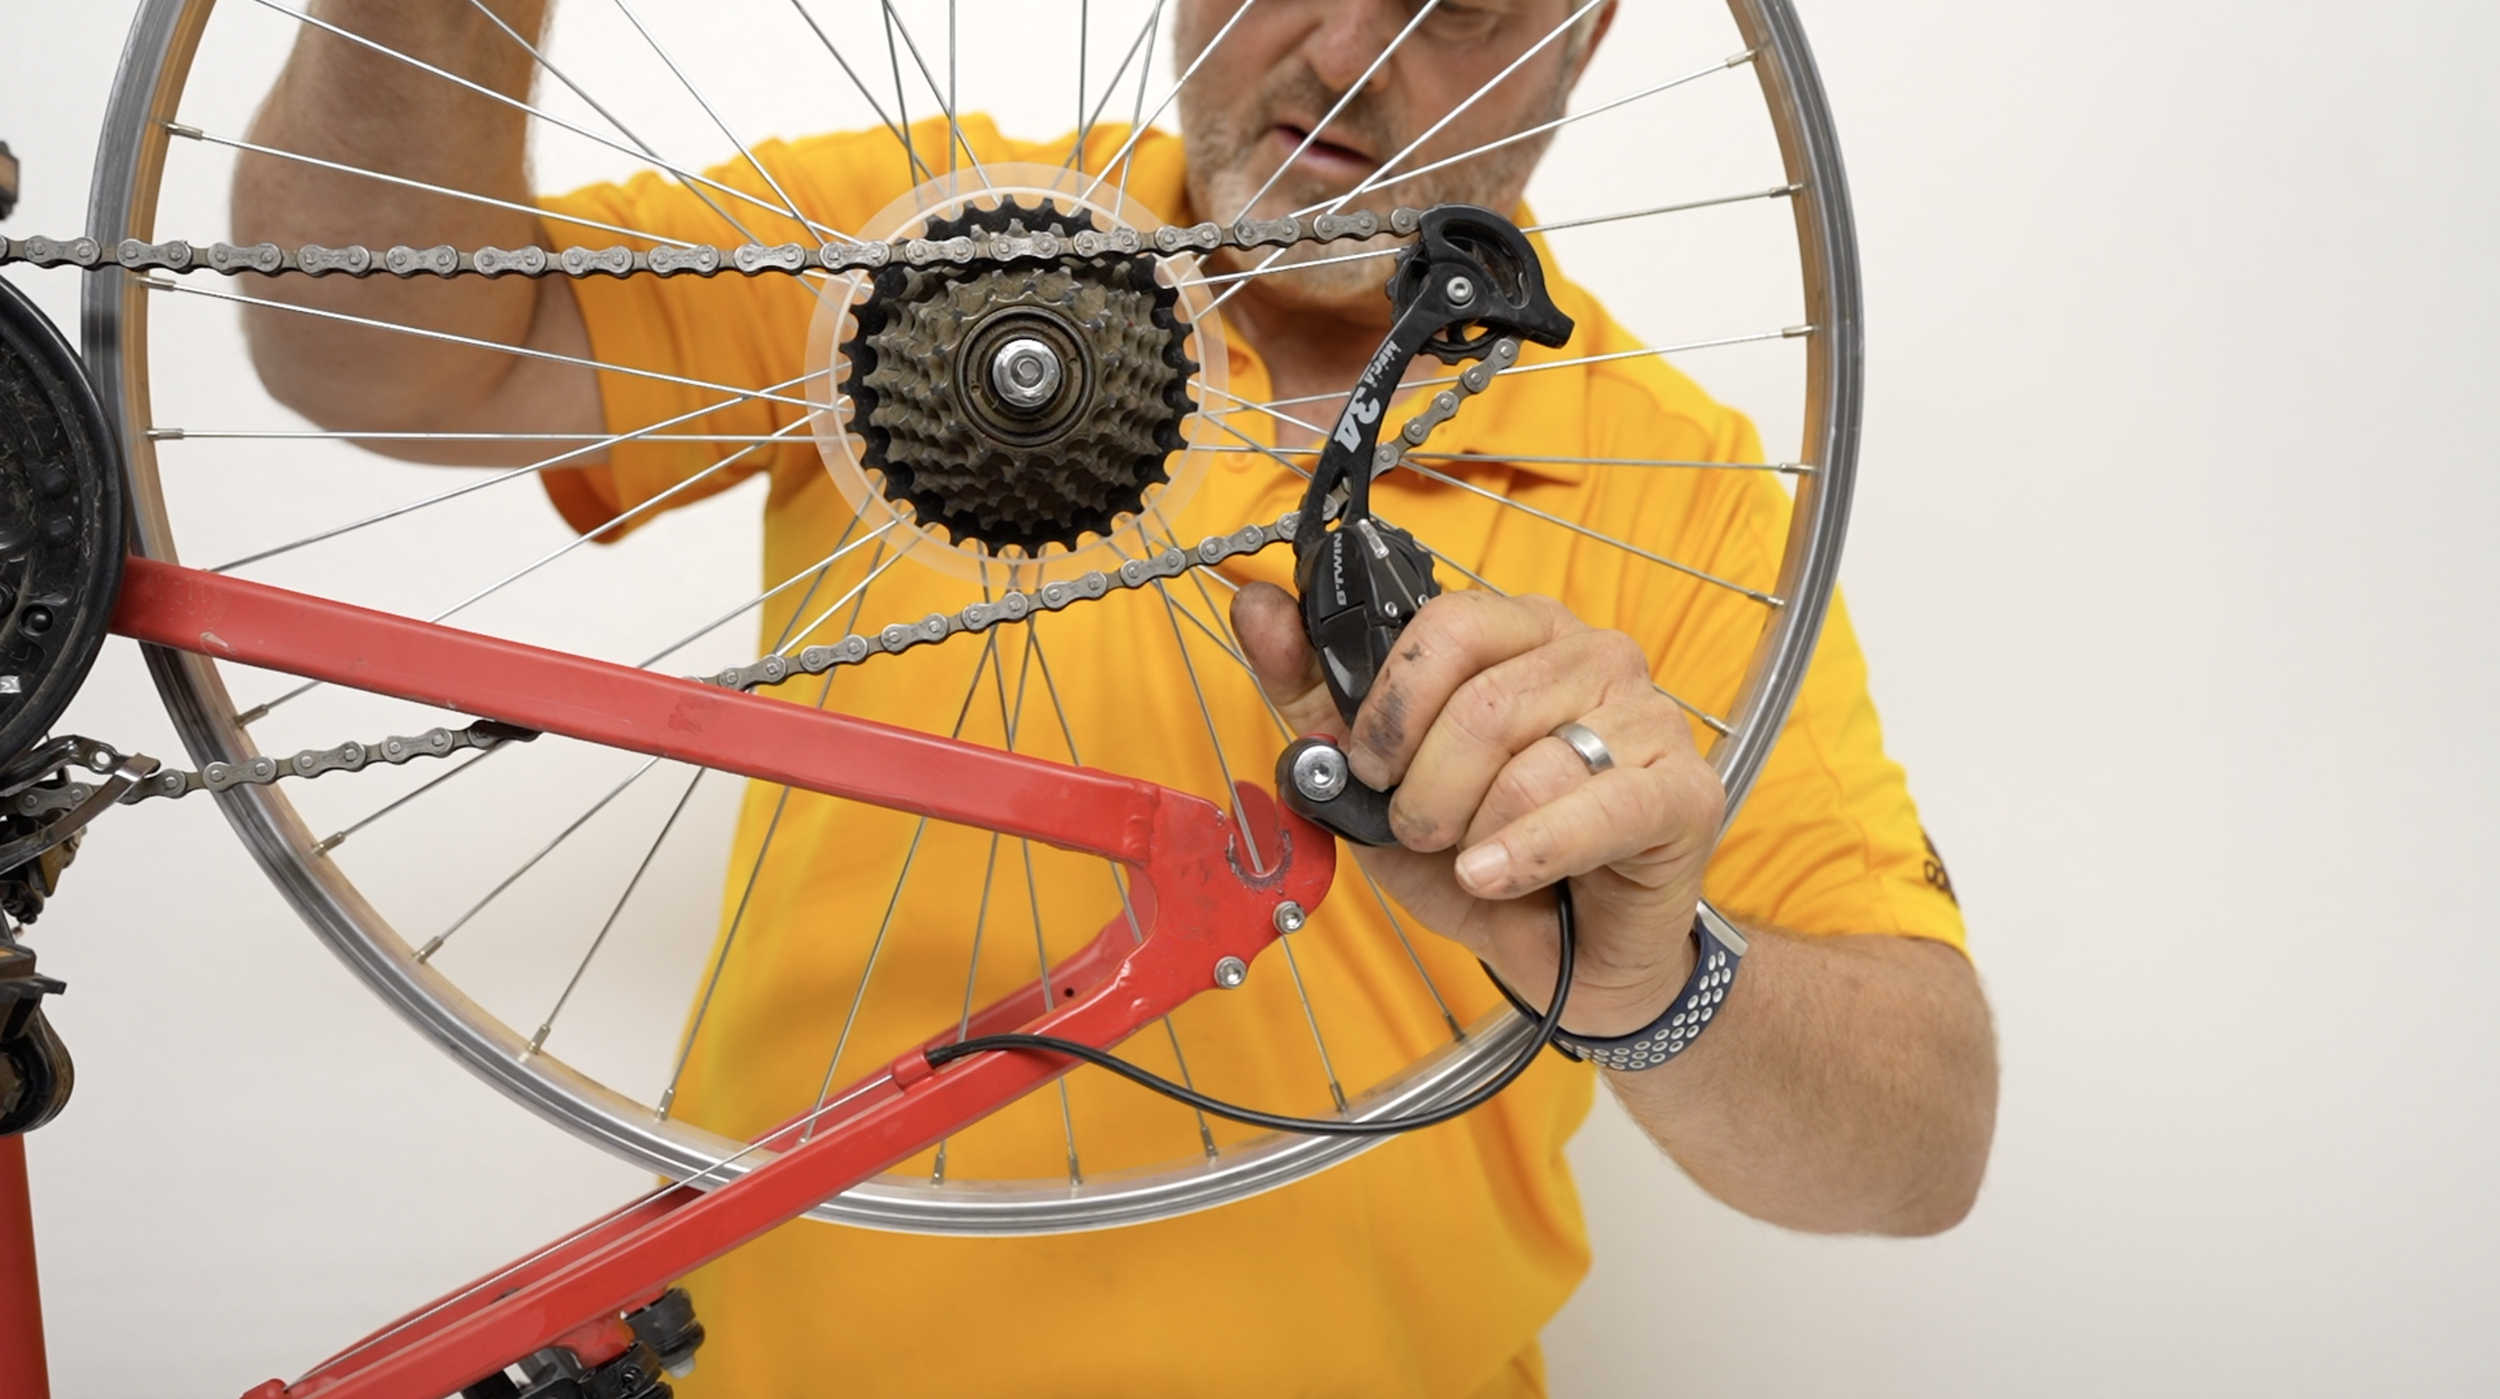
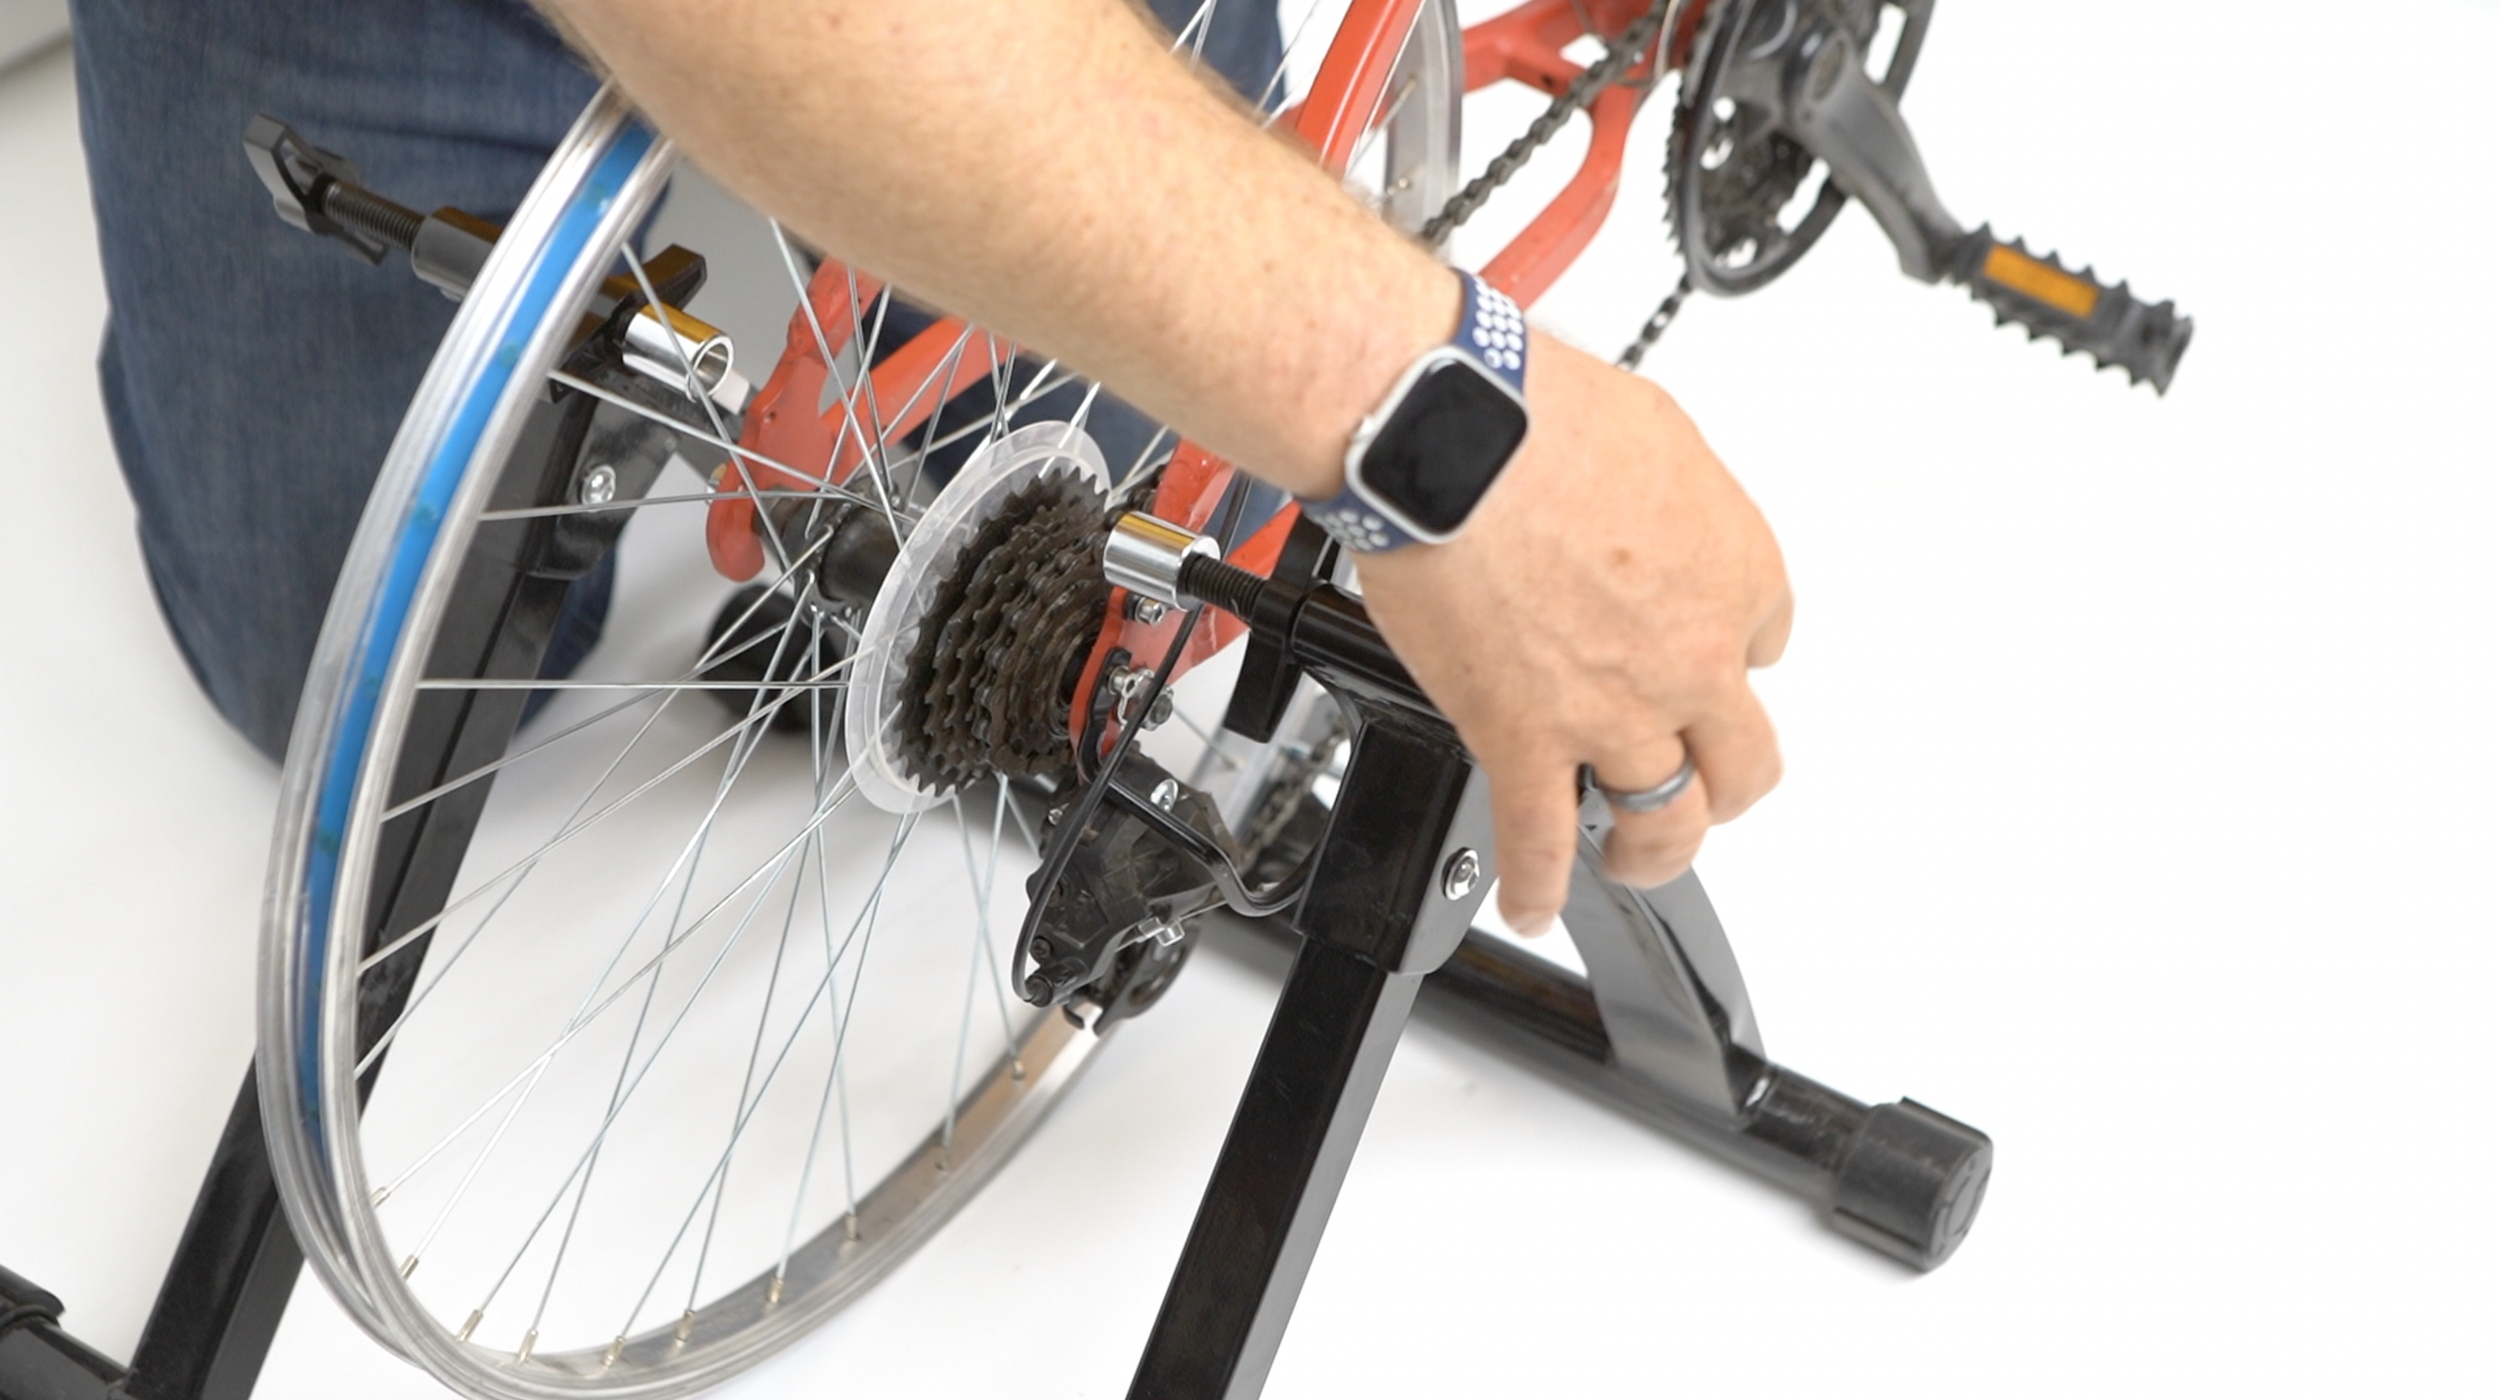
Step 4 - Reinstall the Bike Rim
There is a washer has to kept against the nut when you drop the wheel in place.
Flex the derailleur out of the way to create a window to drop your sprocket in. After the sprocket is in, pull the front and back washers up against the nuts, and drop into place. they should be on the outside of the bike frame.

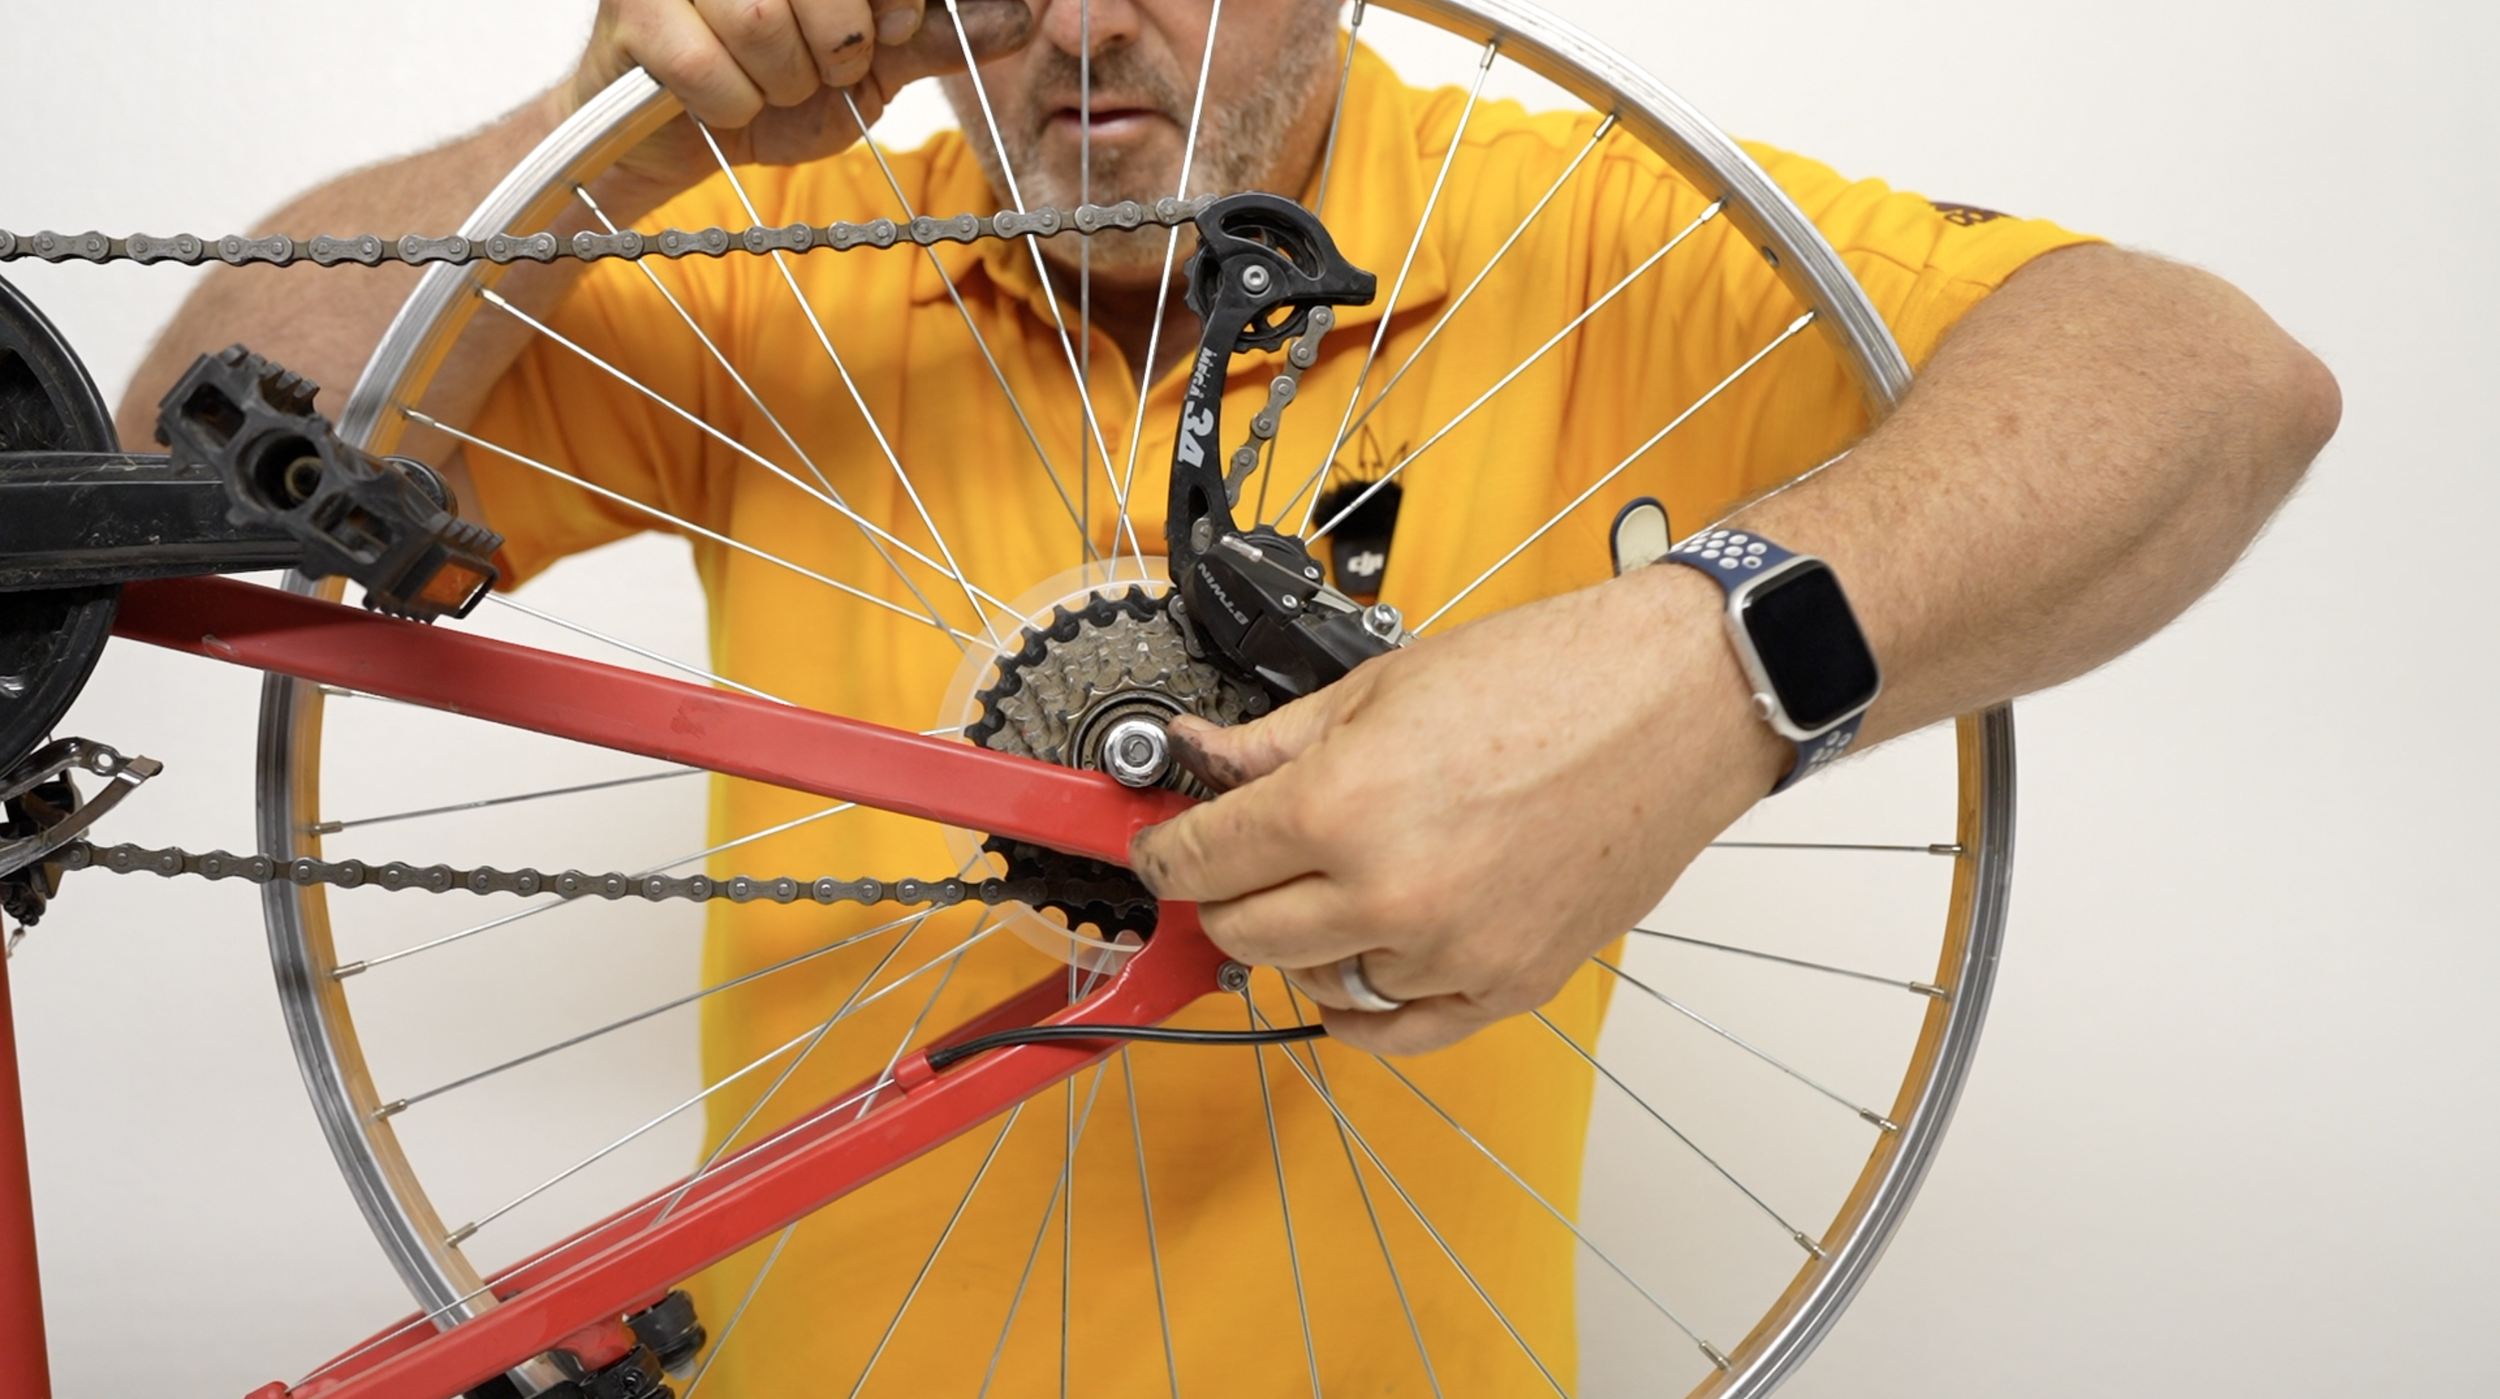
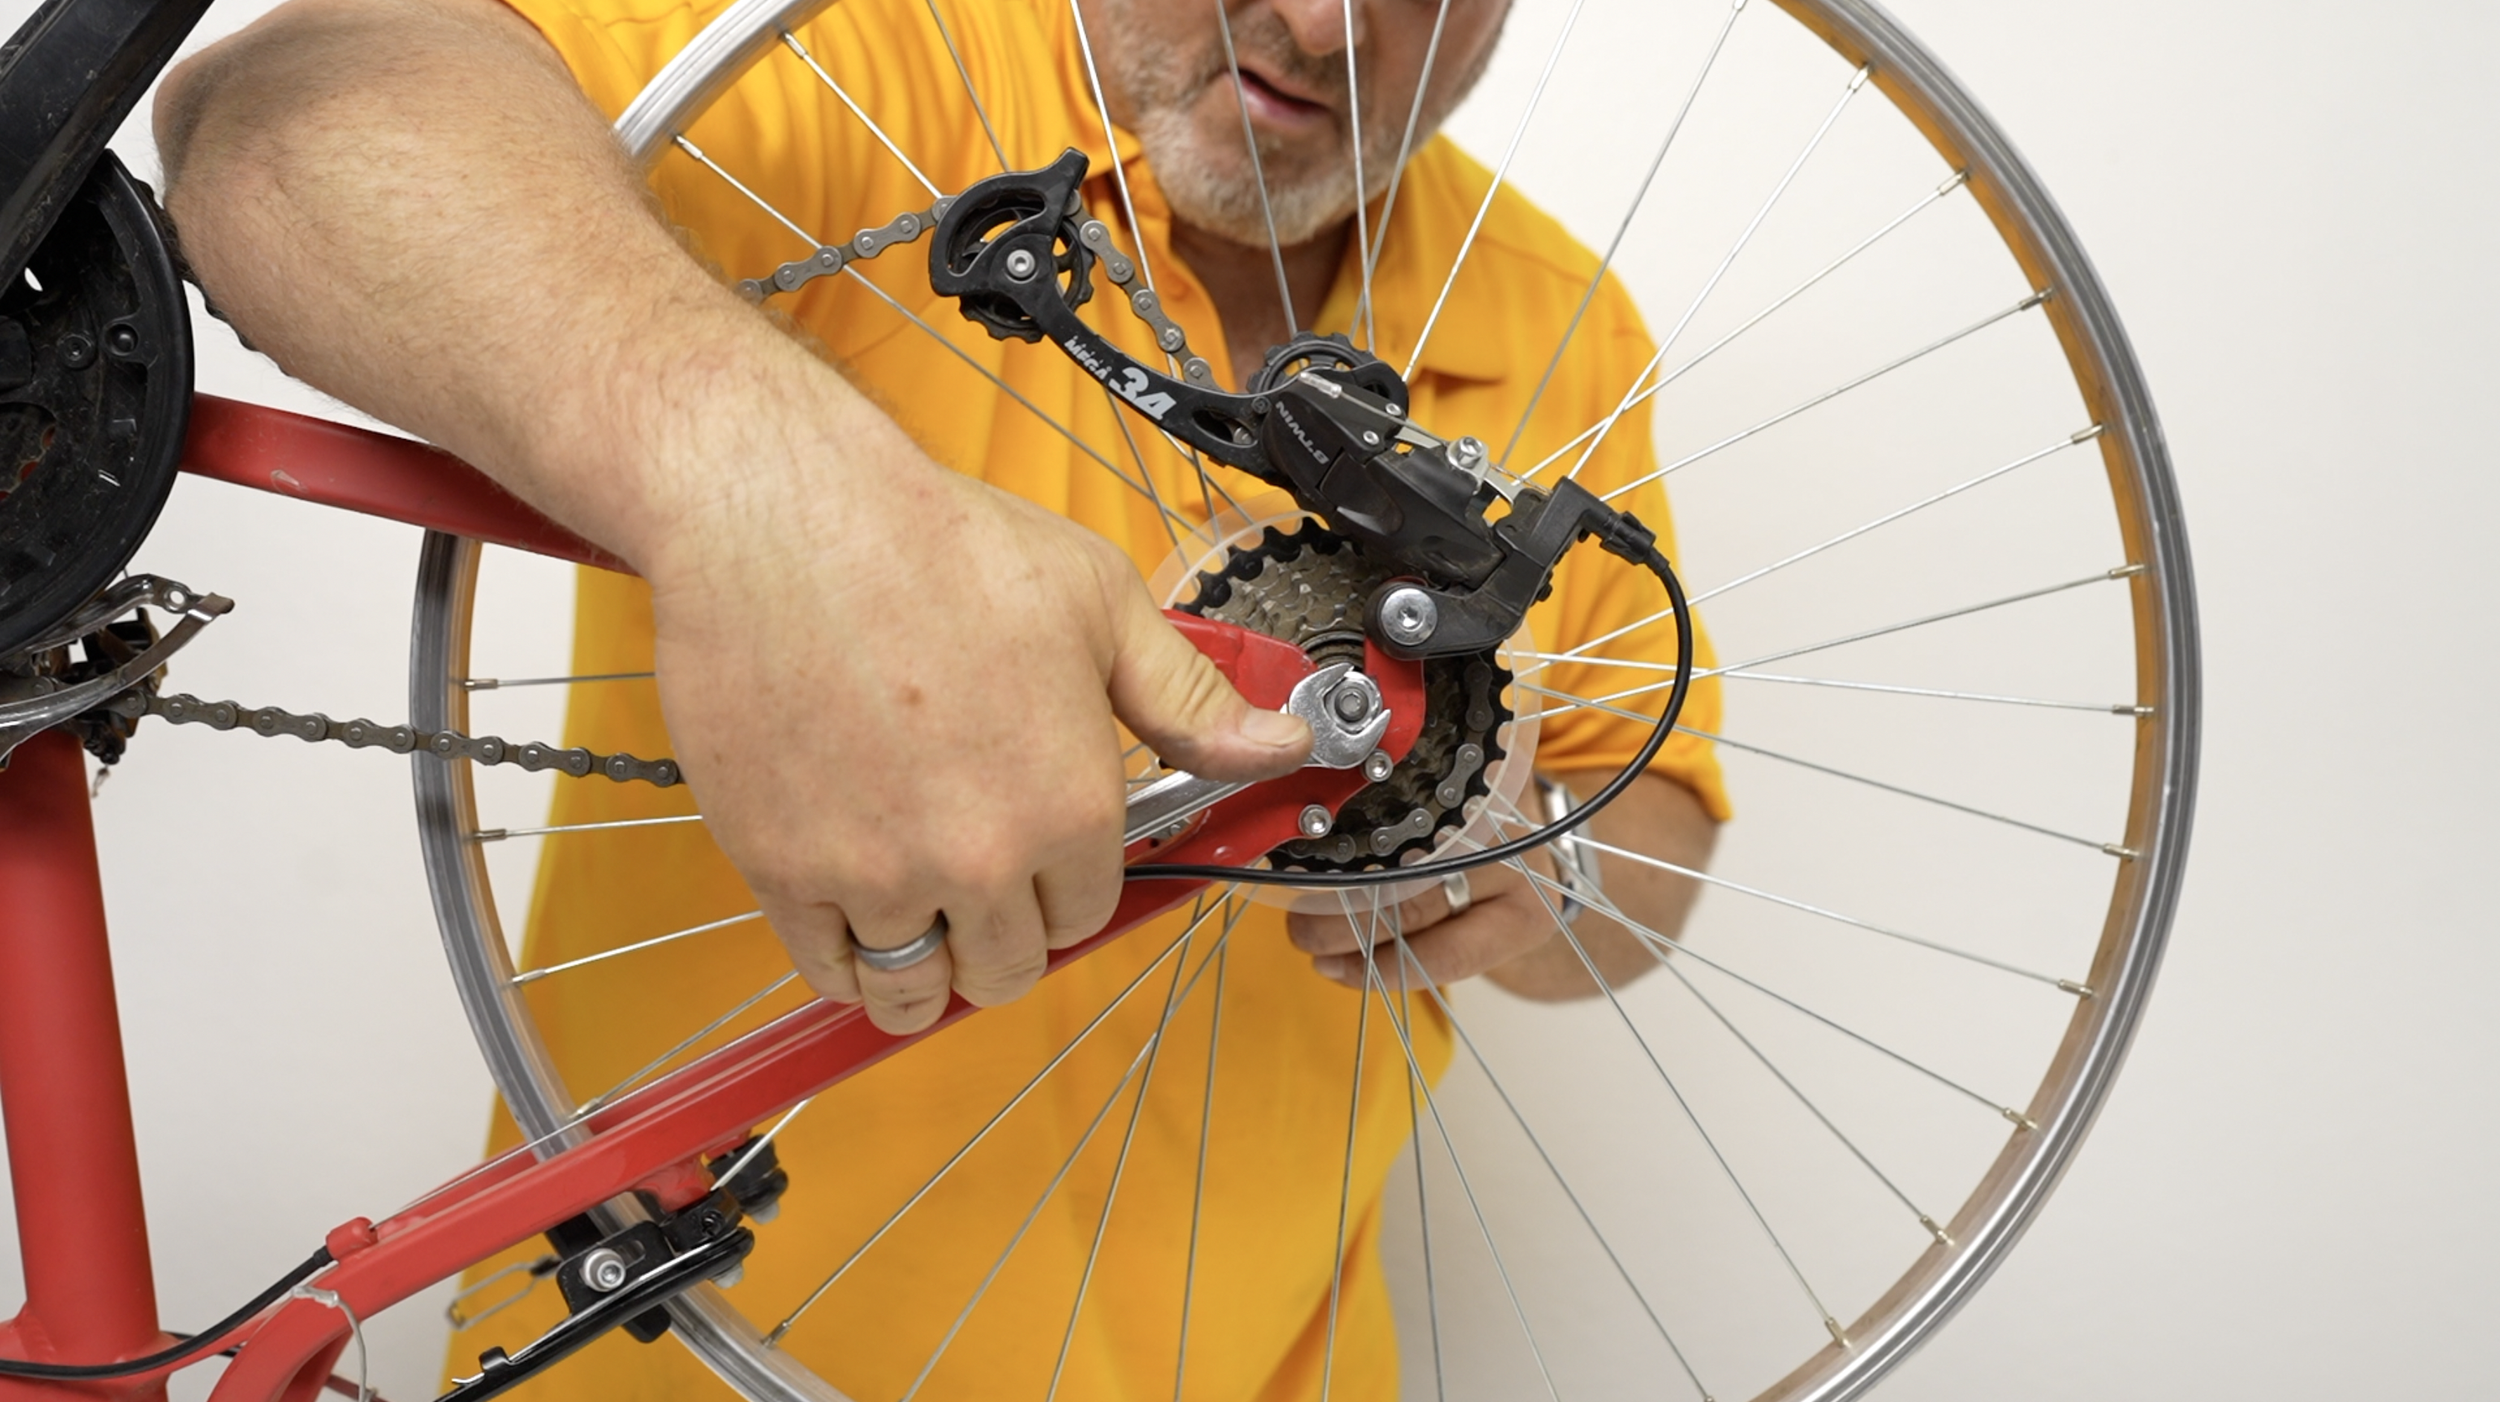
Finger tighten the nuts, then use 20 lbs of force to tighten the bolts with a wrench or socket. These will hold you secure to the bike stand, so that’s why they need to be tight.
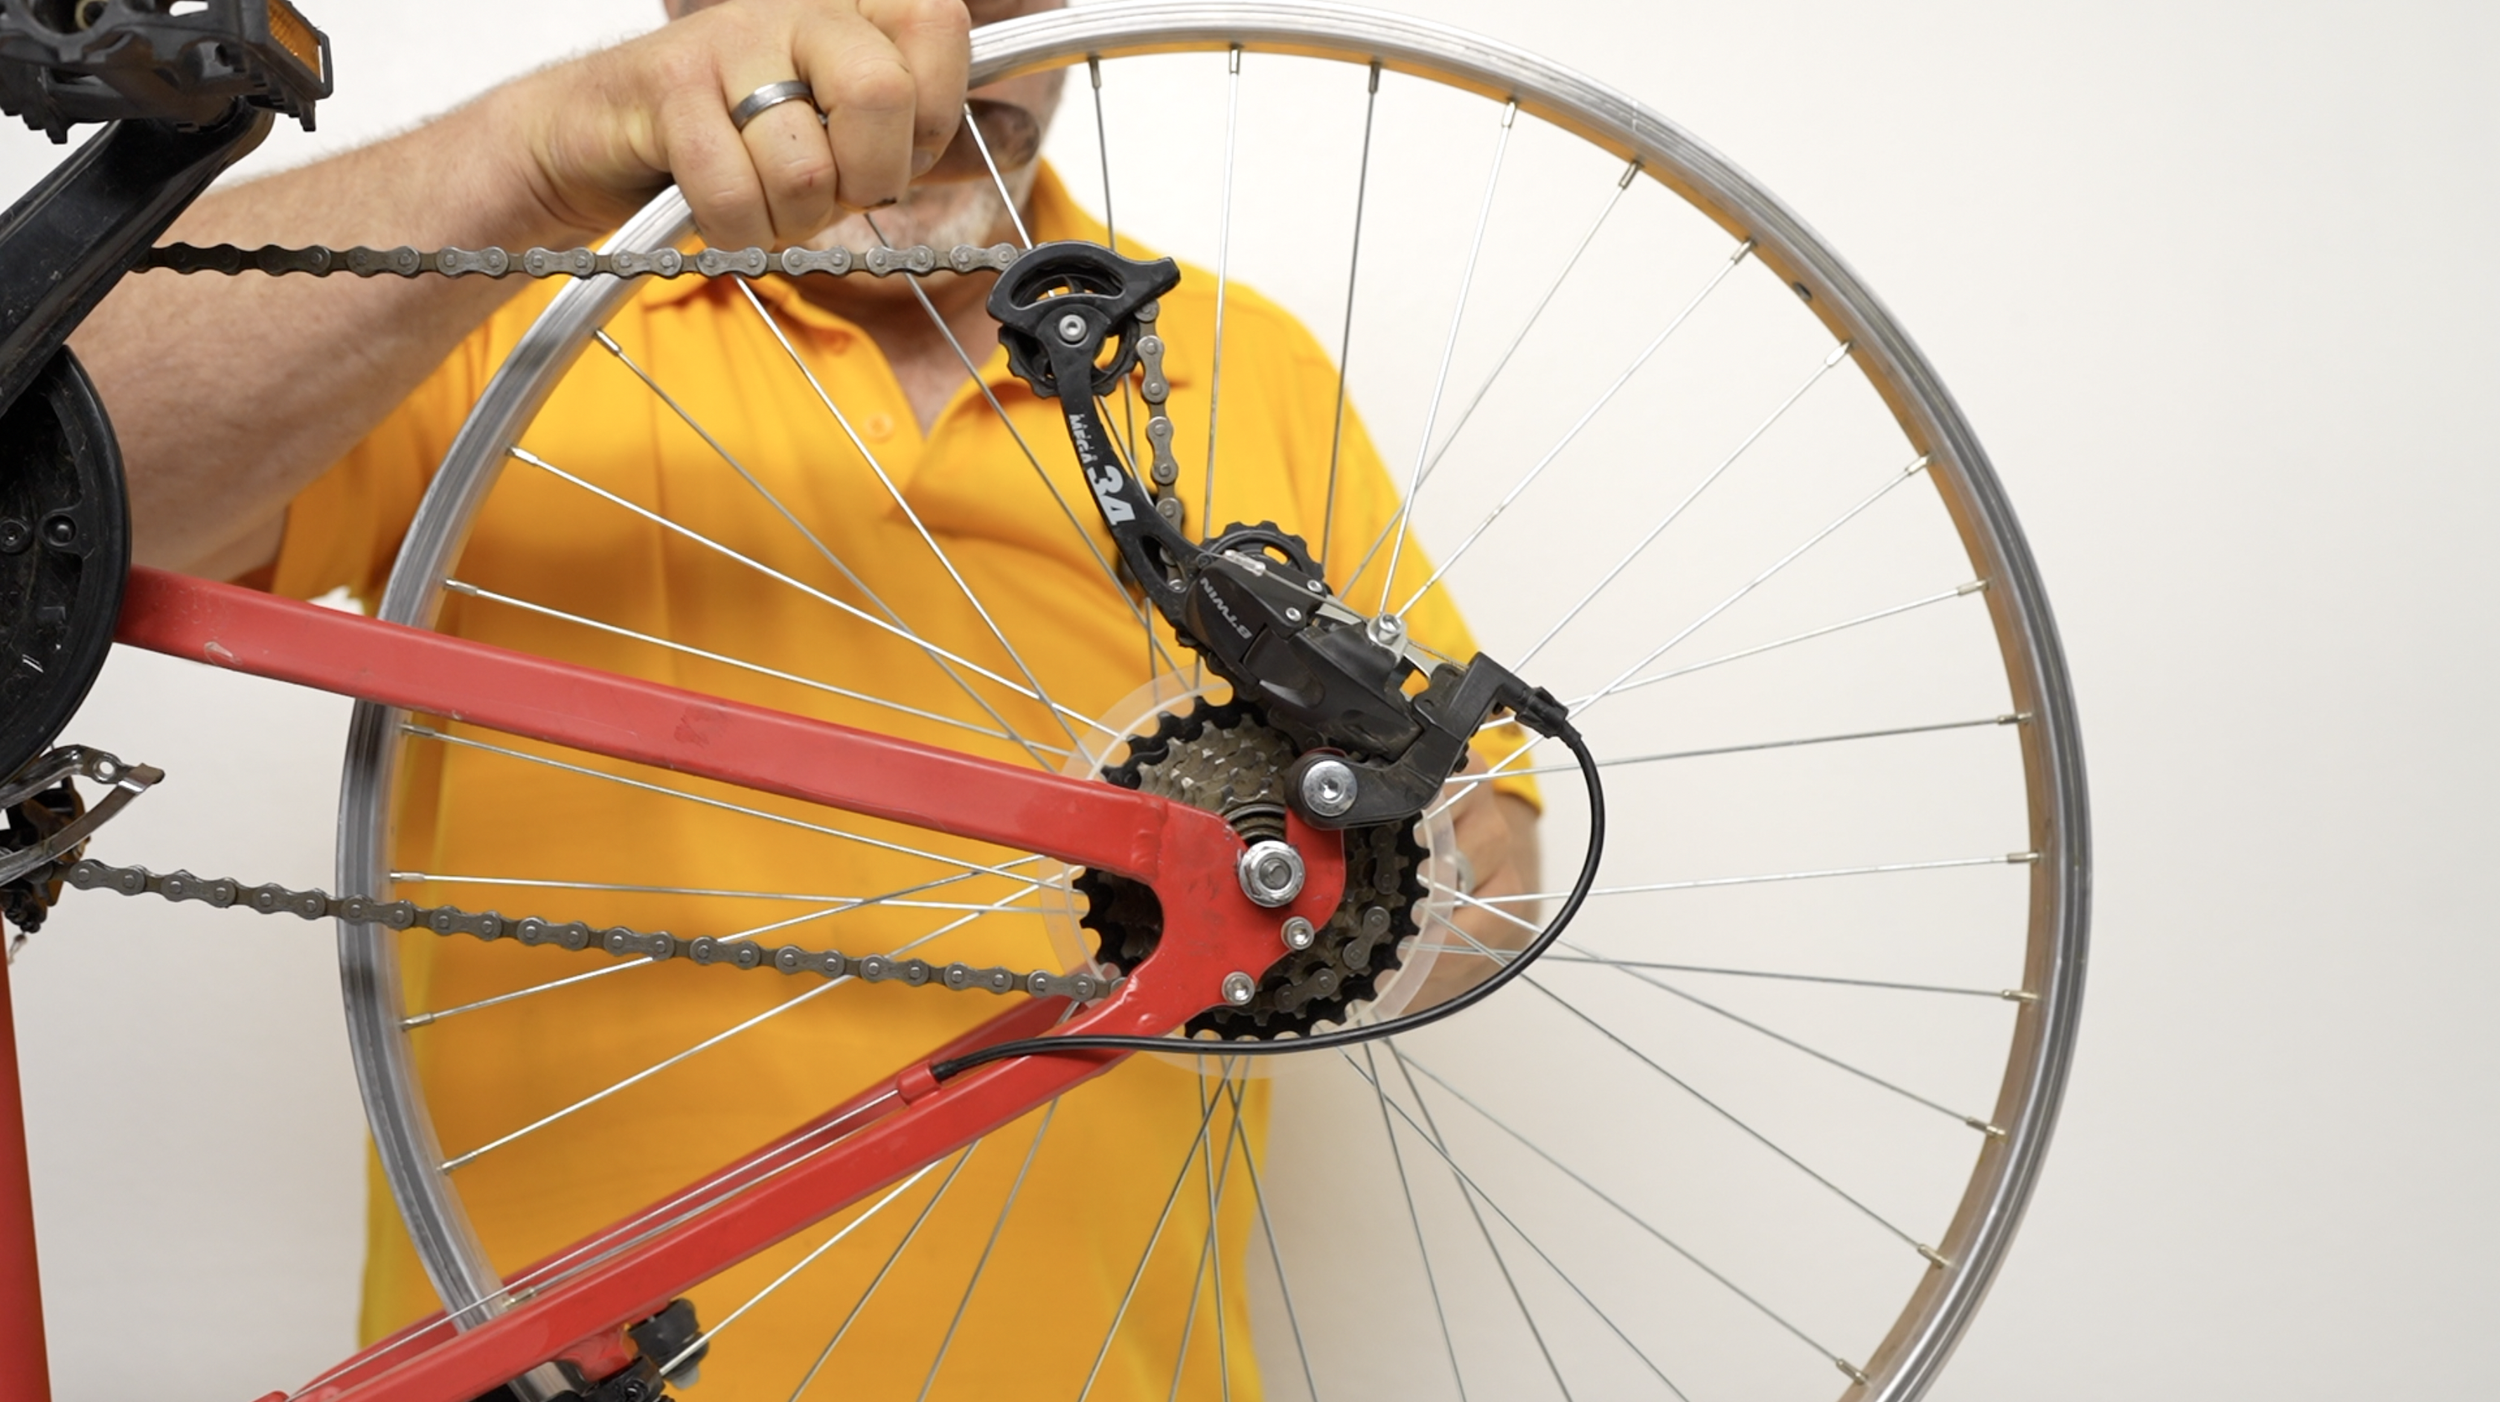
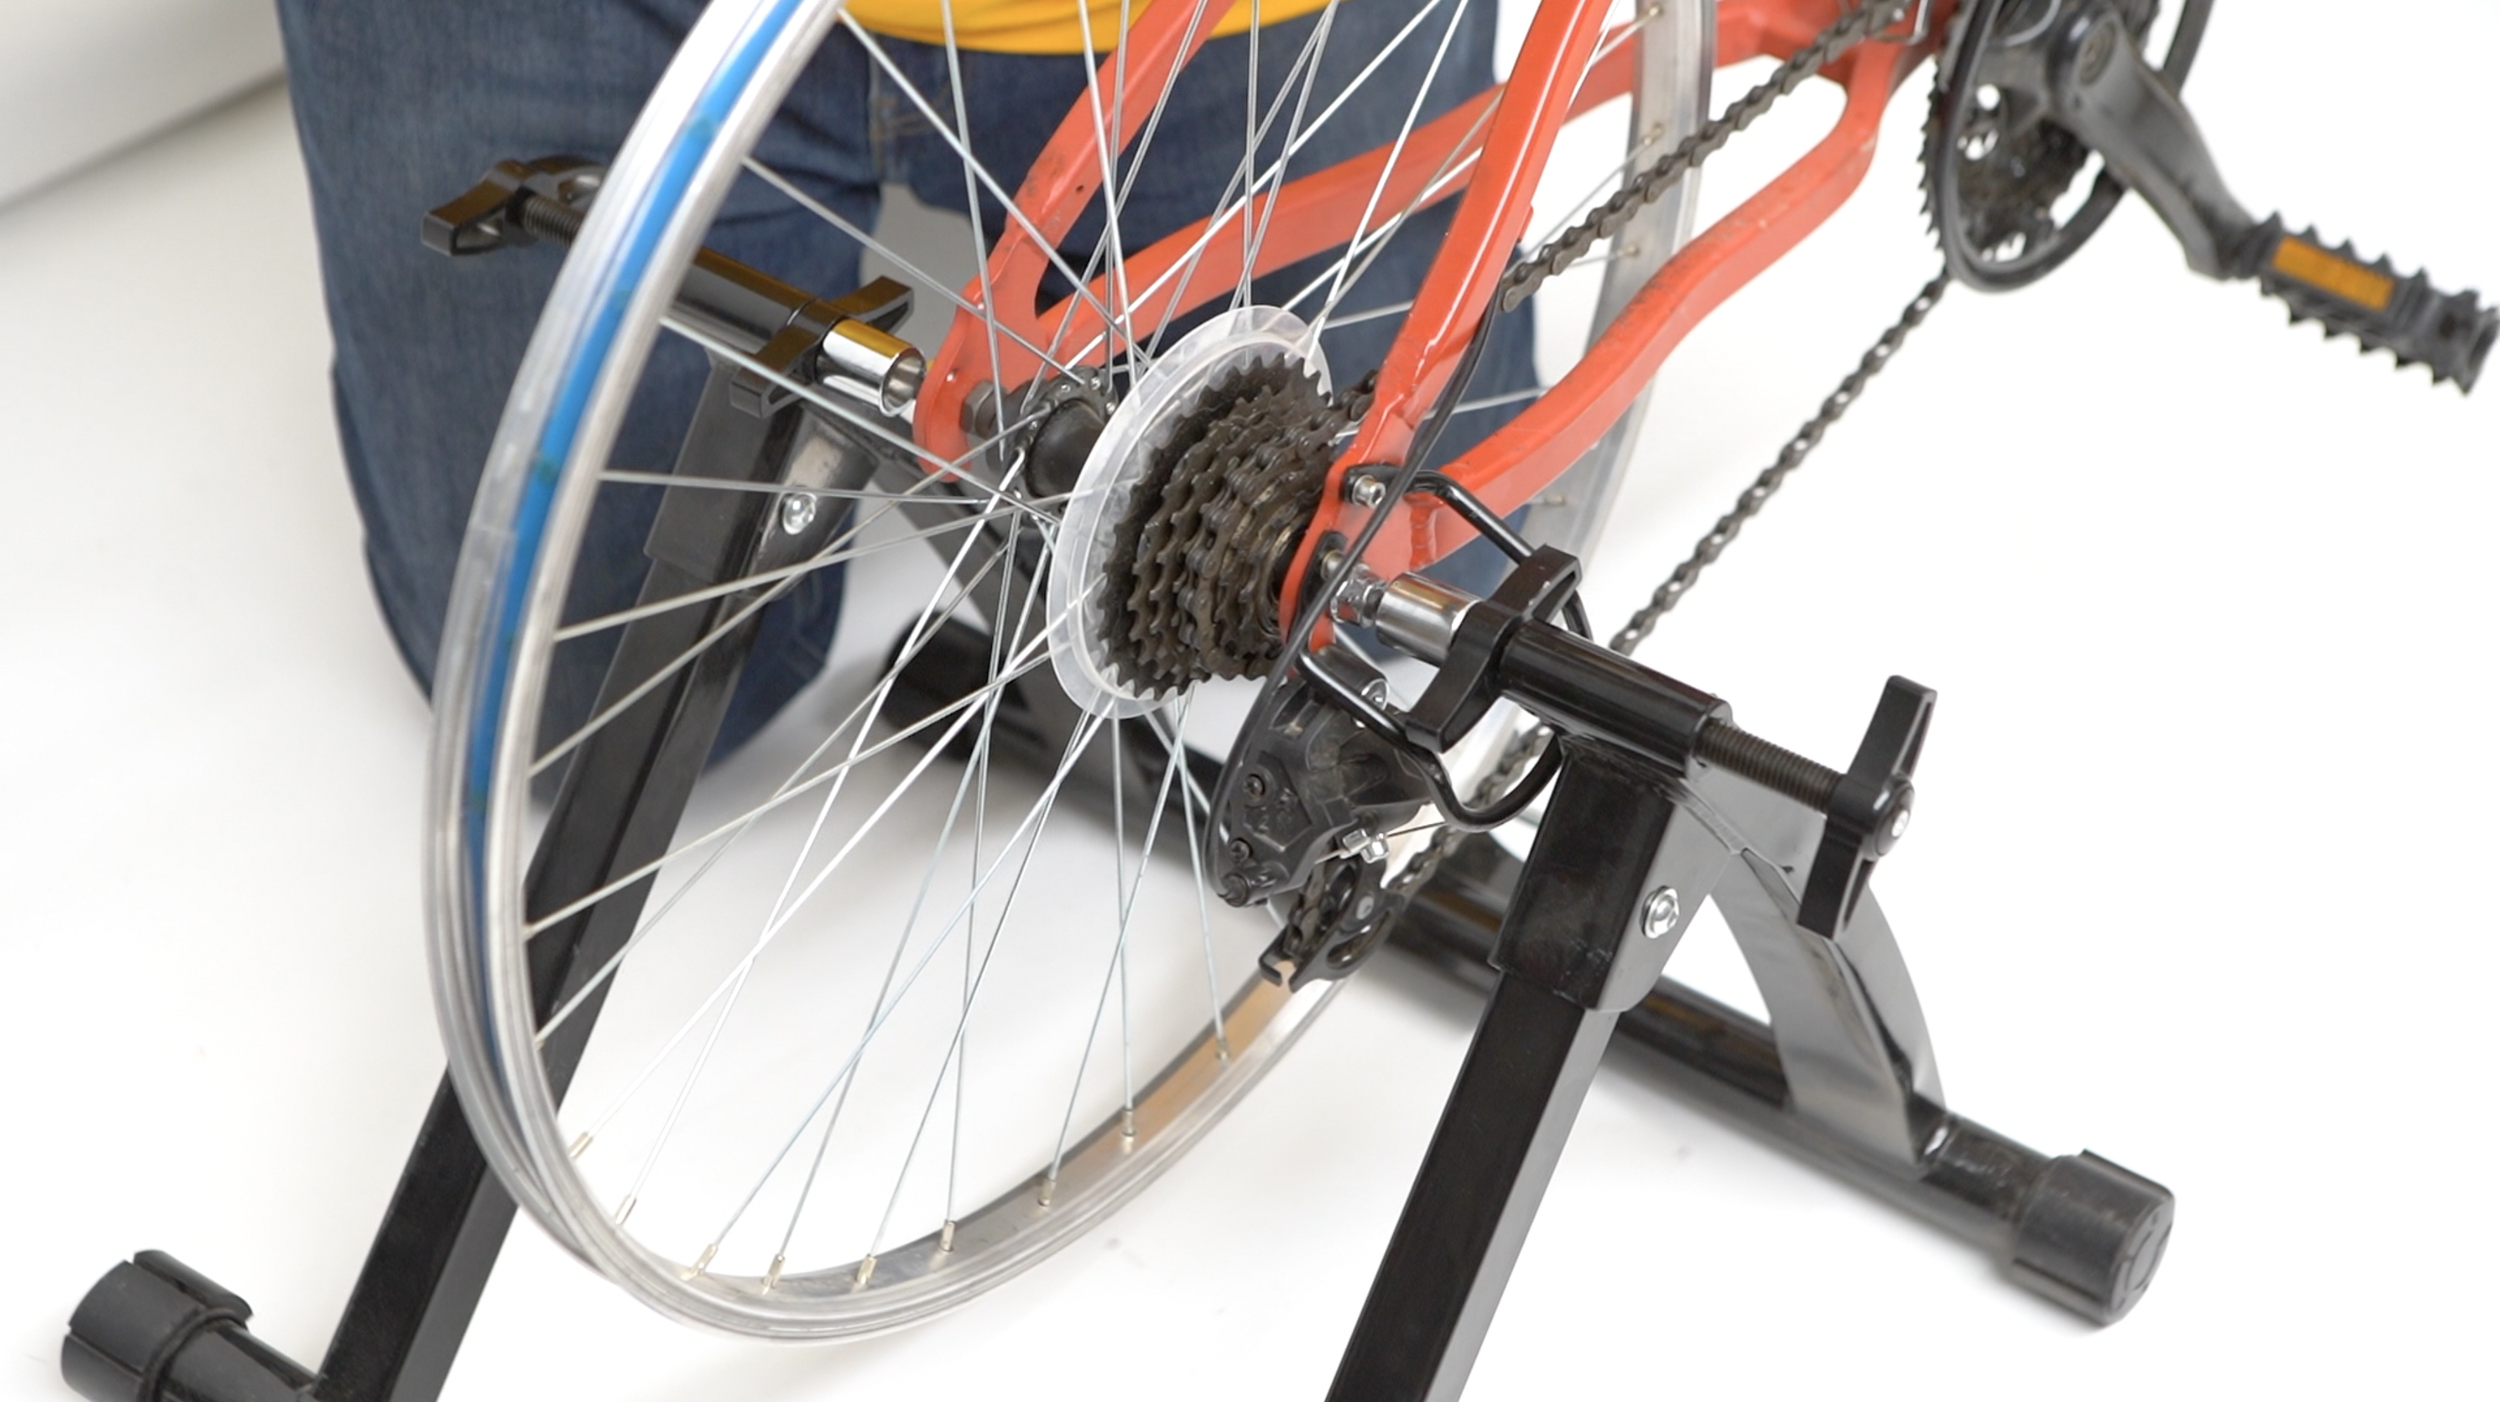
Test the installation by rotating the bike pedals. the wheel should spin like normal.
Step 4 - Attach the Bike to the stand
Open up the two clamp arms and put one side(bolt) of the bike in first. It’s easier with two people.
Once held in place, tighten the clamp arms. You should tighten as much as you can by hand.
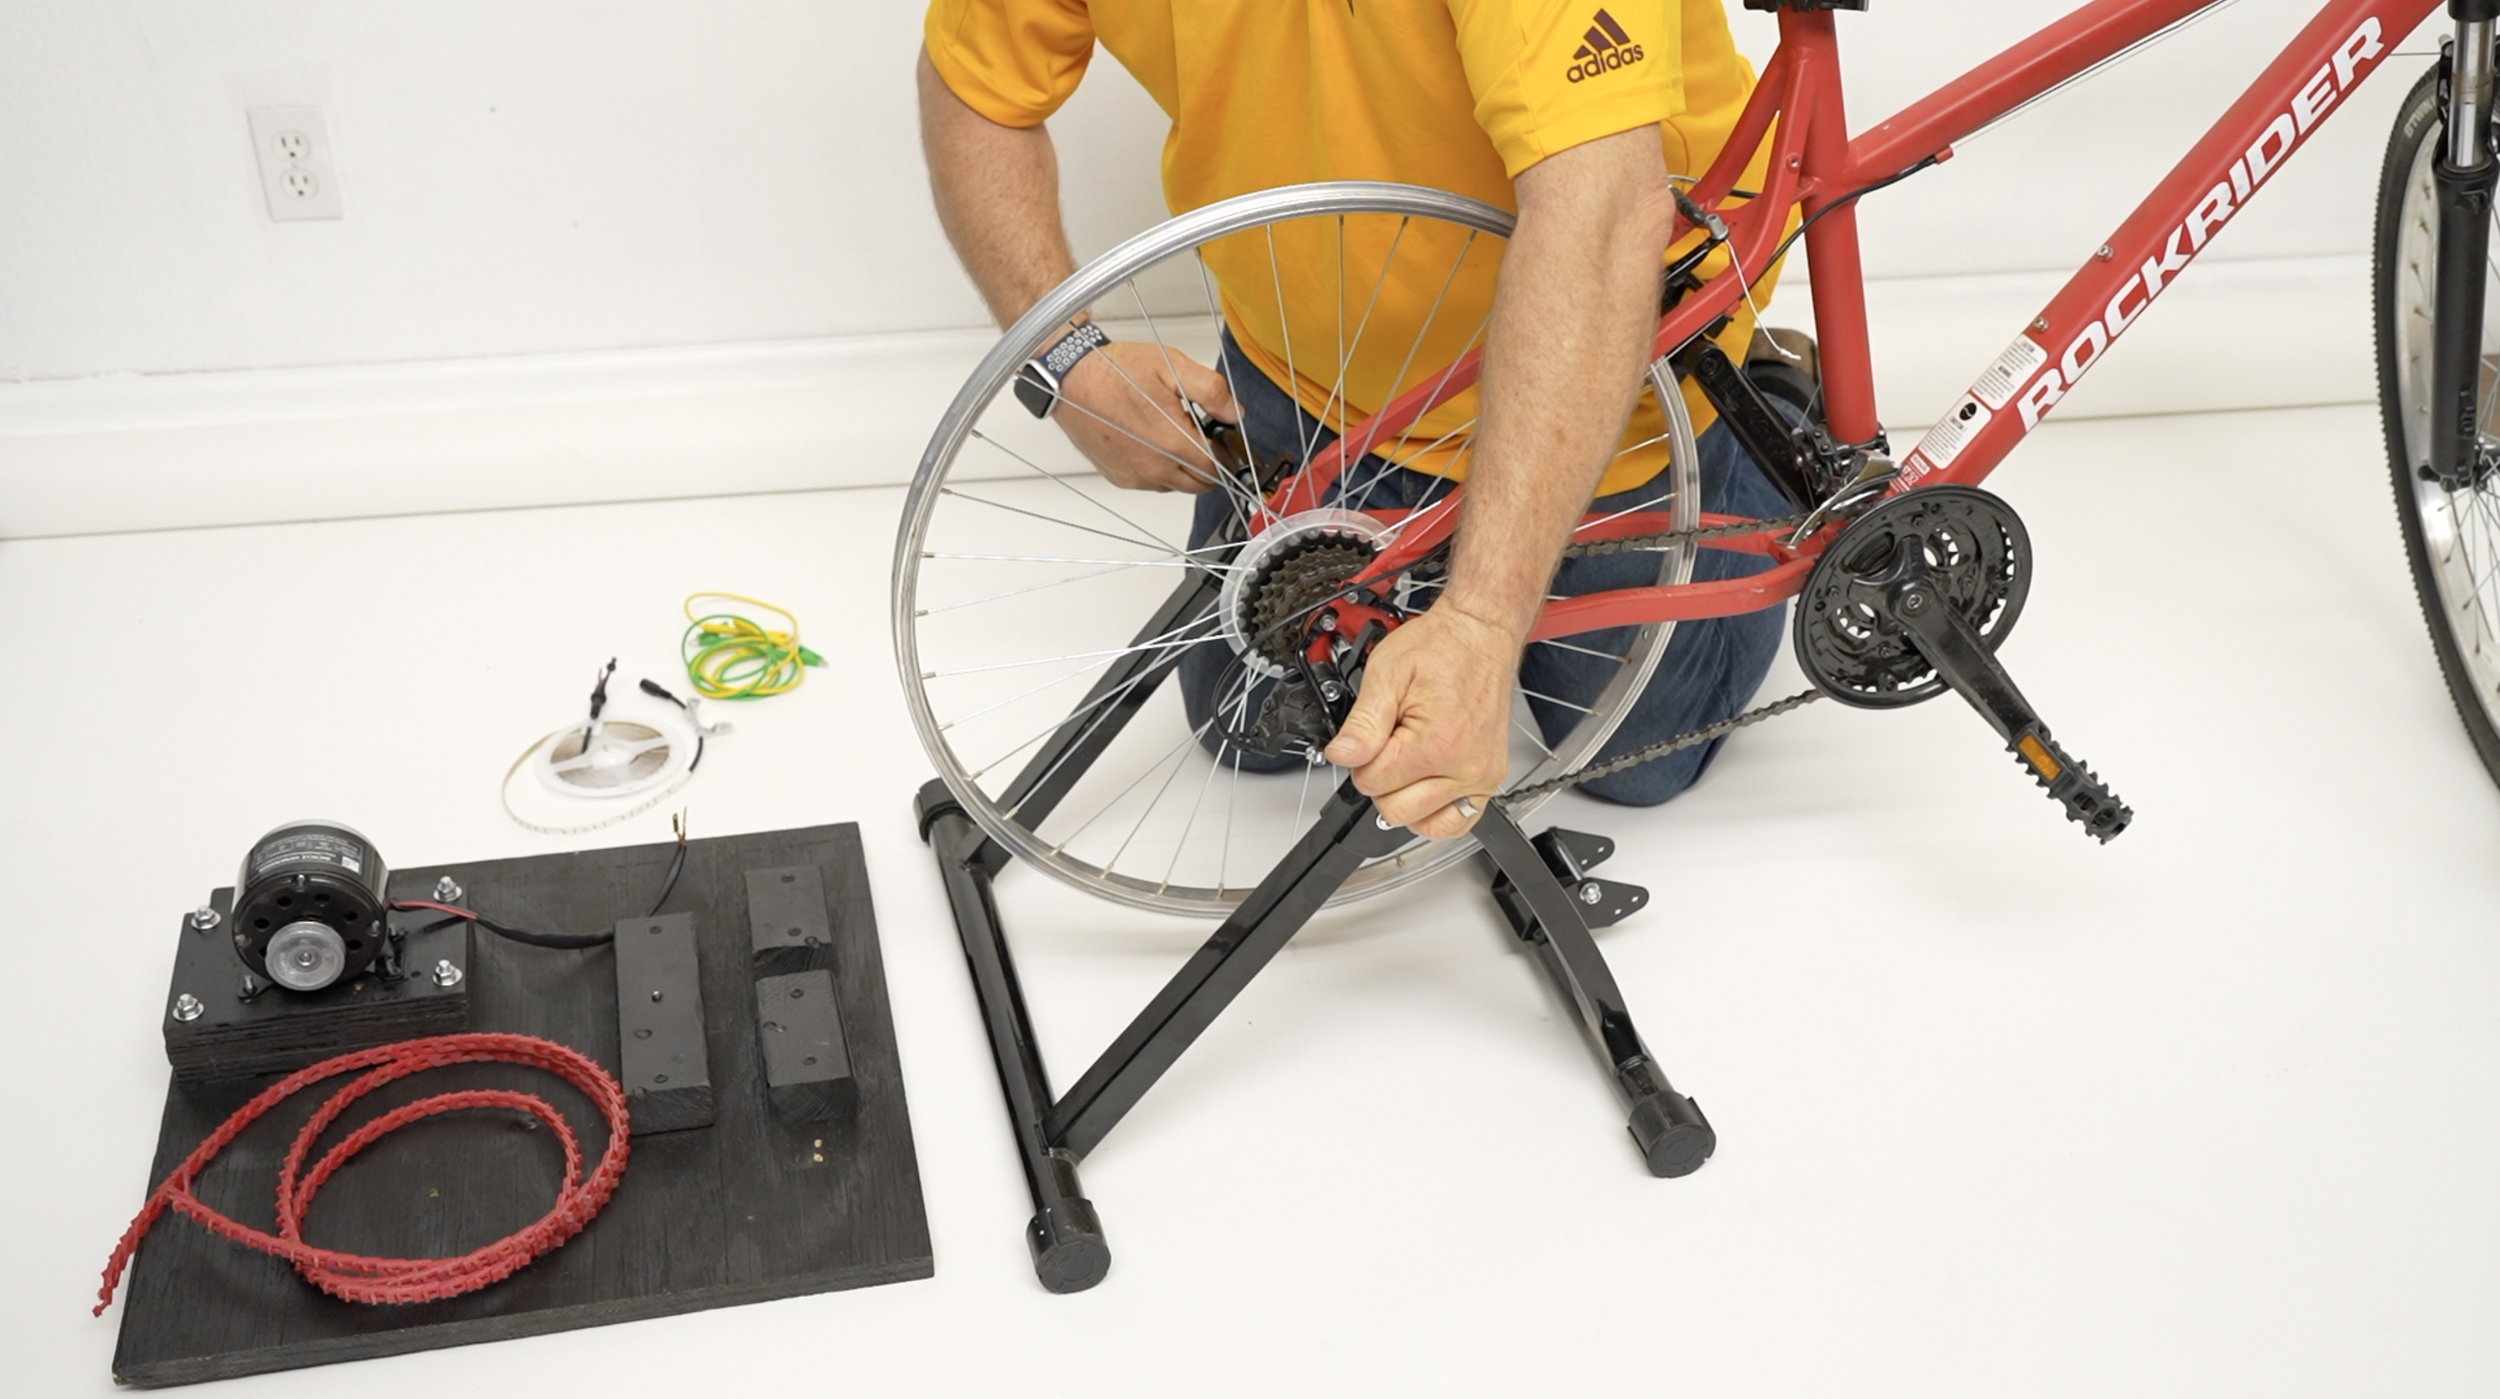
Step 6 - install v-belt
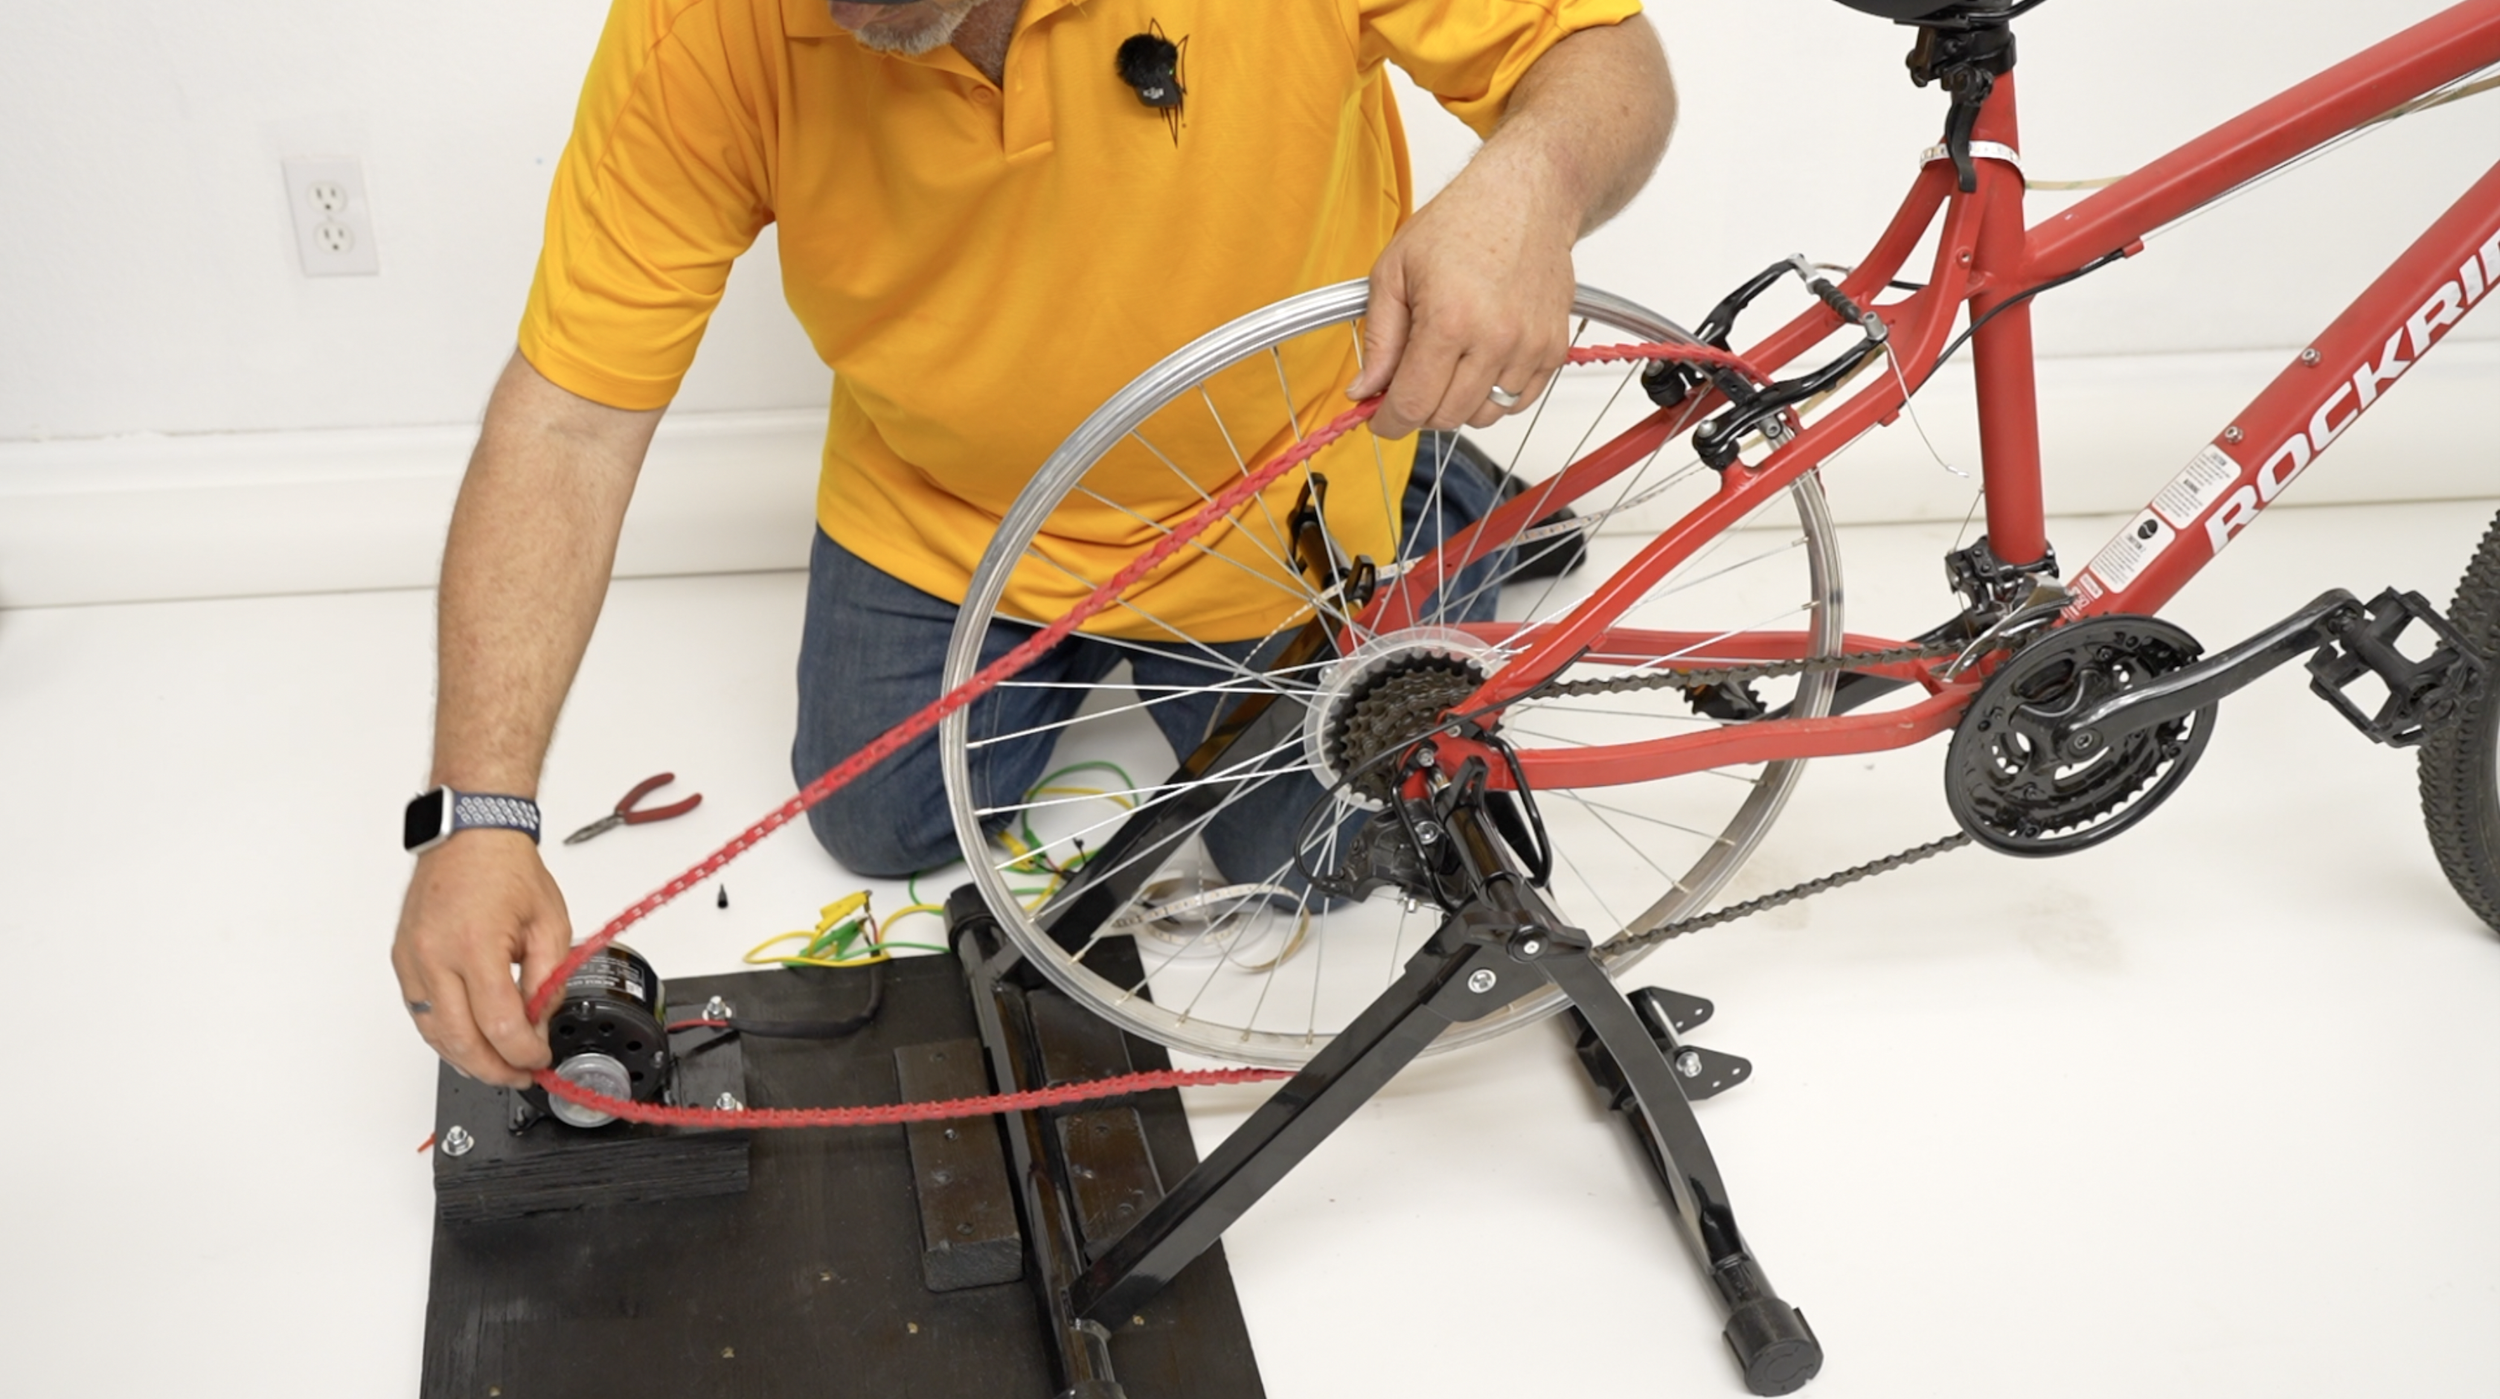
Place the bike onto the platform, and line it up with the generator to the wheel is in line with where the belt goes on the generator.
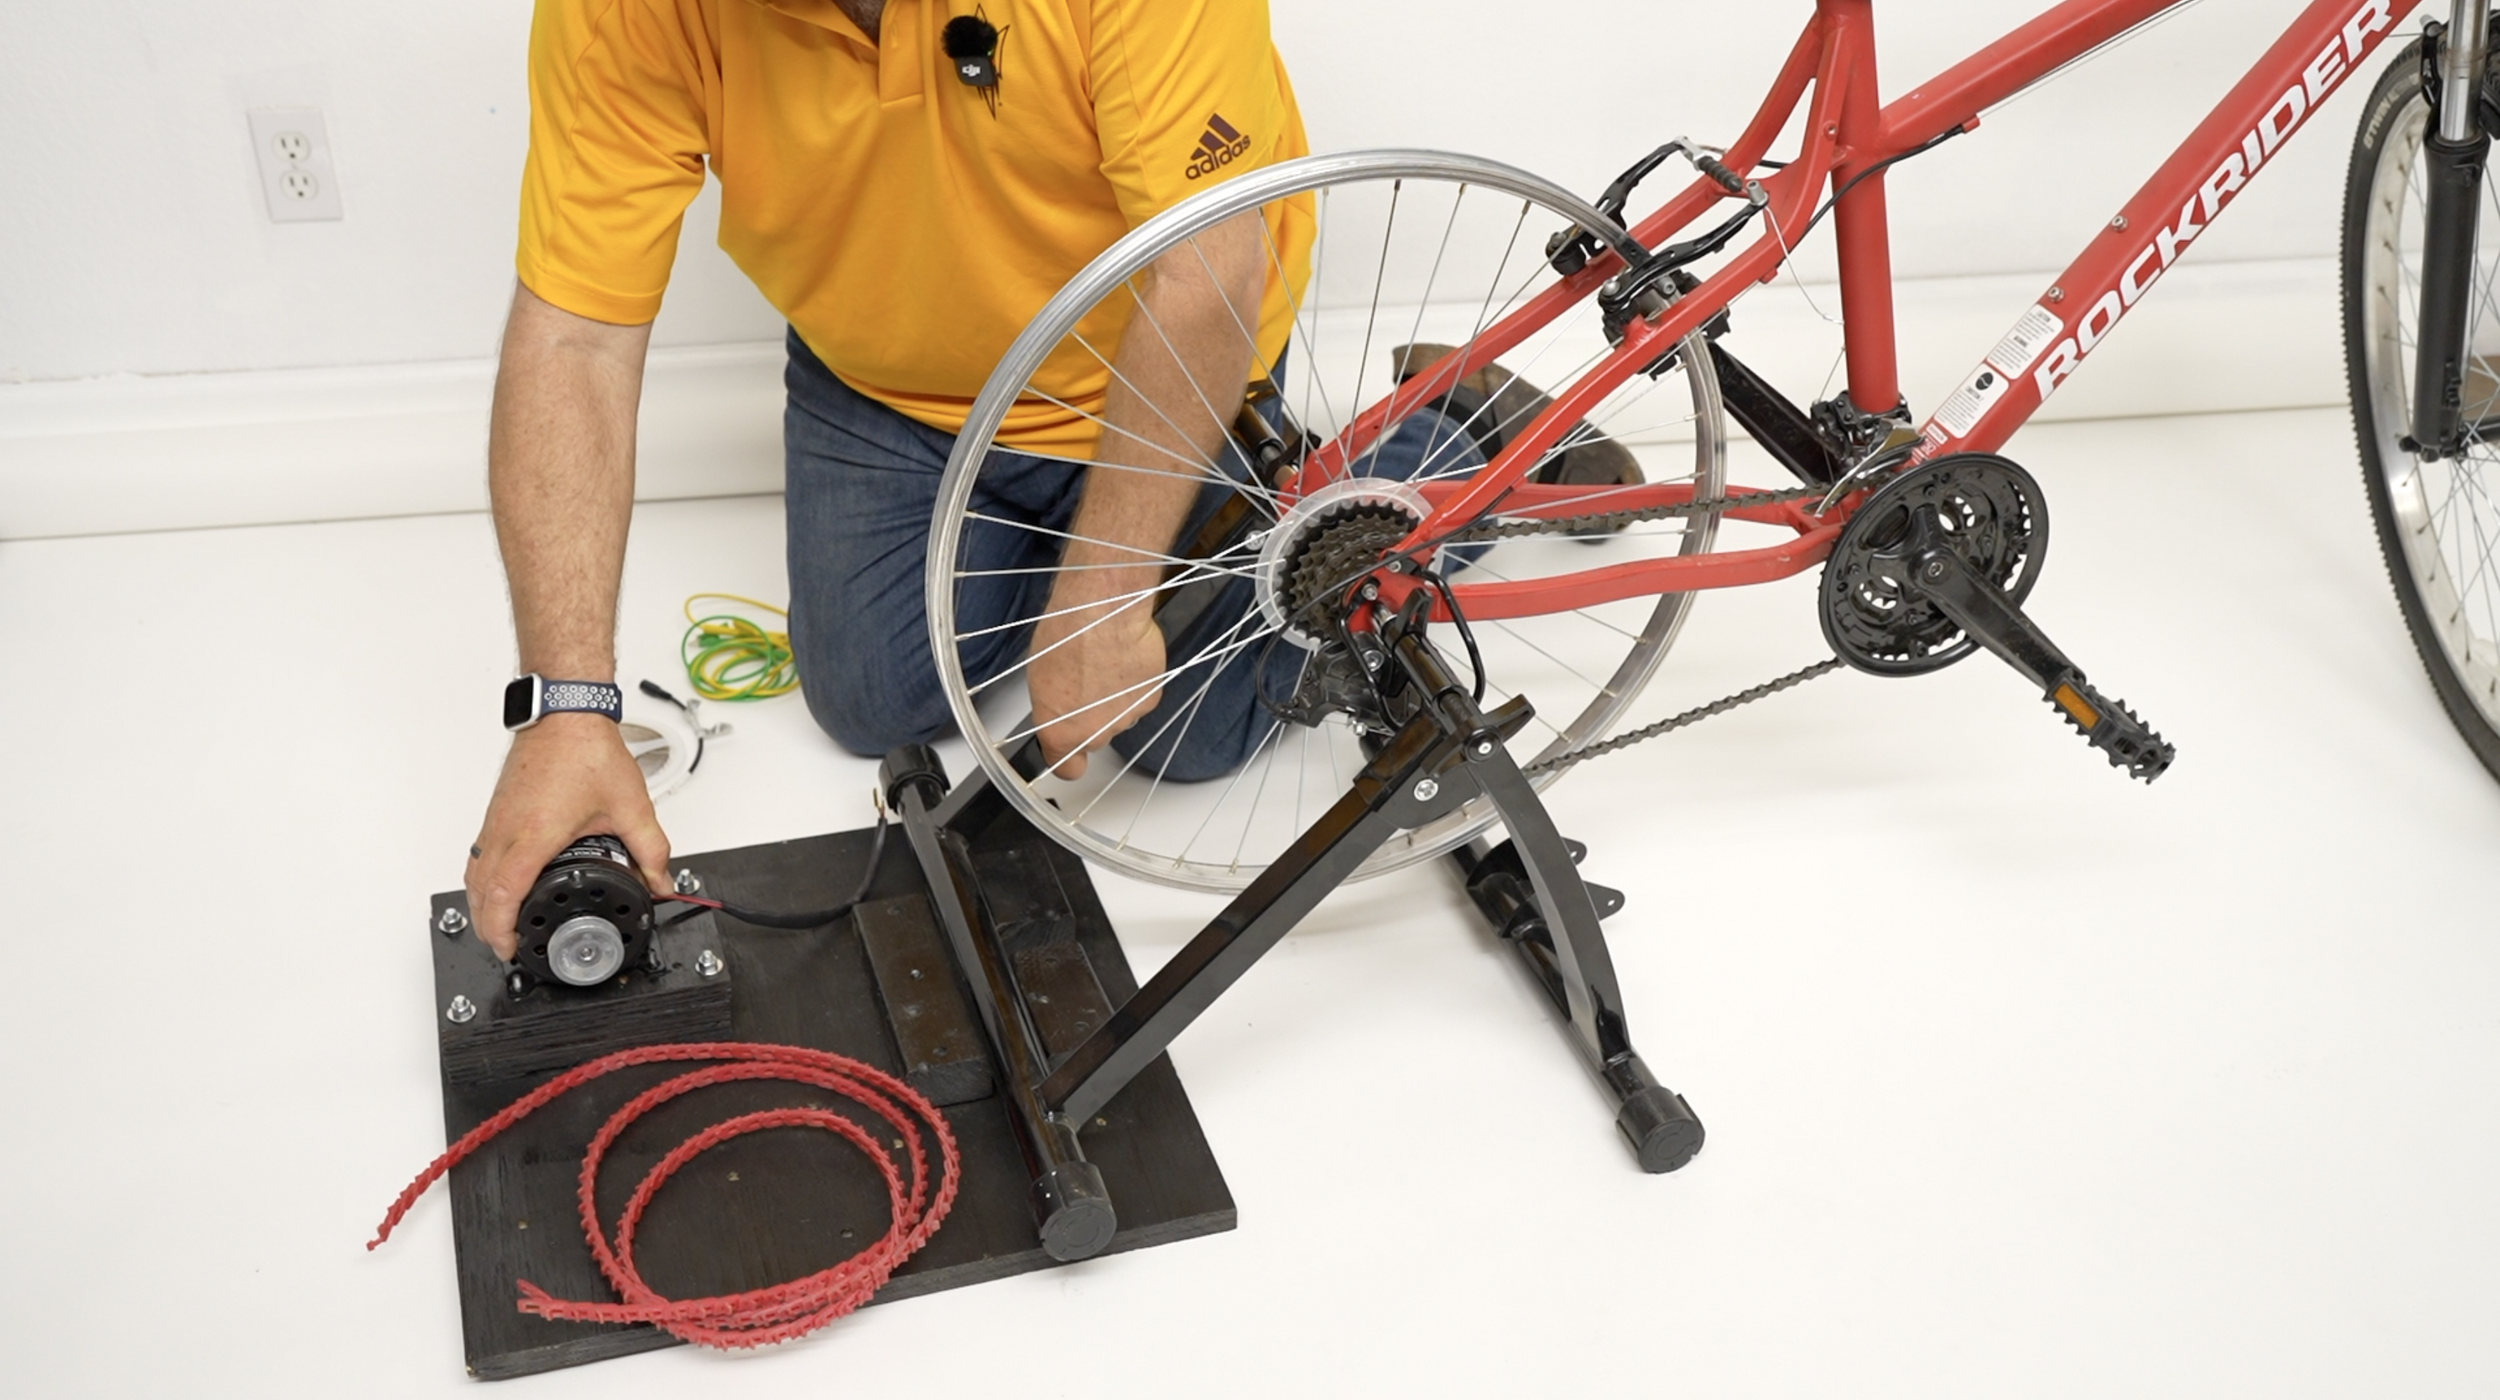
Take the v-belt, and have the tabs facing down, the opposing direction of the wheel. The tabs will catch on the end of the spokes and will have better traction. The open end will face up.
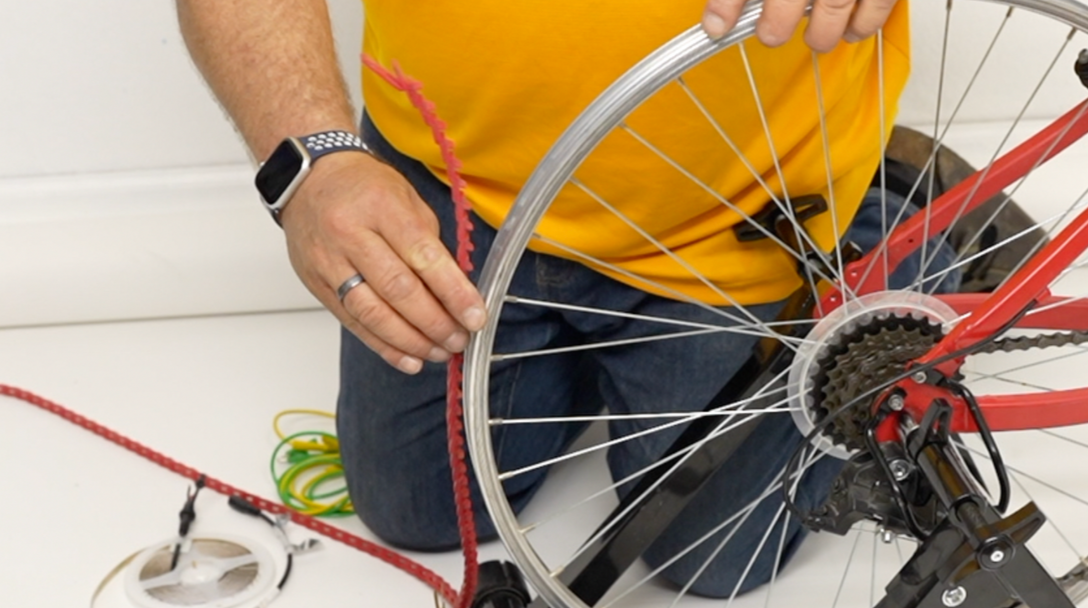
Loop the v-belt around the wheel and the generator and add/remove links as needed. It should not sag, but also not bee too tight. You should be able to press on it and it will flex a few inches up and down.
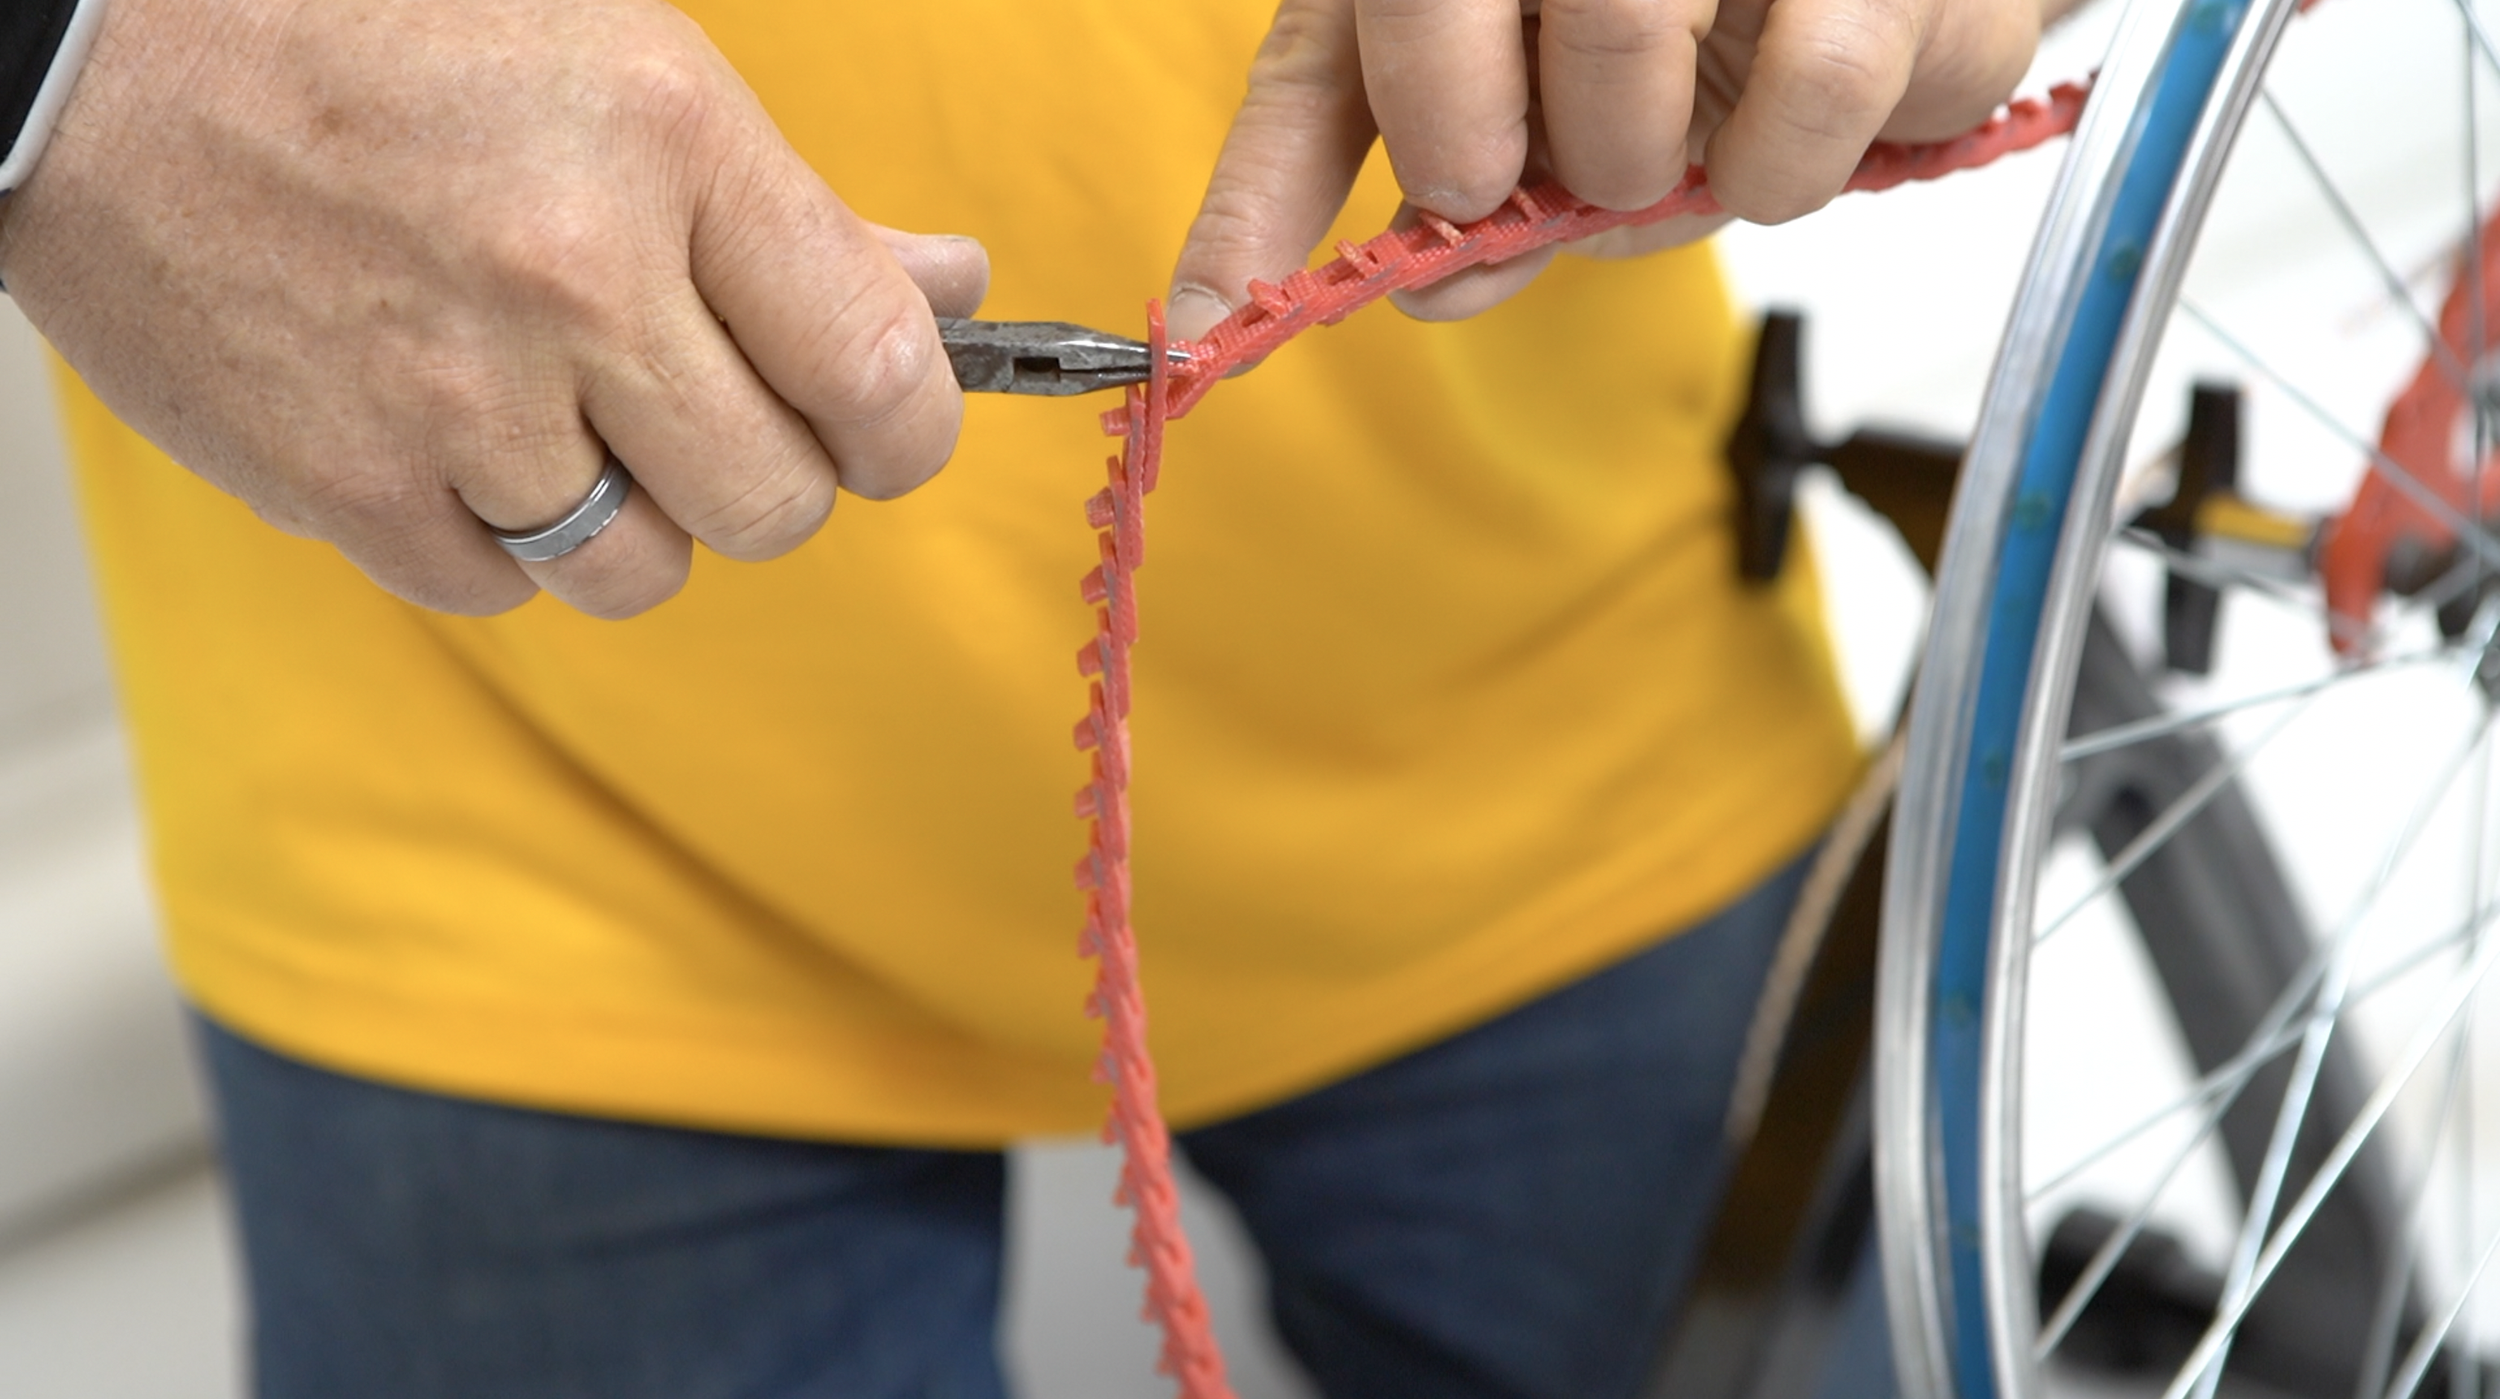
Take the end stem and pull it through the 2nd link from the end.
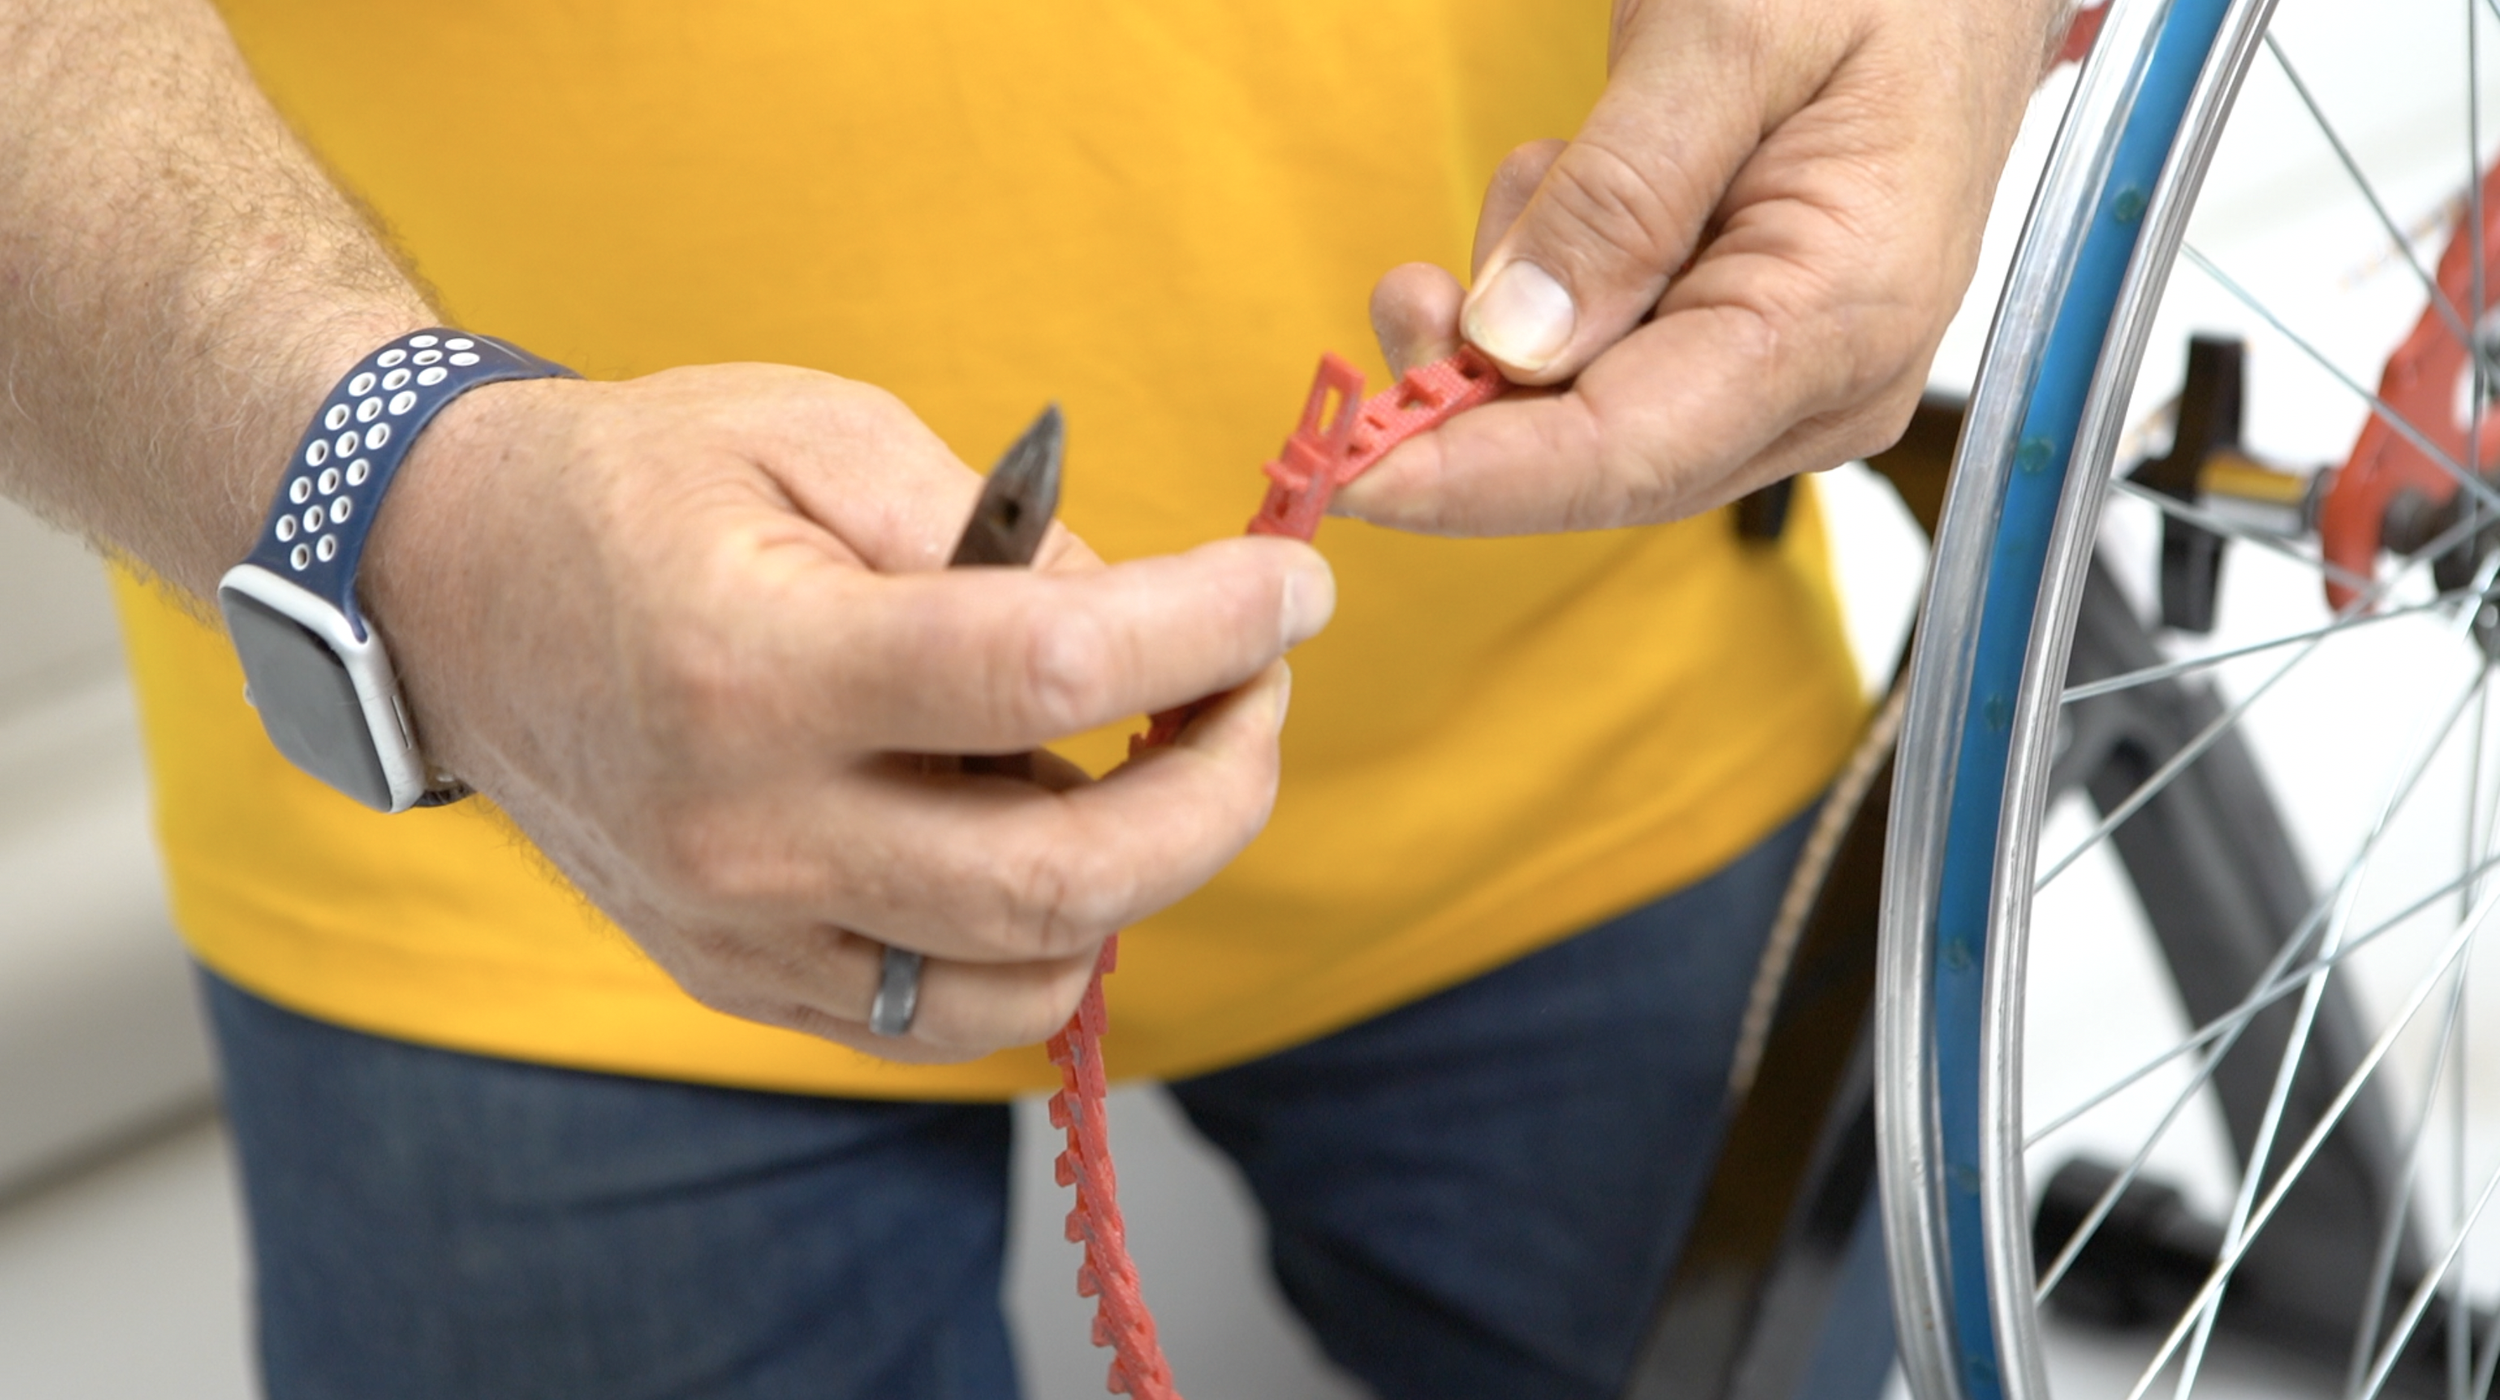
Reach through with some needle nose pliers and pull the tab through the link. You may need to twist side to side while pulling it through.

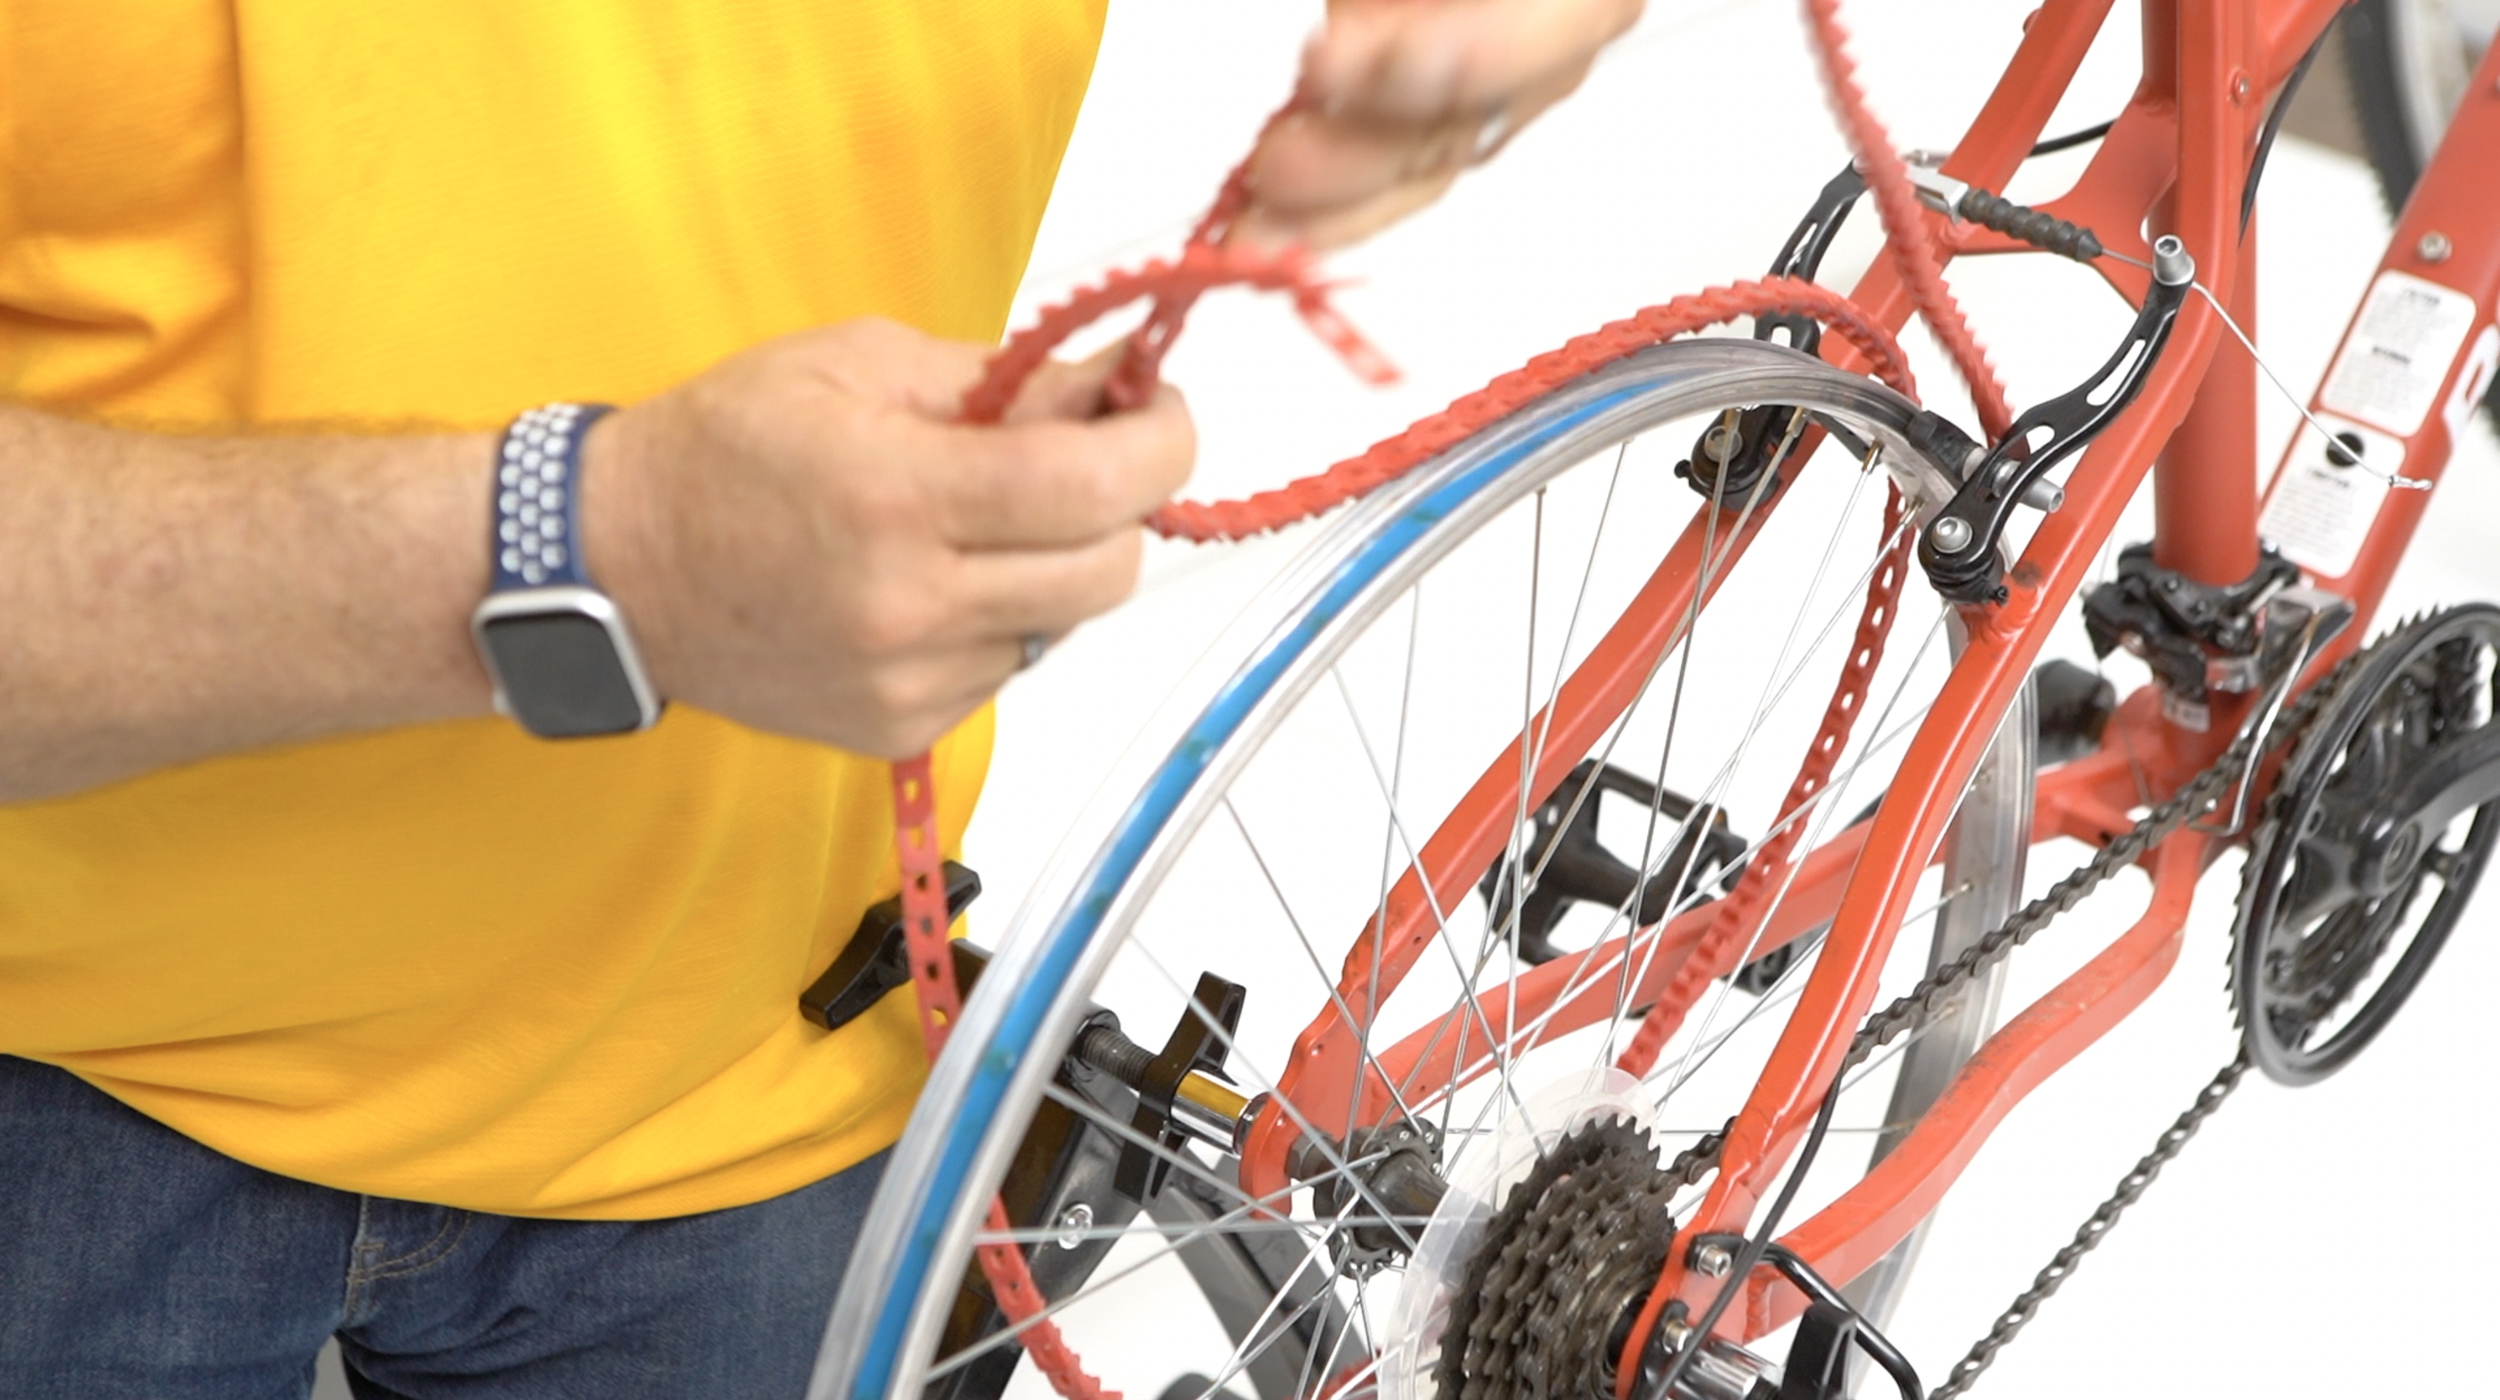
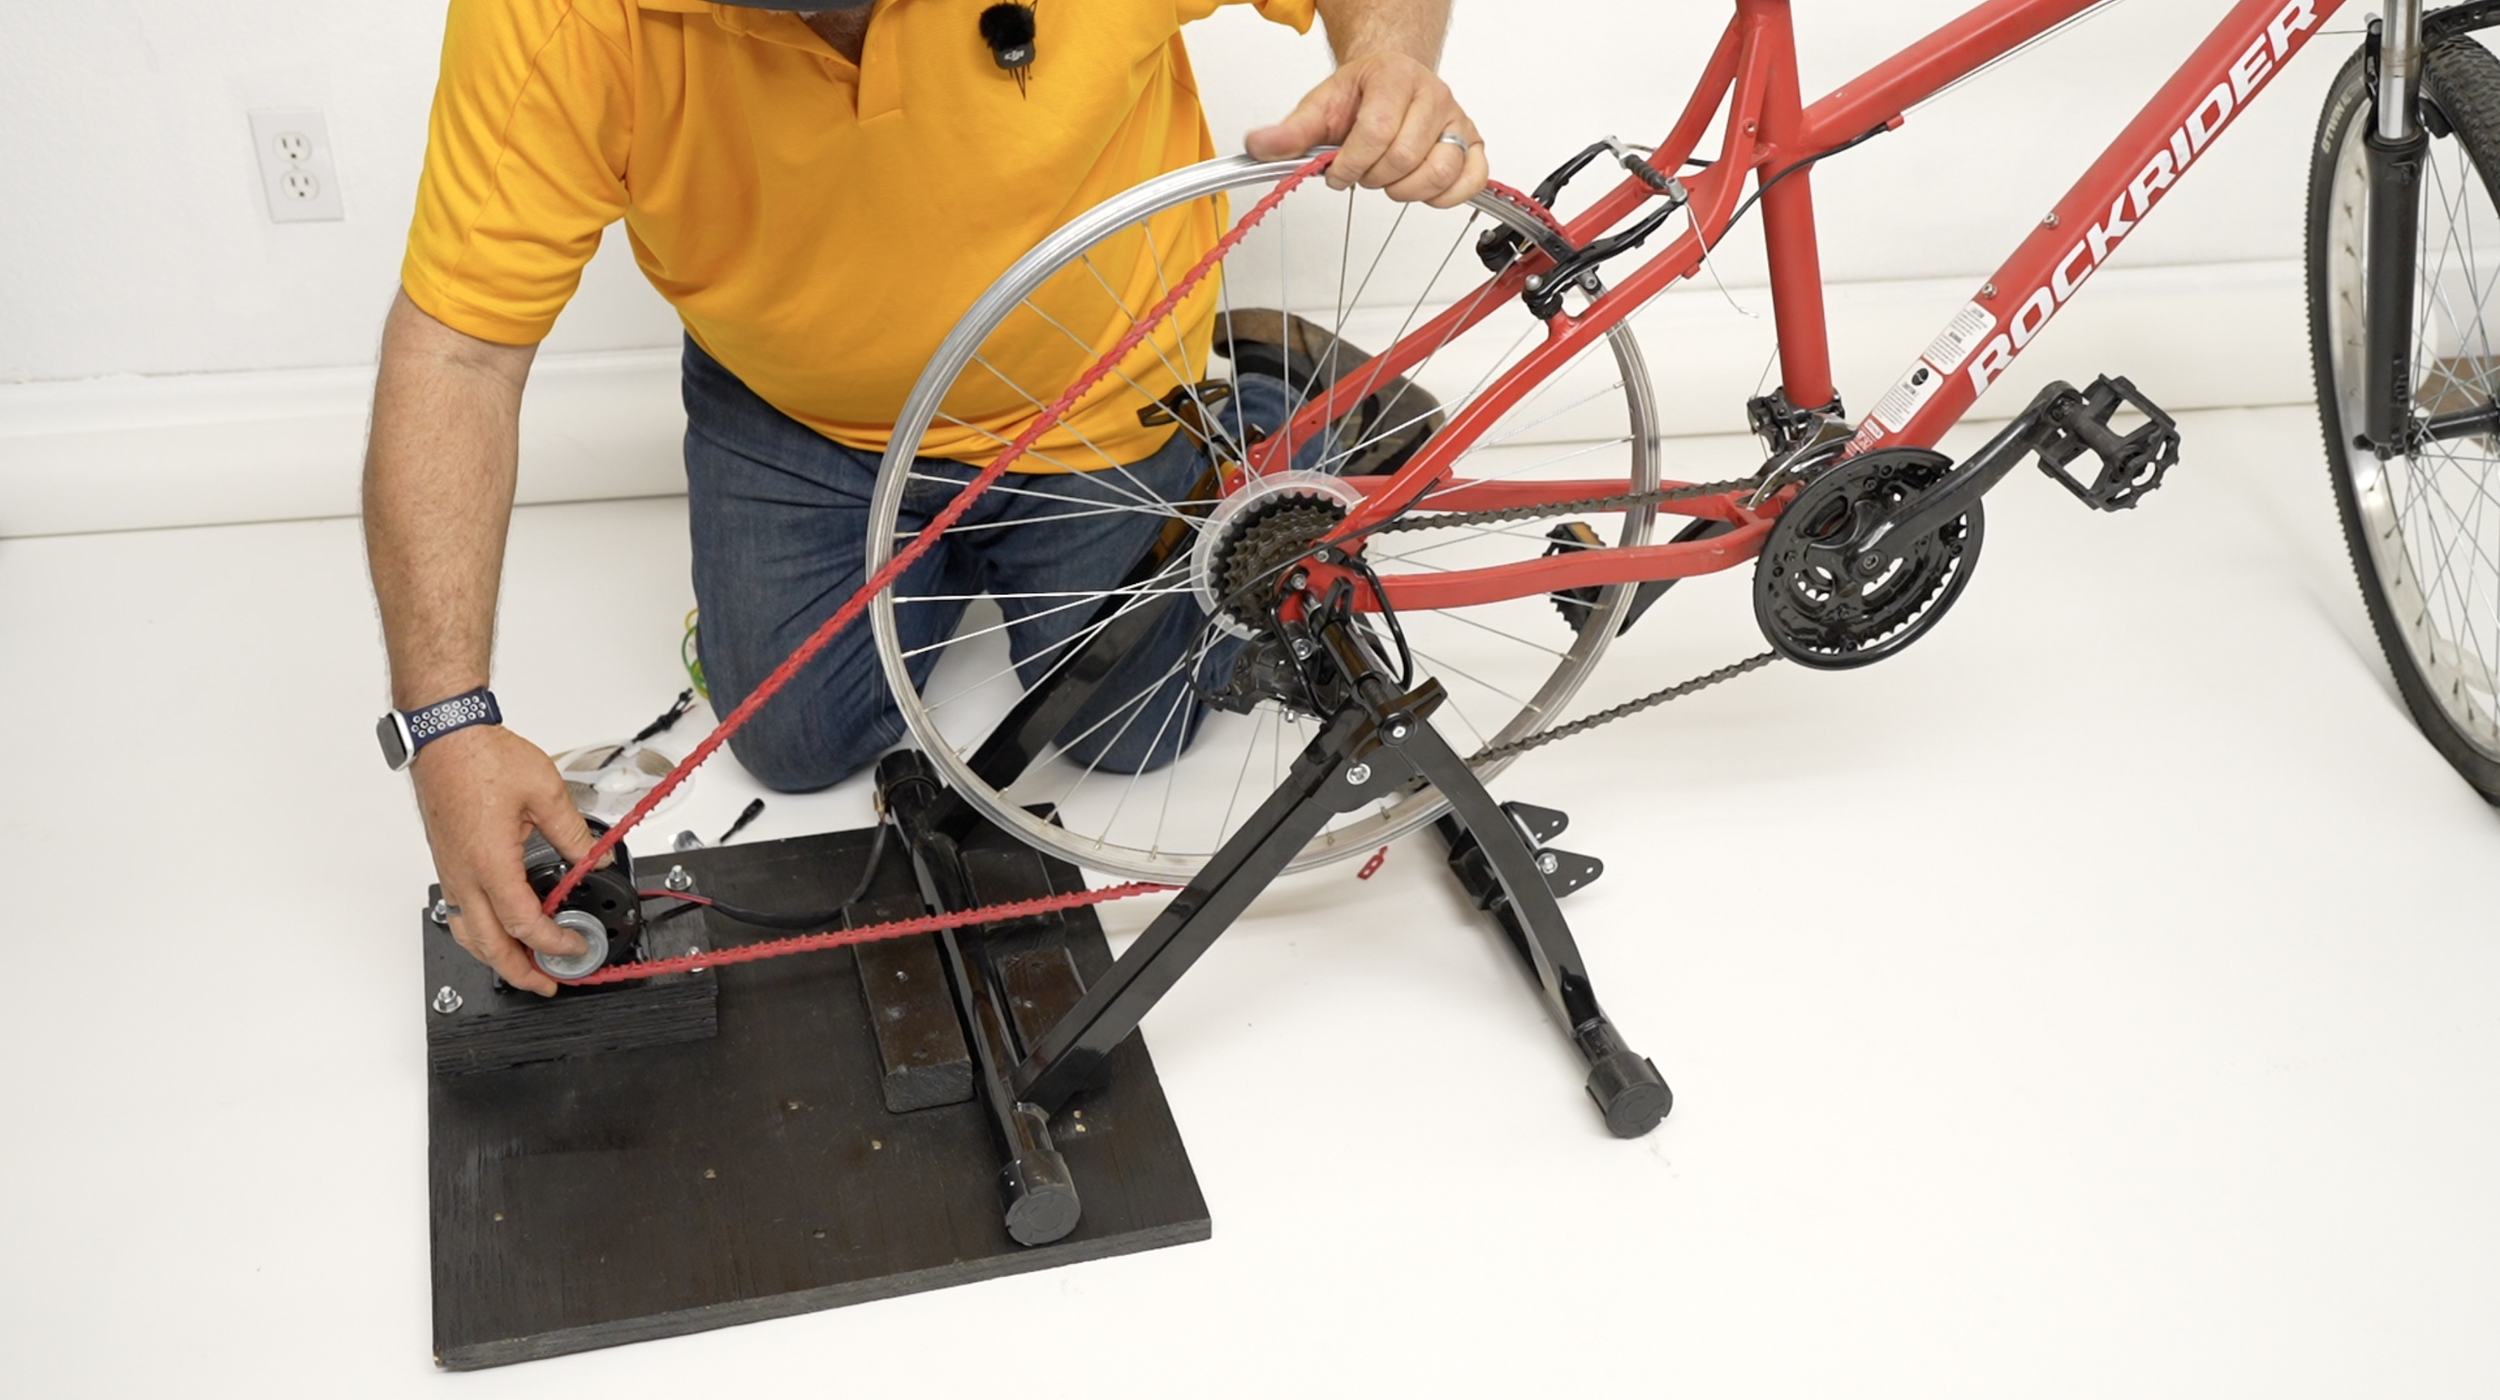
Place the v-belt on the bottom half of the bike wheel, loop around the generator…
and turn the bike wheel backward and the belt should just fall into place.
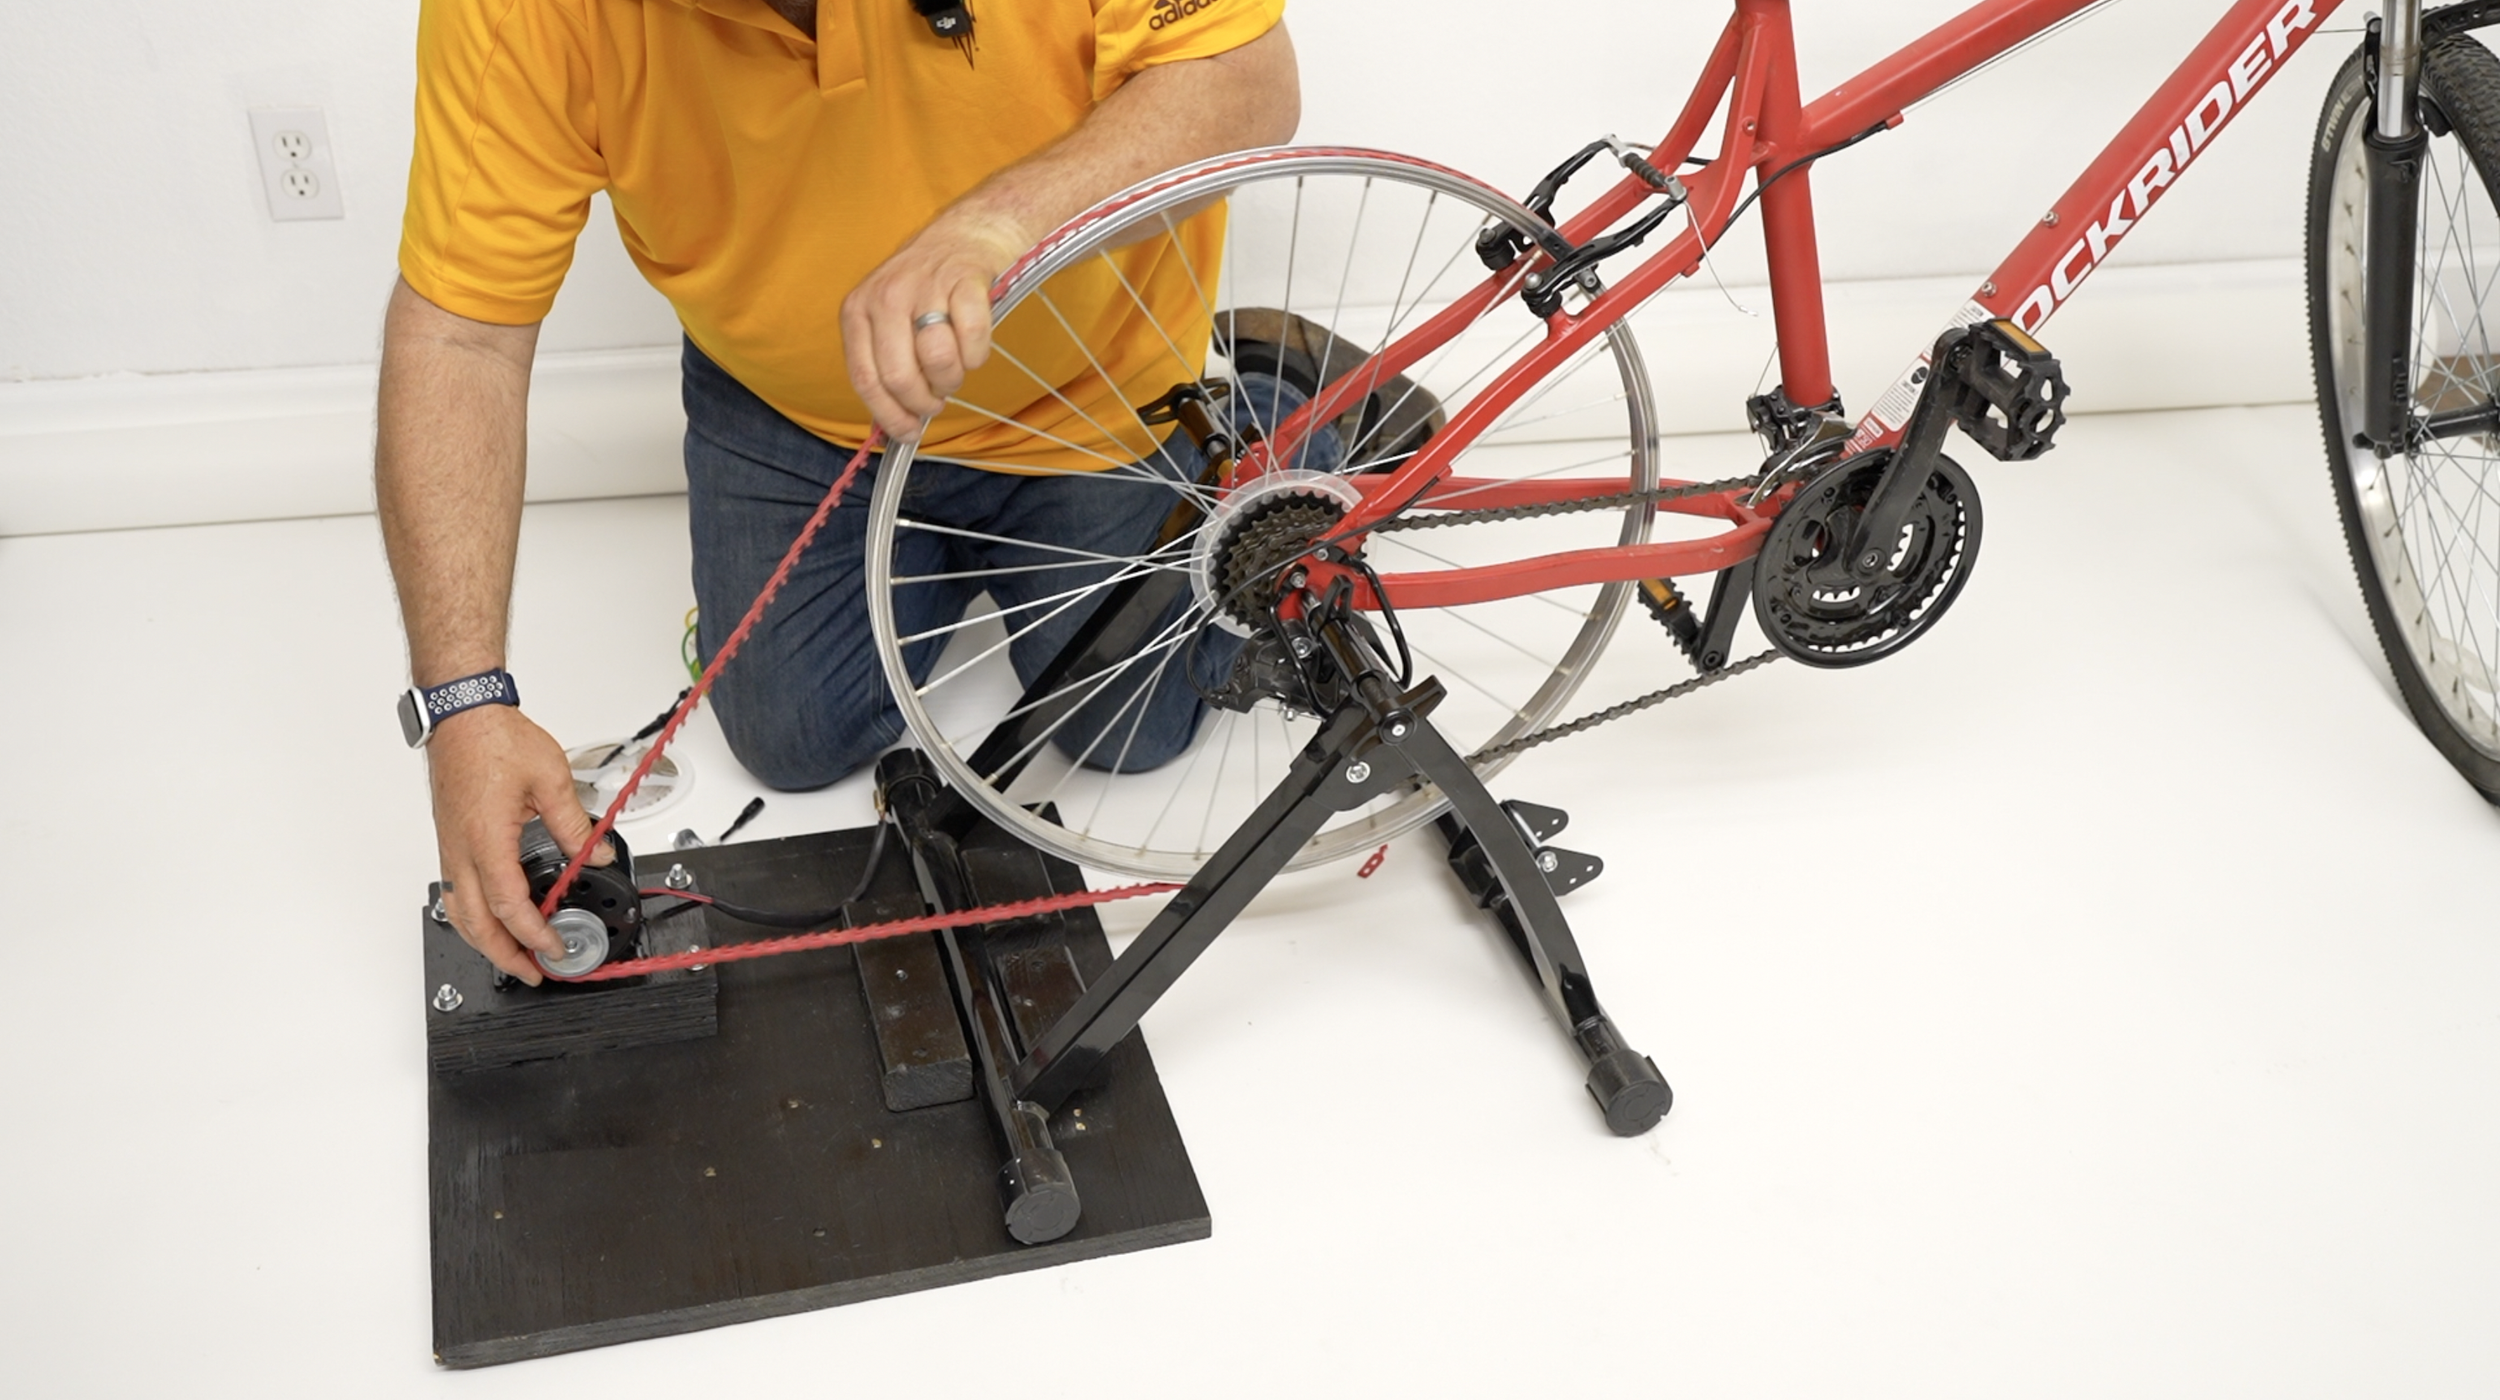
Now you can adjust your alignment by moving the bike slightly to the left or right, so the v-belt is perfectly straight.
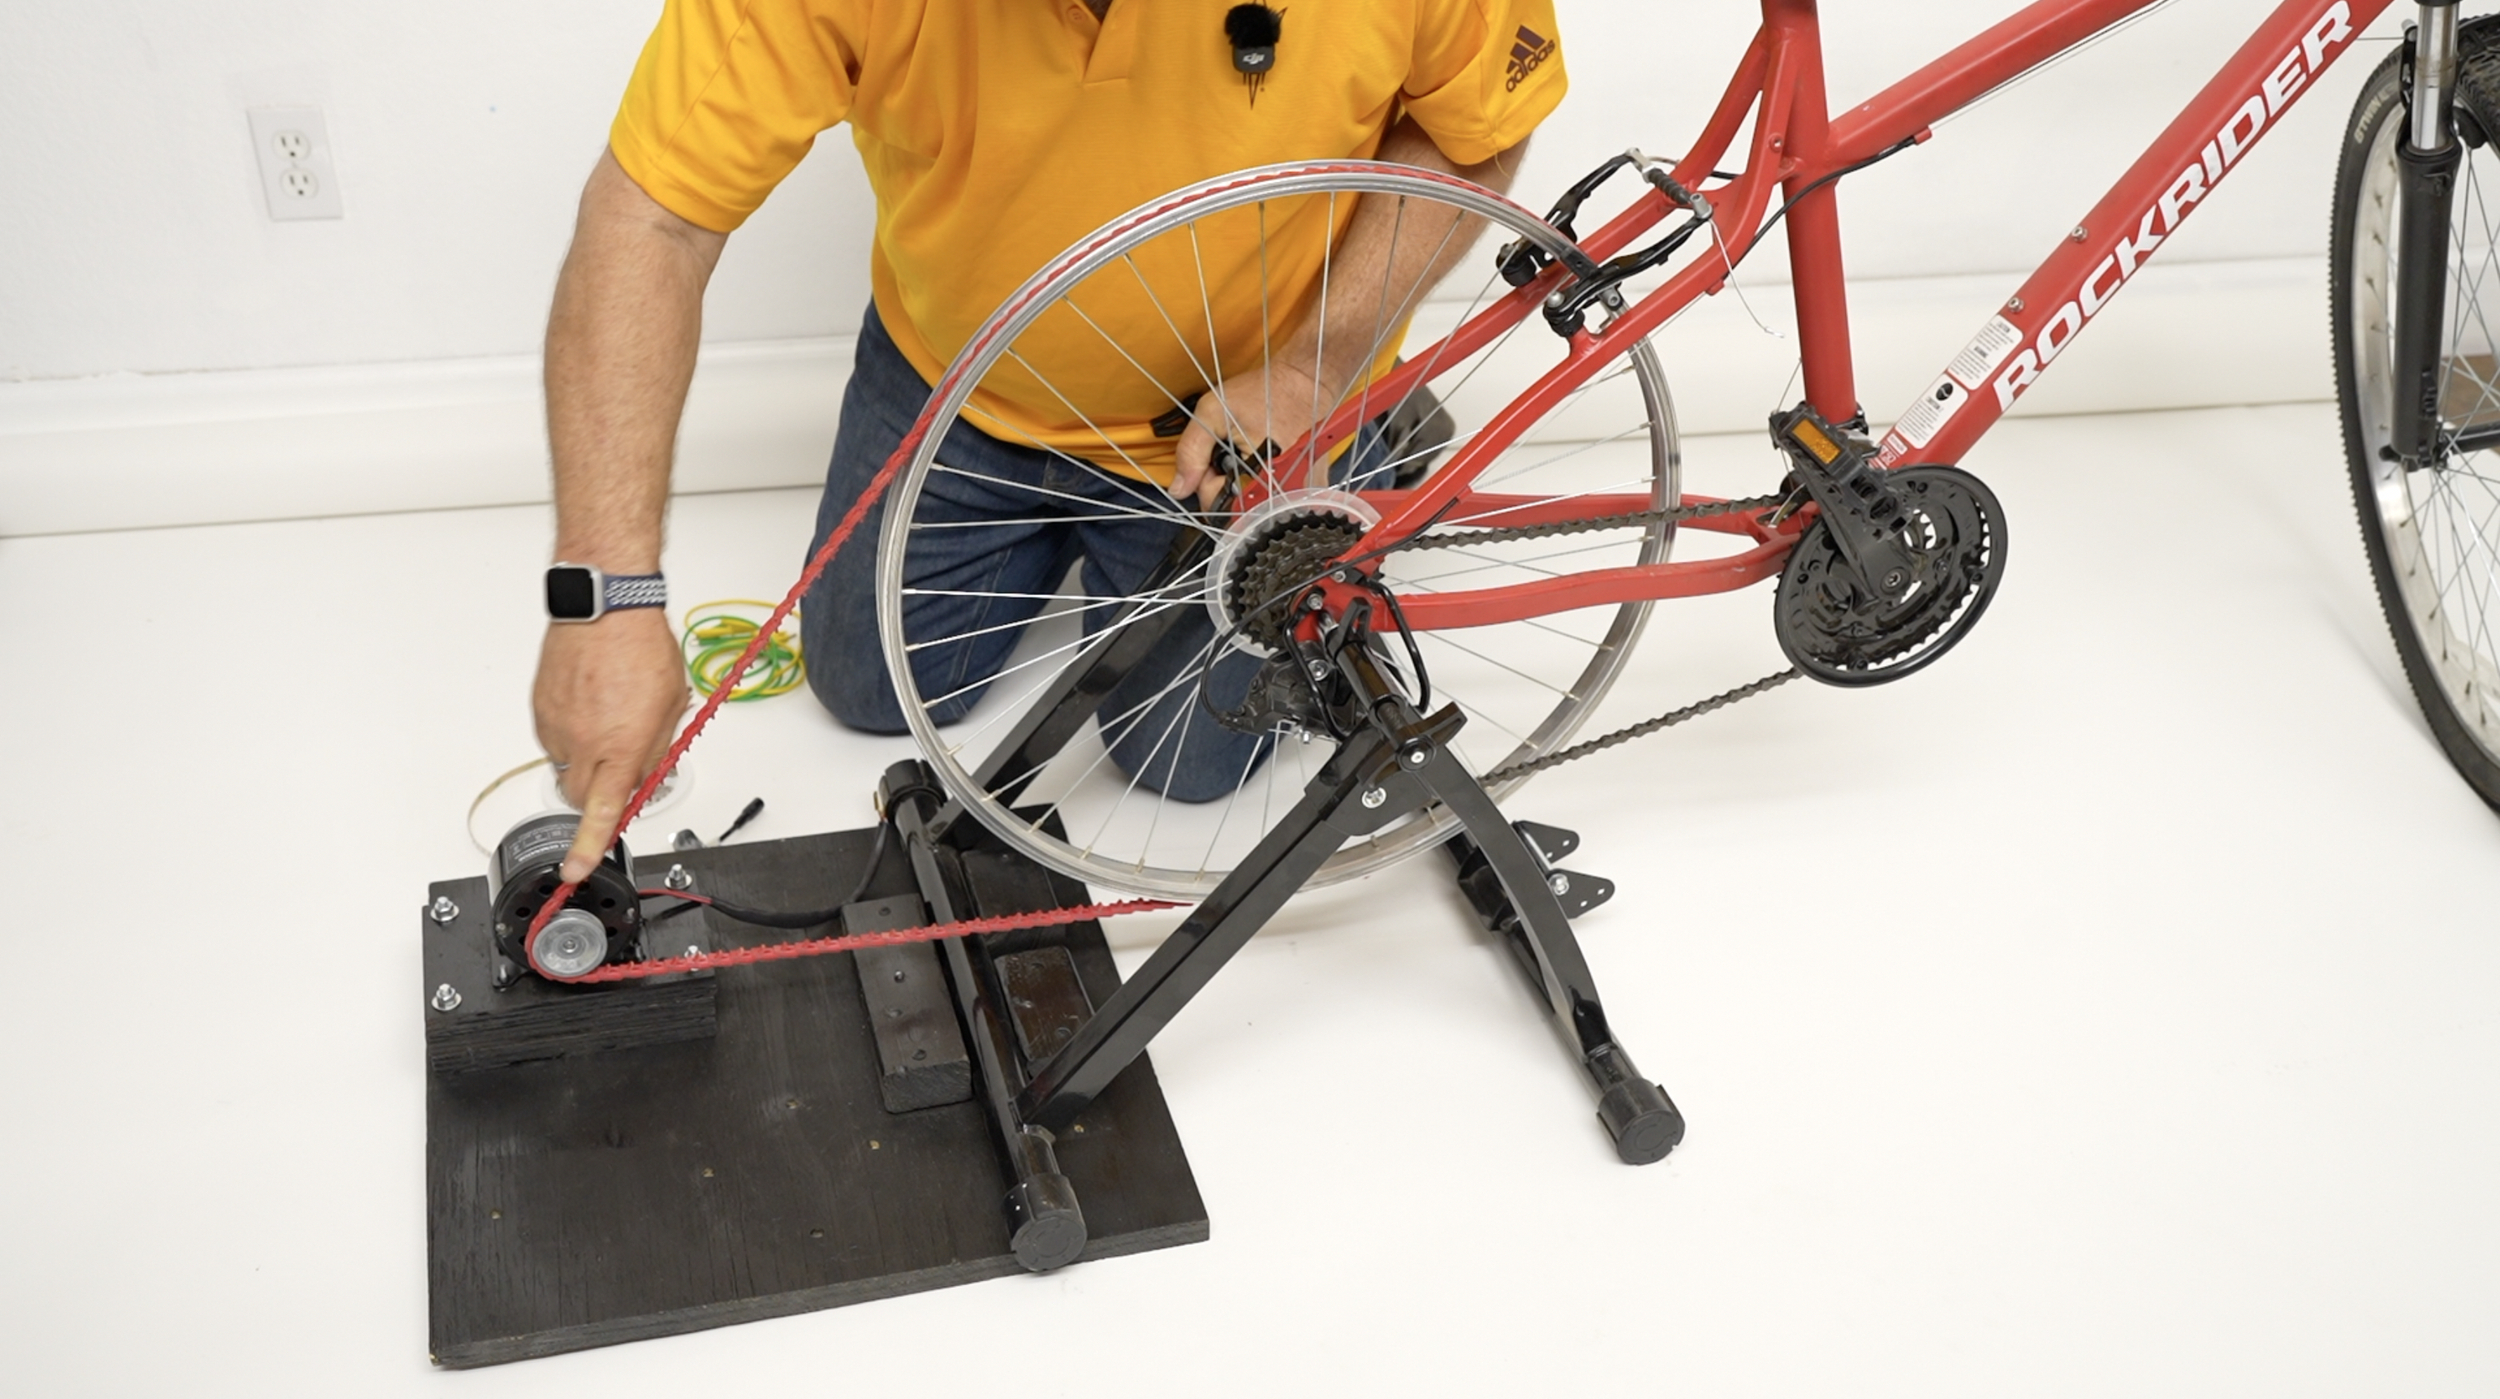
Check your connection by rotating the pedals. The wheel and generator should be rotating.
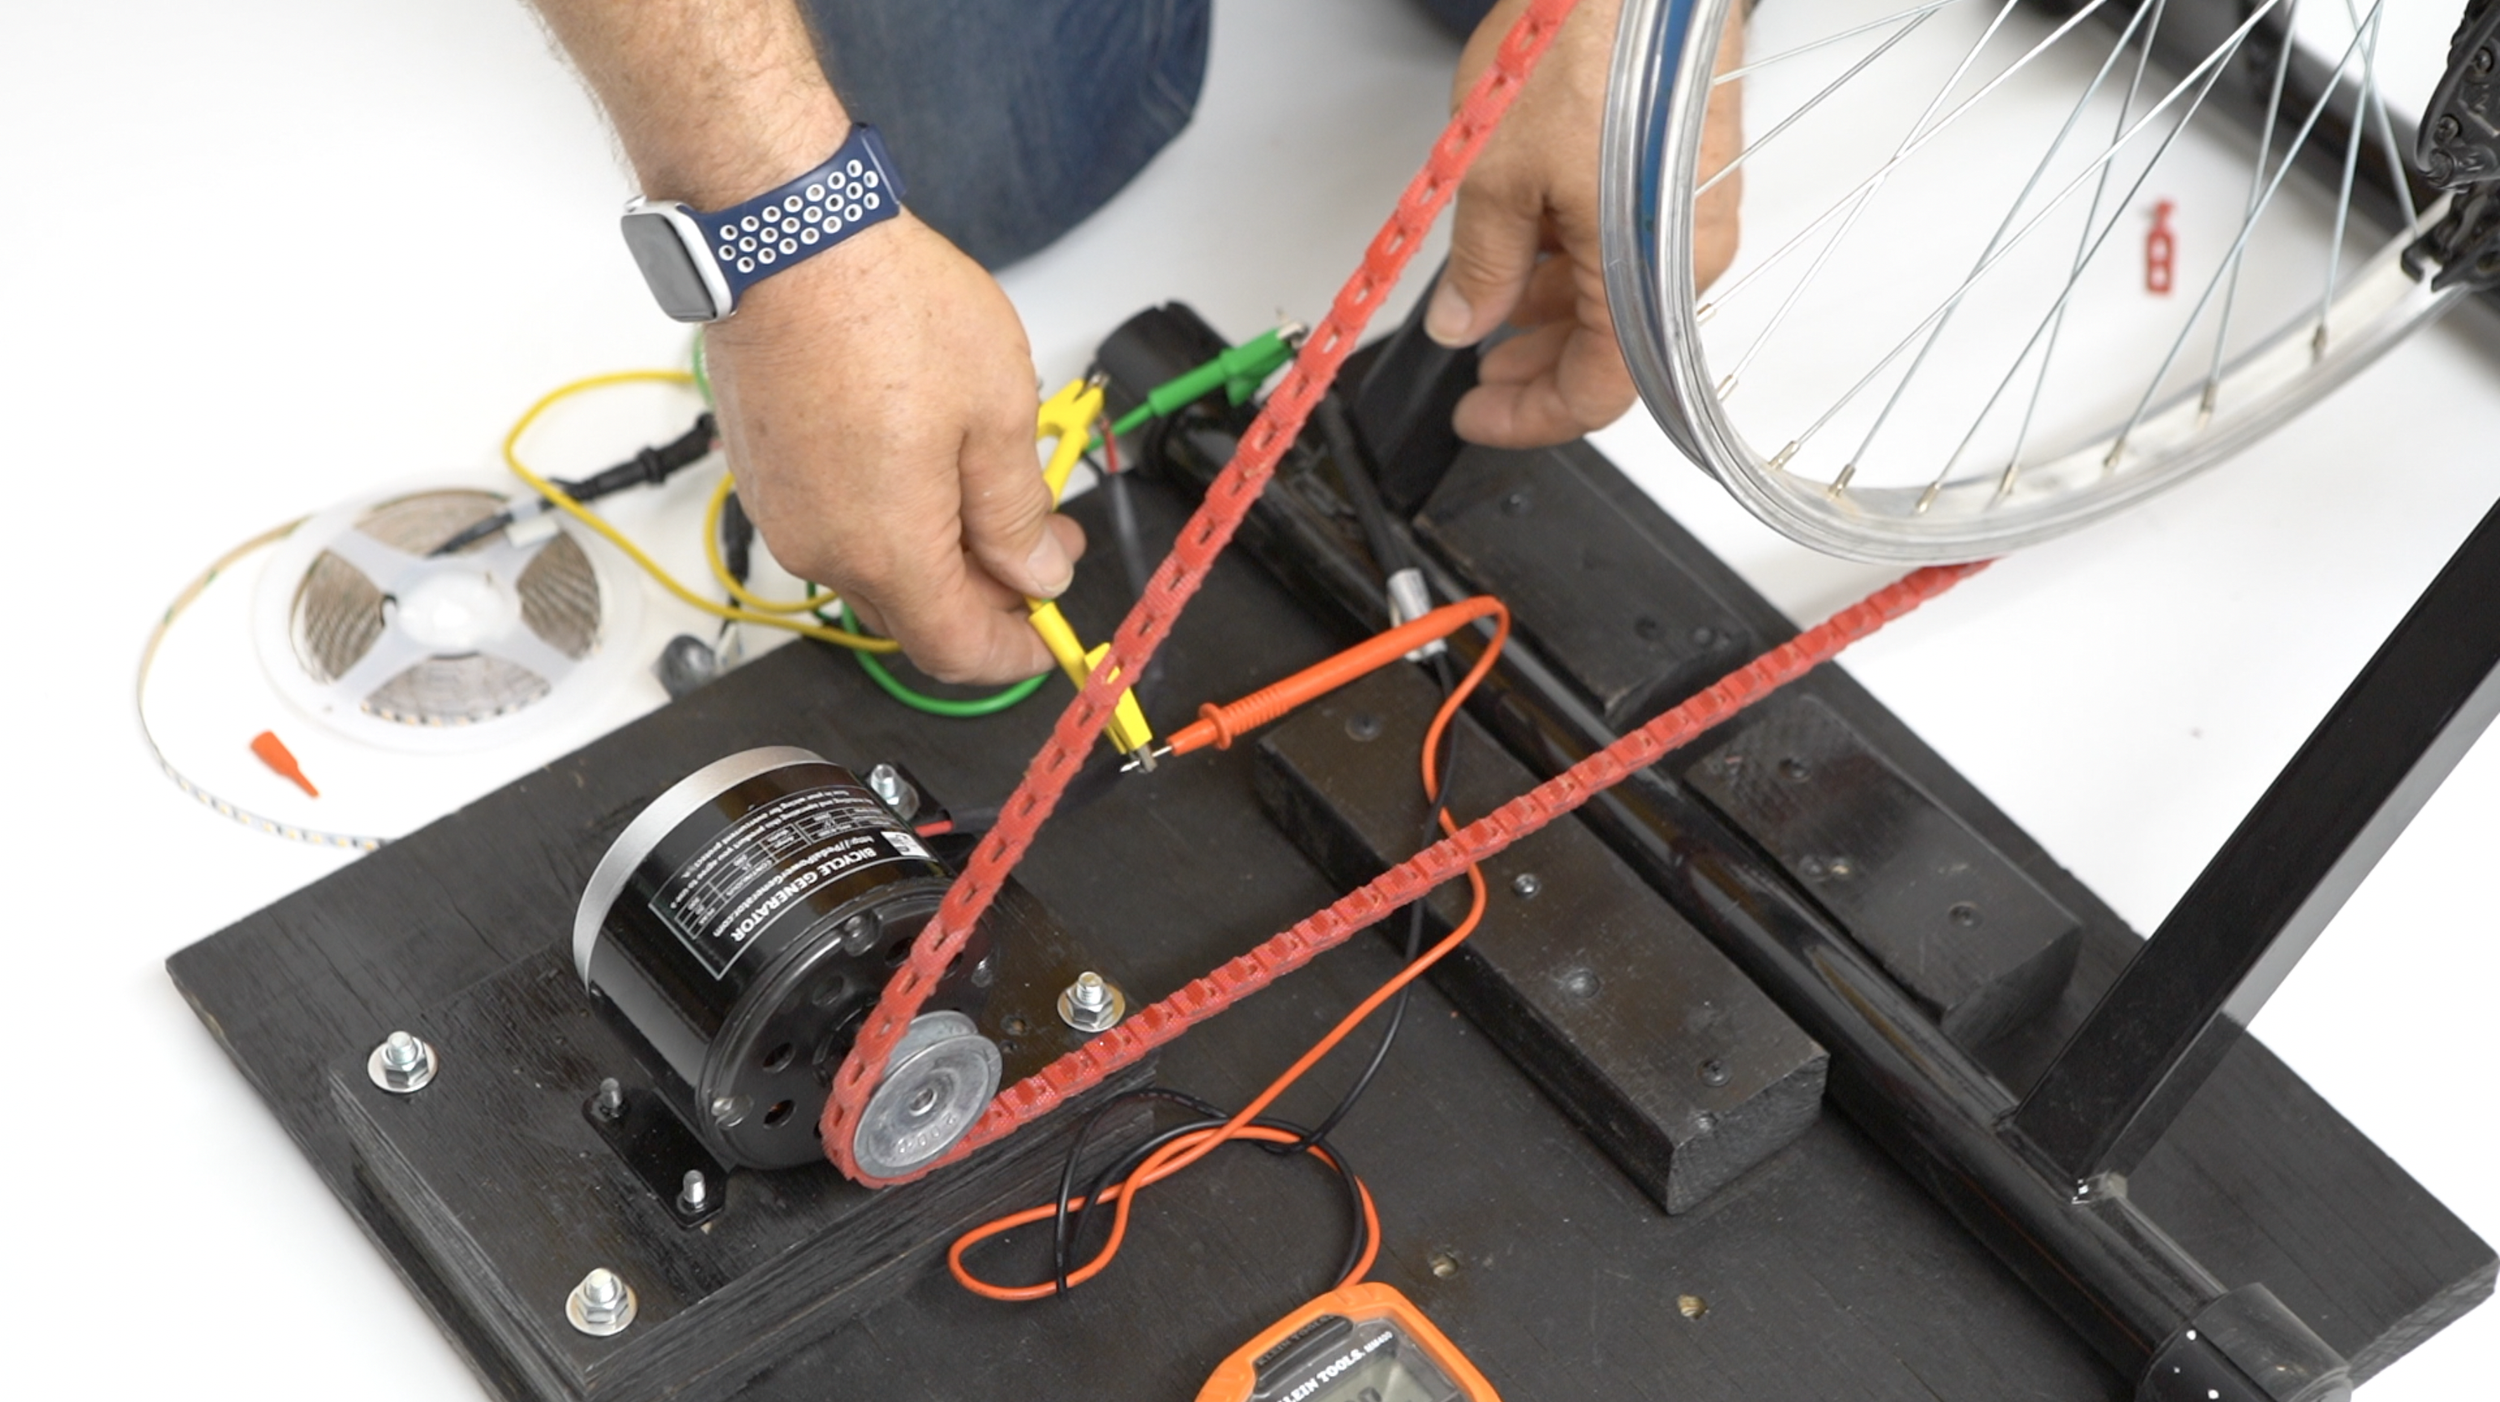
Conduct a voltage check
Now it’s time to check that your polarity is correct.
Red +
Black -
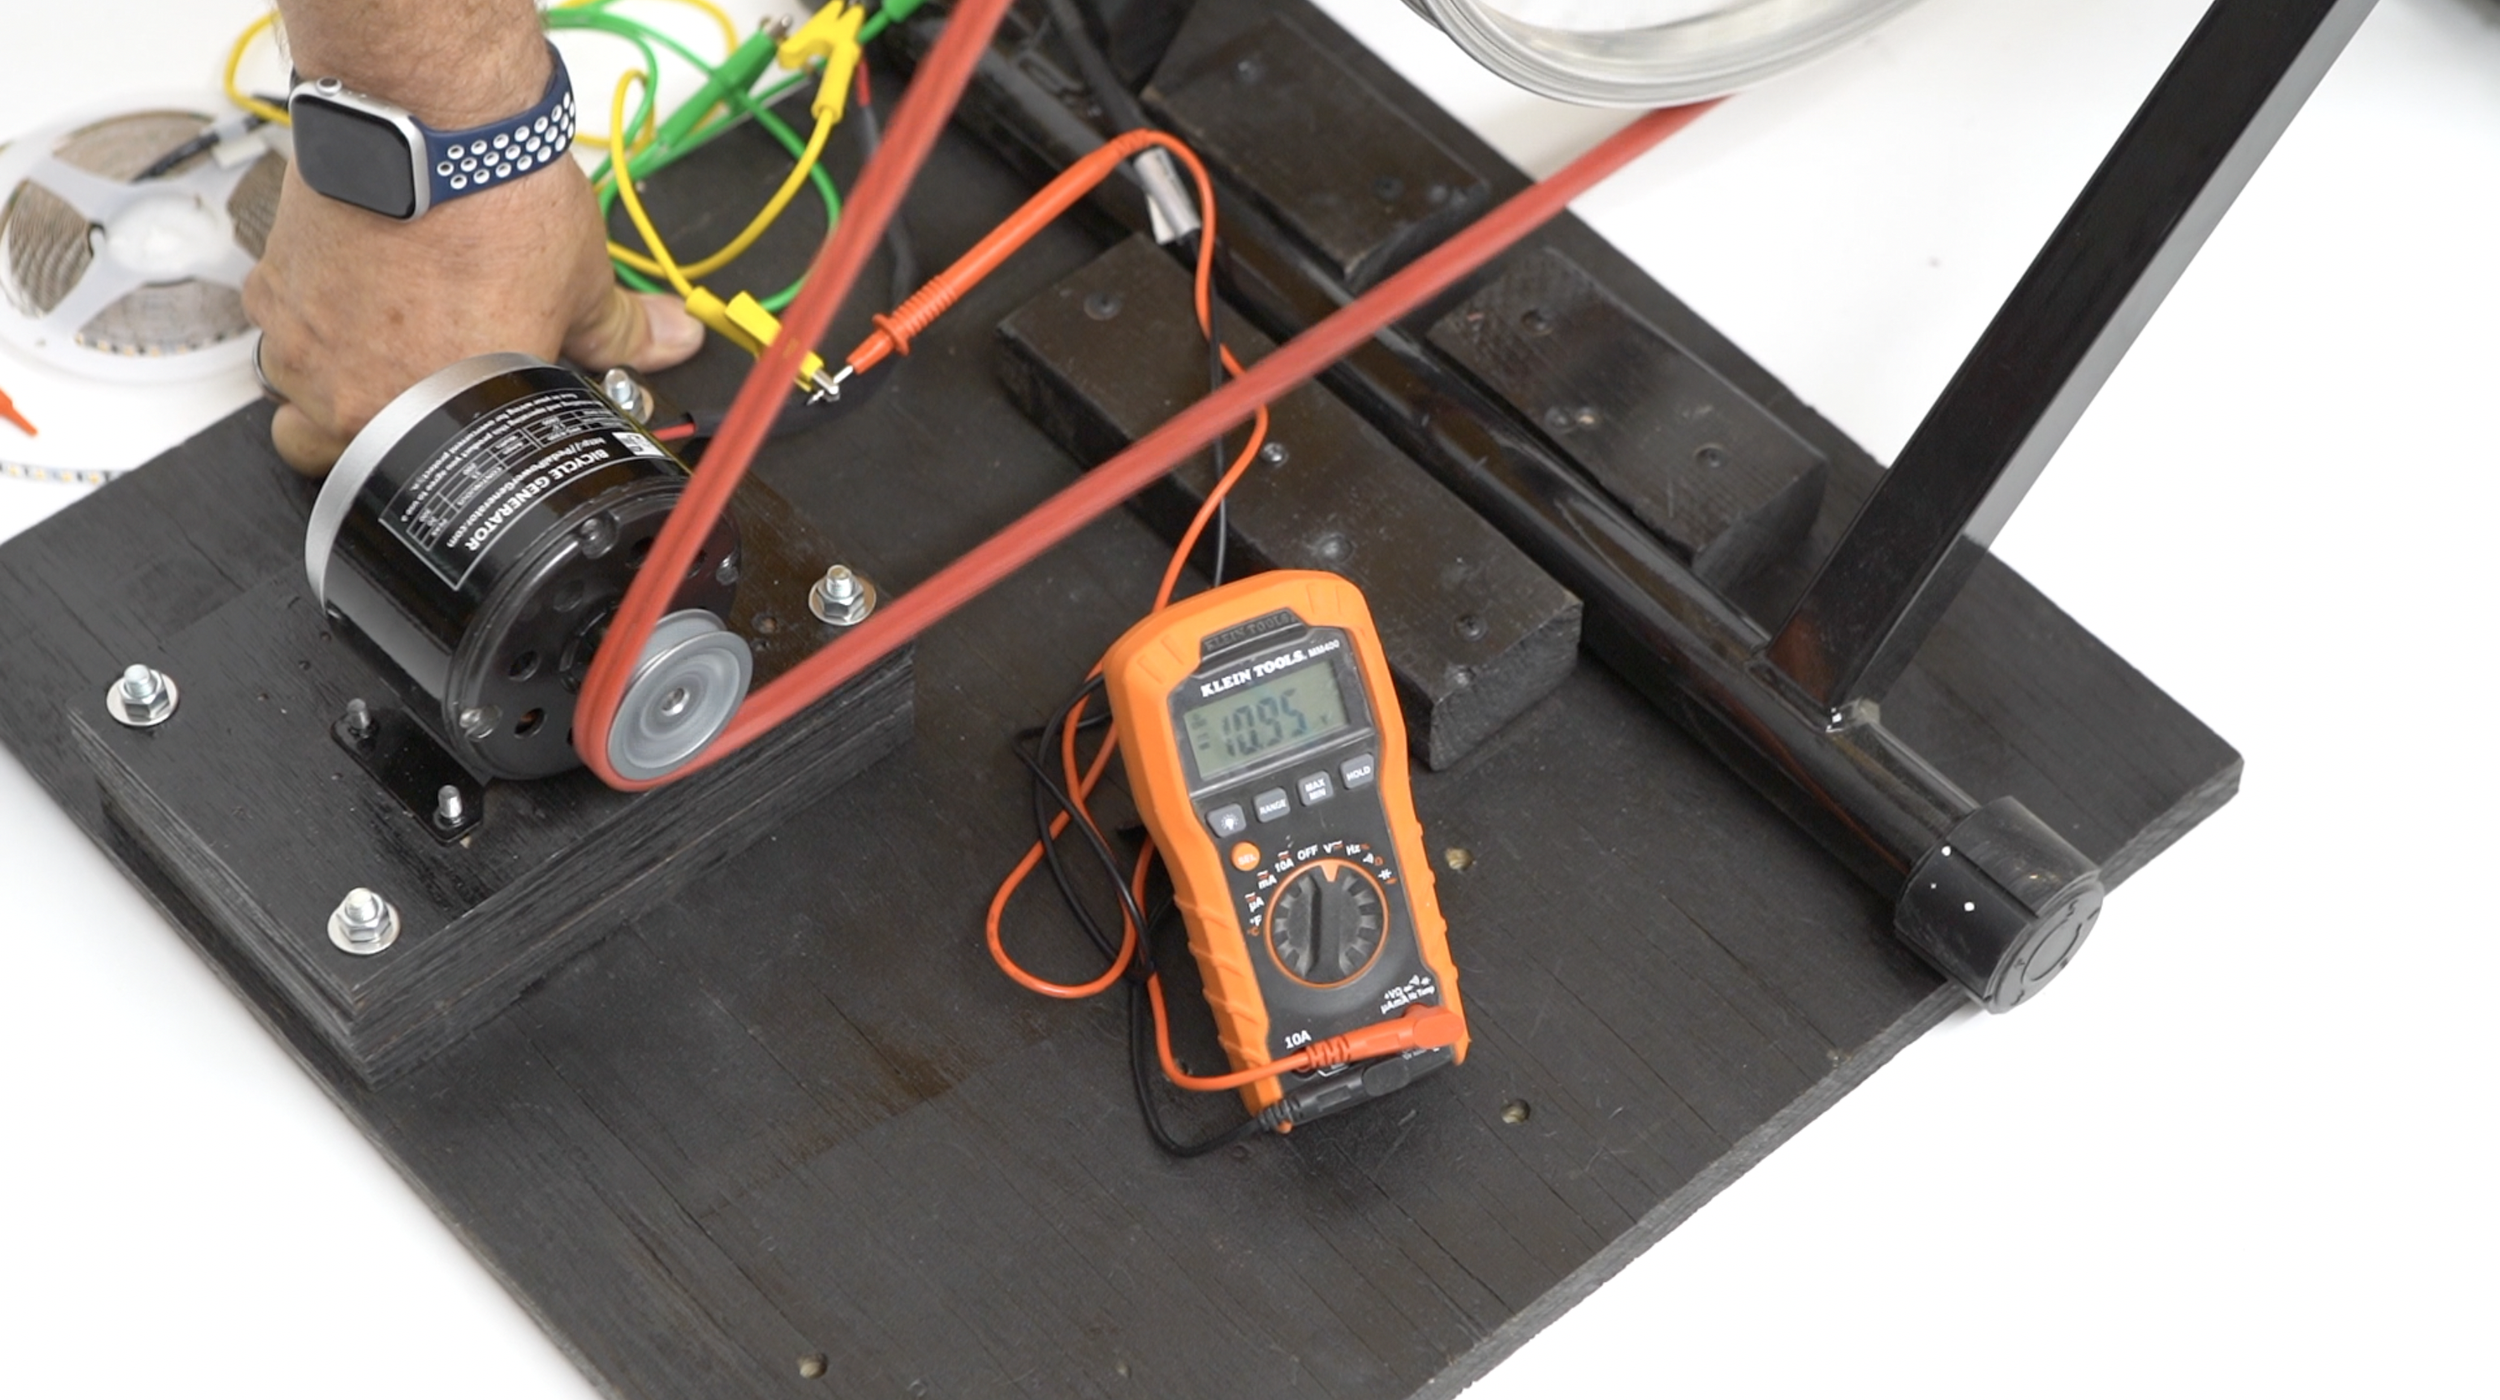
Put the volt meter on the generator using alligator clips. Make sure none of the leads are touching. There is no hazardous energy present while the generator is not moving.
Now start peddling the bike to see your output in volts. Because the is no minus sign, that means it’s correctly reading that the red is positive and black is negative.
For fun, we are going to connect a strand of 12 volt LED lights. I cut the cord so I could connect the alligator clips to the red and black wires.
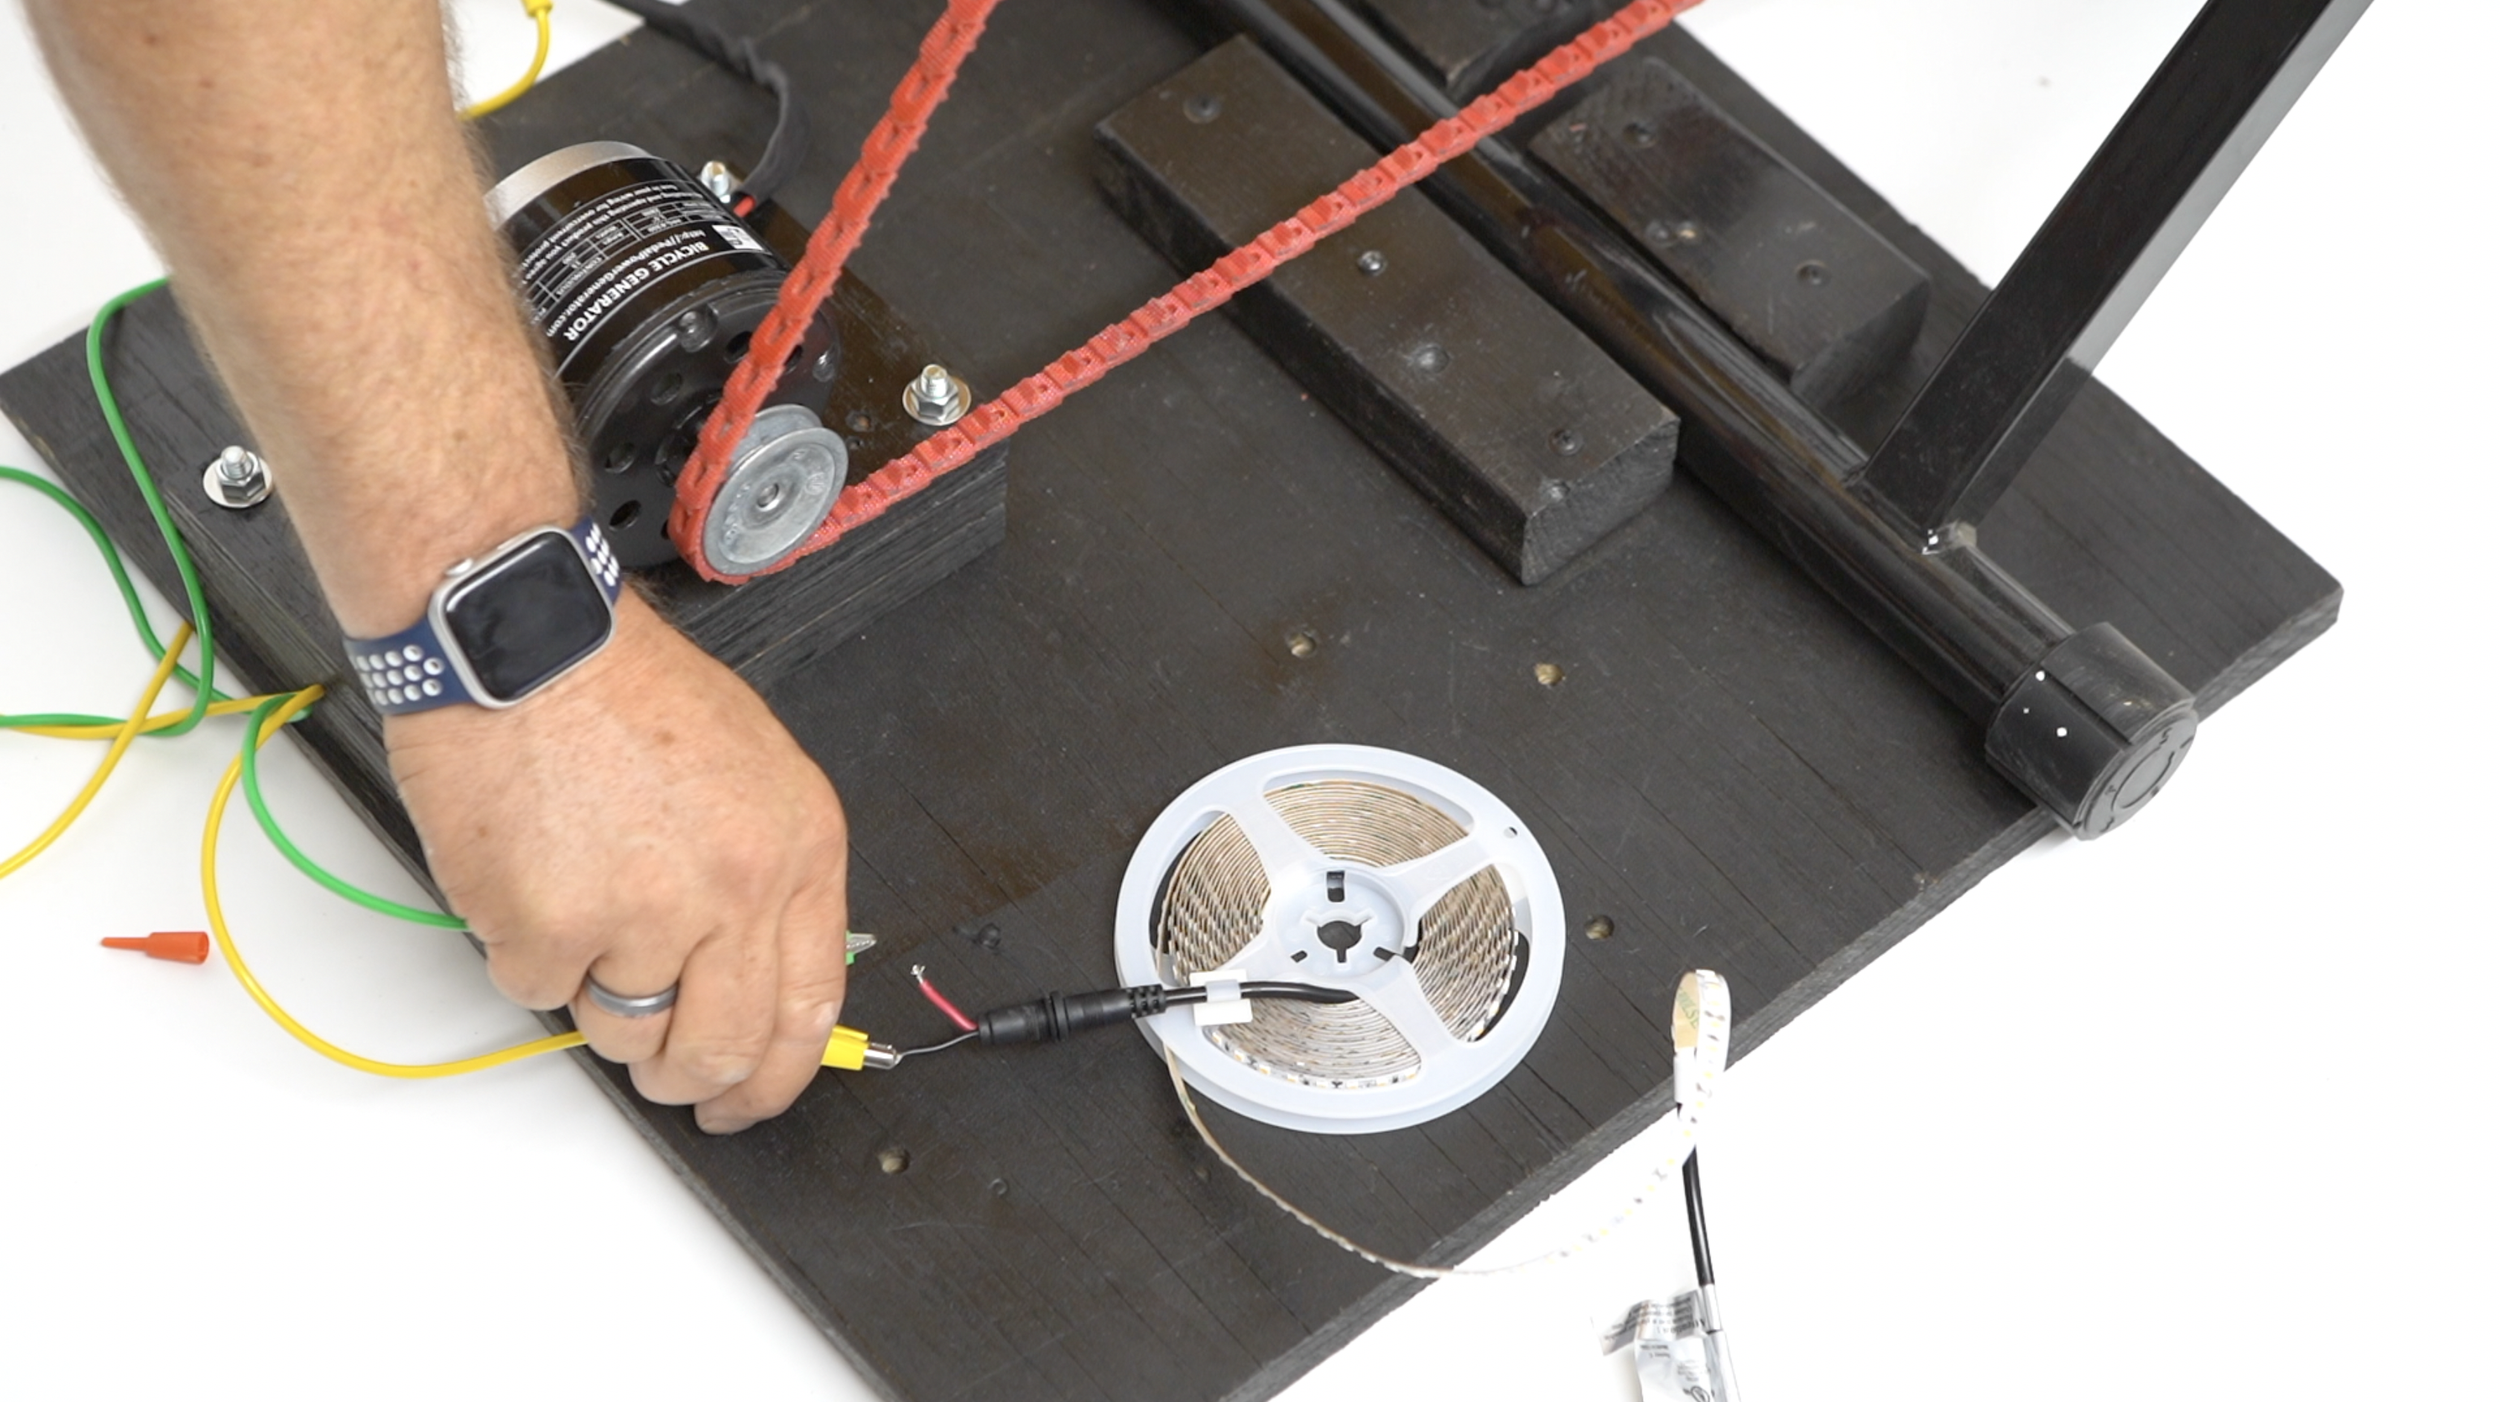
Start peddling, and it will light up! If you don’t pedal fast enough, the light will go out, so keep a constant fairly quick speed.
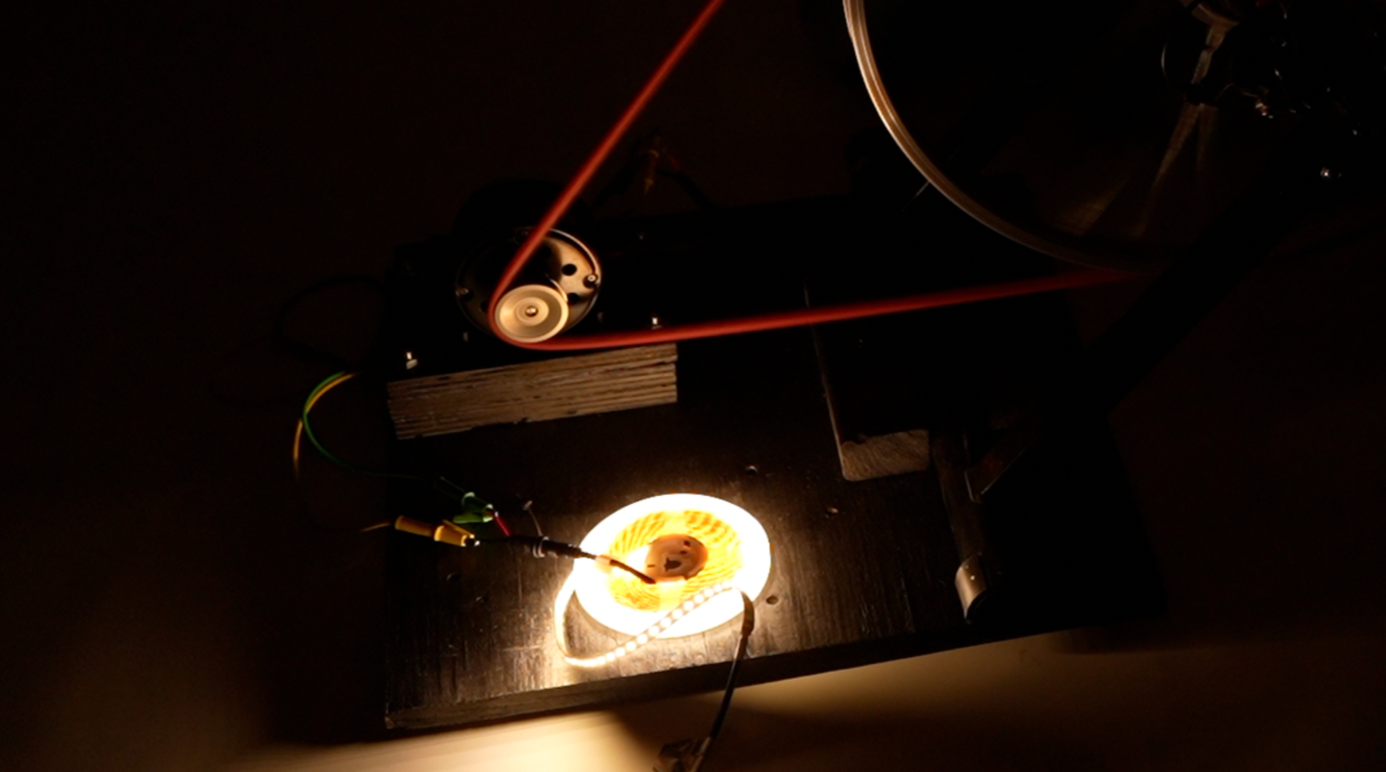
This light strand is so fun to use because you can wrap it around the bike (or anything you want), but be careful not to crease the light strand. This is such a hit for parties or events at night.

Contact me if you need any help at all! I’ll be glad to help.